
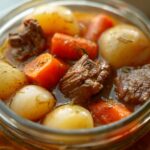
You know those days when you just want a hearty, home-cooked meal but don’t have hours to spare? That’s where my canning pot roast comes in—ready to heat and eat whenever you need it. I’ve been pressure canning this family favorite for years (following strict USDA guidelines, of course), and let me tell you, nothing beats grabbing a jar of tender beef and veggies after a long day. The rich flavors only get better with time, and having these shelf-stable meals on hand has saved my dinner plans more times than I can count!
Why You’ll Love This Canning Pot Roast Recipe
Oh, where do I even start? This canning pot roast recipe is my go-to when life gets crazy (which, let’s be honest, is most days). Here’s why it’s amazing:
- Ready when you are – Just pop open a jar and heat for an instant comfort meal
- Flavor that grows – The spices and meat meld together beautifully over time
- No freezer burn worries – These jars stay perfect on your shelf for up to a year
- USDA-approved safety – Pressure canning makes it shelf-stable and worry-free
Trust me, once you try this method, you’ll never look at pot roast the same way again!
Ingredients for Canning Pot Roast
Alright, let’s talk ingredients! The magic of this canning pot roast starts with simple, quality stuff. I’ve learned over the years that taking a few extra minutes to prep everything right makes all the difference in those jars. Here’s exactly what you’ll need:
- 3 lbs beef chuck roast – Cut into 2-inch cubes (trim excess fat for best results)
- 2 cups beef broth – I use low-sodium so I can control the salt, but regular works too
- 1 large onion – Chopped into 1/2-inch pieces (trust me, they soften perfectly this size)
- 3 carrots – Sliced 1/4-inch thick (don’t go too thin or they’ll disappear)
- 3 medium potatoes – Diced about 3/4-inch (Yukon Golds hold up beautifully)
- 2 cloves garlic – Minced fine (or 1/2 tsp garlic powder in a pinch)
- 1 tsp salt – More if you like it salty, but remember flavors concentrate!
- 1/2 tsp black pepper – Freshly ground if possible
- 1 tsp dried thyme – Rub between your fingers to wake up the oils
1 tsp dried rosemary – Crush it a bit before adding
That’s it! No fancy ingredients – just good, honest food that transforms into something magical in those jars. I always double check my measurements before starting – nothing worse than realizing you’re short an onion halfway through!
Equipment Needed for Canning Pot Roast
Listen, I know canning equipment can seem intimidating at first, but once you’ve got these essentials, you’ll be set for years of perfect pot roast jars! Here’s what you absolutely need:
- Pressure canner – Not optional! Regular pots can’t reach the high temps needed for safe meat canning
- Quart jars – Wide-mouth are easiest for packing those beef chunks
- New lids – Never reuse these – the seal won’t be reliable
- Jar lifter – Trust me, you don’t want to handle hot jars without this
- Canning funnel – Keeps your jar rims clean for proper sealing
That’s the bare bones list! I keep mine in a dedicated “canning toolbox” so I’m always ready when the roast is on sale.
How to Make Canning Pot Roast Step by Step
Okay, let’s get cooking! I’m going to walk you through my tried-and-true method for canning pot roast that gives me perfect results every time. Don’t worry – it’s easier than you think once you get the rhythm down. Just follow these steps and you’ll be rewarded with jars of tender, flavorful goodness.
Browning the Beef for Canning Pot Roast
First things first – let’s get that beef beautifully browned! Heat your skillet over medium-high (I use a 7 on my dial) and add just enough oil to coat the bottom. Working in batches is key here – don’t crowd the pan or your beef will steam instead of brown.
I give each cube about 2 minutes per side, just until they get that gorgeous caramel color. Don’t worry about cooking them through – we’re just building flavor at this stage. A little fond (those brown bits in the pan) is actually perfect – we’ll use that later!
Simmering the Canning Pot Roast Mixture
Now comes the fun part where all the flavors come together! Dump all your browned beef into your biggest pot along with all those chopped veggies and spices. Pour in your broth and give everything a good stir to combine.
Bring it to a gentle boil, then immediately reduce to a steady simmer. Set your timer for 1 hour exactly – that’s the sweet spot where the beef becomes fork-tender but still holds its shape for canning. I stir every 15 minutes or so to prevent sticking, and I always do a taste test at 45 minutes to adjust seasoning if needed.
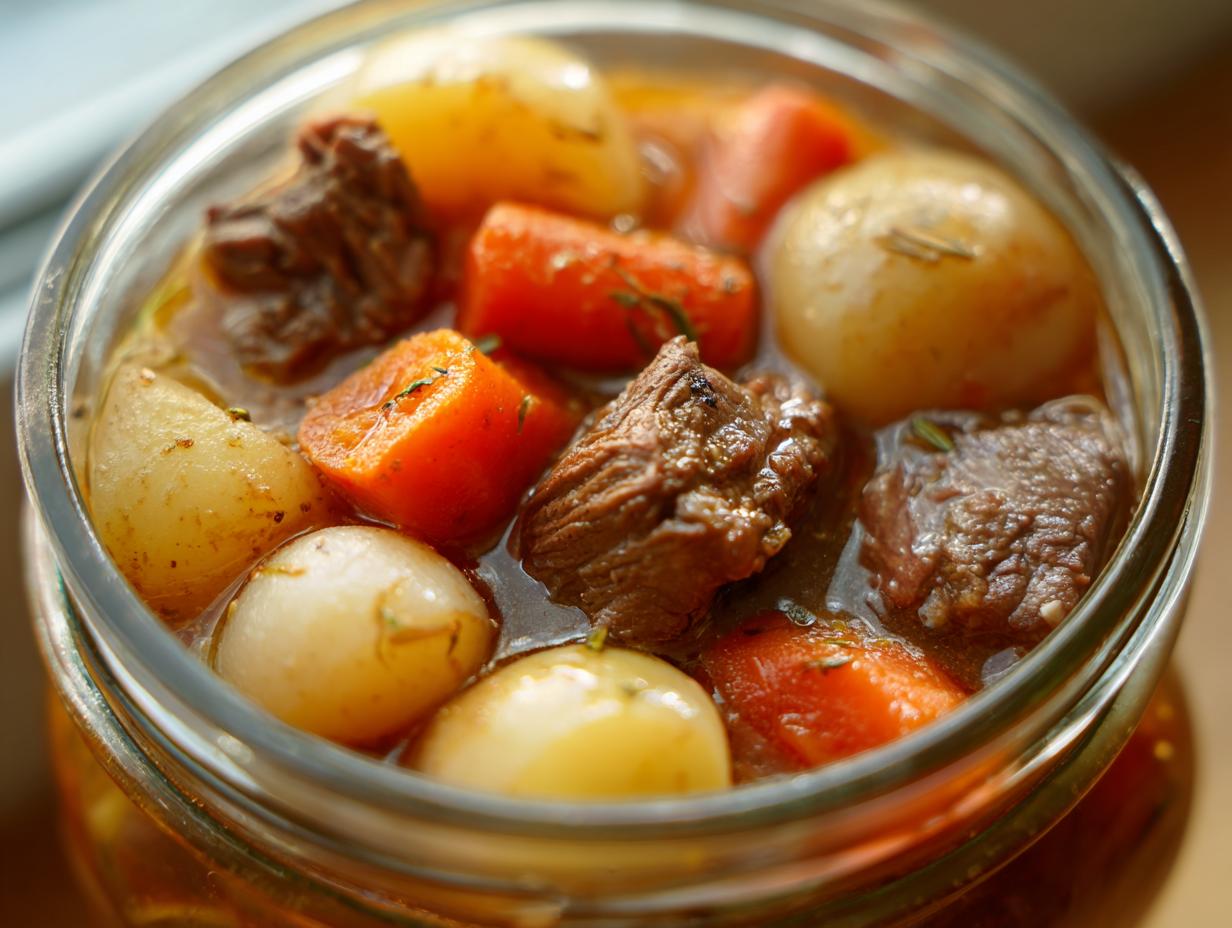
Packing Jars for Canning Pot Roast
Time to assemble those jars! Here’s my foolproof method: start with a layer of beef chunks at the bottom, then add a mix of veggies, alternating as you go. Leave that precious 1-inch headspace at the top – I measure with my finger to be sure.
Now ladle in the hot broth, using a chopstick to remove any air bubbles. Wipe those rims spotless with a damp cloth – any food particles can ruin your seal. Screw the lids on fingertip-tight – no Hercules grip needed!

Processing Canning Pot Roast Safely
Here’s where we make it shelf-stable! Load your canner with the recommended amount of water (check your manual) and get it boiling. Carefully lower in your jars using the rack, then lock the lid.
Let the steam vent for 10 full minutes before adding the weight. Process at 10 lbs pressure for 90 minutes (adjust for altitude if needed). When time’s up, turn off the heat and let the canner depressurize naturally – no peeking!
Once the pressure drops, remove the jars and let them cool undisturbed for 24 hours. That satisfying “ping” means you’ve succeeded! Check each seal before storing – any unsealed jars go straight to the fridge for immediate eating.

Tips for Perfect Canning Pot Roast
After years of canning pot roast (and a few learning experiences!), here are my hard-won secrets for absolute perfection:
- Trim that fat! – Excess fat can create a greasy texture and affect sealing. I leave about 1/4-inch for flavor but no more.
- Deglaze like a pro – After browning beef, splash some broth in the hot skillet to lift those flavorful bits into your mix.
- Seal check is sacred – Press the center of each cooled lid – if it pops, that jar didn’t seal and needs refrigerating.
- Patience with pressure – Don’t rush the canner’s natural depressurization – forced cooling can cause siphoning.
- Label everything – Write the date in permanent marker so you know which jars to use first.
Follow these, and you’ll have pot roast that beats any store-bought version!
Canning Pot Roast Variations
Want to mix things up? This recipe handles swaps beautifully! Try parsnips instead of carrots for a slightly sweeter twist, or toss in some mushrooms if you’re feeling fancy. My neighbor swears by adding a splash of red wine to the broth – just enough to deepen the flavor without overpowering the beef. The beauty of canning pot roast is how adaptable it is to whatever you’ve got on hand or what your family loves most!
Storing and Reheating Canning Pot Roast
Here’s the best part – your canning pot roast stays delicious for up to a year in the pantry! Just store those sealed jars in a cool, dark place (my basement shelves work perfectly). When you’re ready to eat, I always heat mine on the stovetop – just dump the contents into a pot and simmer for 10 minutes until piping hot. Safety first – never taste test before reheating, and if a jar ever looks or smells off, toss it immediately. These little jars become mealtime miracles on busy nights!
Canning Pot Roast Nutrition
Let’s talk about what’s actually in those delicious jars! While every batch varies slightly based on your exact ingredients, here’s the general nutrition breakdown per 1-cup serving of my canning pot roast:
- Calories: 320
- Protein: 28g (That beef packs a punch!)
- Fat: 14g (Mostly the good kind from the chuck roast)
- Carbohydrates: 18g
- Fiber: 3g (Thanks to all those veggies)
- Sugar: 4g (Natural sugars from carrots and onions)
- Sodium: 450mg (That’s why I prefer low-sodium broth)
Remember, these are estimates – your exact numbers might dance around depending on your potato size, how much fat you trim, or if you tweak the seasoning. But one thing’s certain: this canning pot roast gives you a balanced, hearty meal that keeps you full and satisfied!
Common Questions About Canning Pot Roast
I get asked about my canning pot roast all the time – here are the questions that pop up most often with my honest answers:
Can I use venison instead of beef in my canning pot roast?
Absolutely! Venison makes fantastic canned pot roast – just trim any silver skin and use slightly more fat (like bacon) since it’s leaner. Process it exactly the same way as beef. My hunting buddies swear by their venison pot roast jars all winter long!
How long does canned pot roast last on the shelf?
Properly processed canning pot roast stays good for up to a year in a cool, dark place. I mark my lids with the date using permanent marker and try to use older jars first. The flavor actually improves over the first few months!
Why do I need a pressure canner for pot roast?
Here’s the deal – meat is low-acid, so only pressure canning reaches the high temperatures (240°F) needed to kill dangerous bacteria. Water bath canning won’t cut it for canning pot roast safely. It’s worth investing in a good pressure canner – it’ll last decades!
Can I add other vegetables to my canning pot roast?
You bet! I’ve added mushrooms, celery, even green beans when I’m feeling adventurous. Just keep the total veggie quantity about the same as the original recipe so your liquid ratios stay balanced. Root vegetables hold up best during processing.
My jar didn’t seal – can I reprocess my canning pot roast?
If you catch it within 24 hours, you can reheat the contents, use a new lid, and reprocess. But honestly? I usually just refrigerate unsealed jars and eat them within a week. Sometimes the canning gods just want you to enjoy your pot roast immediately!
Ready to try? Tag us with your canning pot roast results! Check out more canning ideas.
Print3 Secrets to Perfect Canning Pot Roast Every Time
A savory pot roast preserved through canning for long-term storage.
- Prep Time: 30 mins
- Cook Time: 1 hour
- Total Time: 2 hours
- Yield: 4 quarts 1x
- Category: Main Dish
- Method: Pressure Canning
- Cuisine: American
- Diet: Low Lactose
Ingredients
- 3 lbs beef chuck roast
- 2 cups beef broth
- 1 onion, chopped
- 3 carrots, sliced
- 3 potatoes, diced
- 2 cloves garlic, minced
- 1 tsp salt
- 1/2 tsp black pepper
- 1 tsp thyme
- 1 tsp rosemary
Instructions
- Cut beef into chunks and brown in a skillet.
- Combine all ingredients in a large pot and simmer for 1 hour.
- Pack meat and vegetables into sterilized jars.
- Fill jars with broth, leaving 1-inch headspace.
- Process jars in a pressure canner at 10 lbs pressure for 90 minutes.
- Let jars cool and check seals before storage.
Notes
- Use fresh, high-quality meat.
- Adjust seasoning to taste.
- Follow safe canning practices.
Nutrition
- Serving Size: 1 cup
- Calories: 320
- Sugar: 4g
- Sodium: 450mg
- Fat: 14g
- Saturated Fat: 5g
- Unsaturated Fat: 7g
- Trans Fat: 0g
- Carbohydrates: 18g
- Fiber: 3g
- Protein: 28g
- Cholesterol: 80mg