
Nothing screams “summer” to me like the tangy crunch of homemade dill relish on a juicy hot dog at a backyard BBQ. I still remember my grandma’s picnic table piled high with burgers, corn on the cob, and her famous homemade relish—that bright, briny flavor cutting through the richness of the meat. The best part? Making dill relish at home is ridiculously easy. No fancy equipment, no hours of cooking—just fresh cucumbers, a handful of pantry staples, and a little patience while it chills. This stuff transforms everything from hot dogs to tuna salad into something extraordinary, and once you taste the difference from store-bought, you’ll never go back.
Why You’ll Love This Dill Relish Recipe
This isn’t just any relish—it’s the kind of recipe that’ll make you wonder why you ever settled for the jarred stuff. Here’s why it’s a game-changer:
- No cooking required – Just chop, stir, and let the fridge do the work while you kick back
- Customize the tang – Like it extra zippy? Add more vinegar. Prefer sweeter? Adjust the sugar. It’s your relish
- Weeks of flavor – Stays fresh in the fridge for up to 2 weeks (if it lasts that long!)
- Secret weapon status – Elevates everything from eggs to potato salad with zero effort
Trust me, once that crisp dill and vinegar scent hits your kitchen, you’ll be hooked.
Ingredients for Dill Relish
Grab these simple ingredients – you probably have most in your kitchen already! The magic happens when these humble players come together:
- 4 cups chopped cucumbers (about 3 medium cukes – I leave the peel on for color but you do you)
- 1/2 cup chopped onion (yellow or sweet onions work best – chop ’em fine so no one gets a big bite)
- 1/4 cup chopped fresh dill (see my note below if you’re stuck with dried)
- 1/2 cup white vinegar (the backbone of that tangy flavor we love)
- 1/4 cup sugar (balances the vinegar’s punch perfectly)
- 1 tbsp salt (don’t skip – it draws out the cucumber juices)
- 1 tsp mustard seeds (little pops of flavor that make it special)
Ingredient Notes & Substitutions
No white vinegar? Apple cider vinegar works great too – it’ll add a fruity note. Out of sugar? Try honey (start with 2 tbsp). Fresh dill is ideal, but in a pinch, use 1 tbsp dried (it won’t be quite as bright). And if you want extra crunch, throw in some chopped celery!
How to Make Dill Relish
Okay, let’s get chopping! This dill relish comes together so fast you’ll be shocked something this good takes less effort than tying your shoes. Follow these simple steps and you’ll have condiment gold in no time.
Step 1: Prep Vegetables & Dill
First things first – grab those cucumbers. I like to leave the peel on for that pretty green color, but feel free to peel them if you prefer. The key here is uniform chopping – you want everything about the size of small peas for that perfect relish texture. Pro tip: If your cucumbers have big seeds, scoop ’em out with a spoon first (less watery relish that way!).
Chop the onion just as fine – nobody wants a giant onion chunk stealing the show. Then give that fresh dill a rough chop. Oh, that smell! It already smells like summer in a bowl.
Step 2: Mix the Brine
Now for the magic potion! In a big bowl (I use my favorite glass mixing bowl), combine the vinegar, sugar, salt and mustard seeds. Here’s where you really want to dissolve that sugar completely – I stir for a good minute until I don’t feel any graininess at the bottom. This ensures every bite of your dill relish has that perfect sweet-tangy balance. The mustard seeds will float at first – don’t worry, they’ll distribute later!
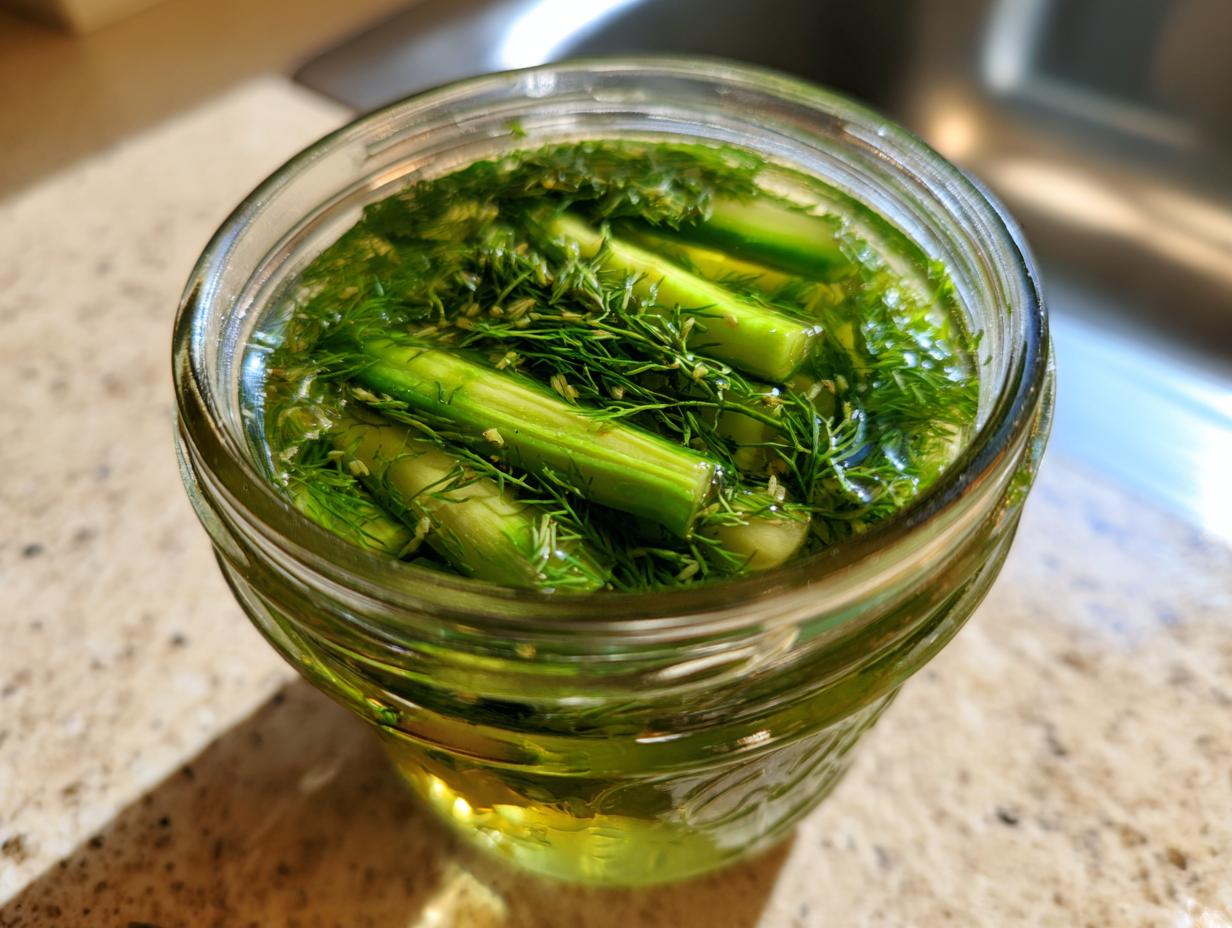
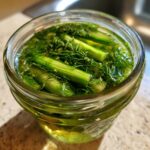
Step 3: Combine & Chill
Time for the grand mix! Dump all your chopped veggies and dill into the bowl with the brine. Give it a good stir – you’ll see the cucumbers start releasing their juices almost immediately. That’s exactly what we want!
Now for the hardest part: walk away. Cover that bowl tight with plastic wrap or transfer to an airtight container (I’m partial to mason jars for that cute farmhouse look). Let it chill in the fridge for at least 2 hours – though overnight is even better. That wait time lets all the flavors get to know each other and transforms this from chopped veggies to incredible homemade dill relish.

Tips for Perfect Dill Relish
Want to take your relish game to the next level? These little tricks make all the difference:
- Sterilize those jars! For longest shelf life, pour boiling water over clean jars and lids before filling – kills any sneaky bacteria
- Taste and tweak after chilling – add a splash more vinegar for extra zing or a pinch of sugar if it’s too sharp
- Use a food processor to chop veggies if you’re short on time – pulse carefully so it doesn’t turn to mush!
- Make it pretty by leaving some dill fronds whole when serving – looks gorgeous on a picnic table
- Salt your cukes first if they’re watery – let sit 30 mins, then rinse and pat dry for maximum crunch
See? Pro-level relish without breaking a sweat!
Serving Suggestions for Dill Relish
Oh, where doesn’t this dill relish belong? I slather it on everything from grilled brats (game changer!) to simple turkey sandwiches—that vinegary crunch wakes up even the most boring lunch. My favorite midnight snack? A scoop of this relish stirred into cottage cheese with cracked black pepper. Try it on:
- Classic hot dogs – Obviously! Skip the neon-green store stuff forever
- Grilled salmon burgers – The dill sings with fish
- Avocado toast – Sounds weird, tastes incredible
- Deviled eggs – Fold some right into the yolk mix
- Taco night – Especially good on fish tacos with lime crema
Last summer I even stirred a spoonful into potato salad and my family demanded the recipe. This stuff’s magic, I tell you.
Storing & Freezing Dill Relish
Here’s the beautiful thing about this dill relish—it actually gets better as it sits! Pop it in an airtight container (I swear by mason jars with those click-top lids) and it’ll keep like a dream in the fridge for up to 2 weeks. The vinegar acts as a natural preservative, so no worries about spoilage—though in my house, it never lasts that long!
Want to stock up for winter? Freeze it in small portions (ice cube trays work great for this!) Once frozen solid, transfer the cubes to a freezer bag. They’ll keep for 3 months—perfect for stirring into soups or thawing overnight for a sudden hot dog craving. Just note the texture softens slightly after freezing, but the flavor stays bright as ever.
Dill Relish FAQ
Got questions about making the perfect homemade dill relish? I’ve answered all the ones my friends and family pester me with most – consider this your relish hotline!
Can I use pickling cucumbers instead of regular ones?
Absolutely! Pickling cucumbers (the bumpy little guys) actually make fantastic dill relish. They’ve got thicker skins and fewer seeds, which means crunchier results. Just be sure to chop them extra fine since they’re more dense. Funny story – my neighbor once grew a bumper crop of pickling cukes and we made 12 jars of relish. Best summer ever!
How long does homemade dill relish last in the fridge?
Properly stored in an airtight container, your dill relish will stay fresh and crispy for about 2 weeks. The vinegar keeps it preserved beautifully. Pro tip: Always use clean utensils when scooping it out – no double-dipping! That extends the shelf life. And honestly? It never lasts that long in my fridge anyway – my teenagers eat it straight from the jar with chips.
Can I make this relish without sugar?
You can, but hear me out – that little bit of sugar balances the vinegar perfectly without making it sweet. If you must skip it, try adding a tablespoon of honey or maple syrup instead (just stir well to dissolve). Or go full savory with a pinch of stevia. But trust me – the small amount in the recipe won’t make it dessert-like, just perfectly rounded.
Why is my relish watery after sitting?
Ah, the cucumber juice shuffle! Two tricks: 1) Scoop out the seeds before chopping (they hold lots of water), or 2) Toss your chopped cukes with 1/2 tsp salt, let sit 30 minutes, then rinse and pat dry before mixing with the brine. Either method helps prevent a pool at the bottom of your jar. But honestly? That liquid’s packed with flavor – I just stir it back in before serving!
Can I use dried dill instead of fresh?
In a pinch, yes – use 1 tablespoon dried dill weed instead of the fresh. But fresh makes all the difference in flavor and that gorgeous green color. No fresh dill at the store? Try growing your own – it’s ridiculously easy in a windowsill pot and you’ll have fresh dill all season long for relishes, dips, and more!
Nutritional Information
Here’s the skinny on this dill relish – per tablespoon, you’re looking at about 10 calories, 2g sugar, and 0g fat. Exact numbers may vary slightly depending on your cucumber size and how much brine clings to each spoonful. But let’s be real – you’re not eating this for the nutrition, you’re eating it for that addictive tangy crunch!
Share Your Dill Relish Creations
Nothing makes me happier than seeing your kitchen adventures with this dill relish recipe! Did you add a secret ingredient? Maybe some jalapeños for heat or a splash of pickle juice for extra tang? I want to hear all about it! Snap a photo of your relish-topped masterpiece (that hot dog with perfect zig-zag mustard lines counts as art in my book) and tag me on Instagram – I’ll feature my favorites in stories!
Or leave a star rating below if you tried it – did it remind you of your grandma’s recipe too? Your notes help other home cooks know what tweaks work best. And hey, if you’ve got a brilliant new way to use this relish that I haven’t tried yet (relish-stuffed olives, anyone?), share it in the comments. Let’s build the ultimate dill relish fan club together!
PrintTangy Homemade Dill Relish Recipe Ready in Just 2 Hours
A tangy and flavorful dill relish perfect for hot dogs, burgers, and sandwiches.
- Prep Time: 15 mins
- Cook Time: 0 mins
- Total Time: 2 hours 15 mins
- Yield: 2 cups 1x
- Category: Condiment
- Method: No-Cook
- Cuisine: American
- Diet: Vegetarian
Ingredients
- 4 cups chopped cucumbers
- 1/2 cup chopped onion
- 1/4 cup chopped fresh dill
- 1/2 cup white vinegar
- 1/4 cup sugar
- 1 tbsp salt
- 1 tsp mustard seeds
Instructions
- Chop cucumbers, onion, and fresh dill.
- In a large bowl, mix vinegar, sugar, salt, and mustard seeds.
- Add the chopped vegetables and dill to the bowl.
- Stir well to combine all ingredients.
- Cover and refrigerate for at least 2 hours before serving.
Notes
- Store in an airtight container for up to 2 weeks.
- Adjust sugar and vinegar to taste.
Nutrition
- Serving Size: 1 tbsp
- Calories: 10
- Sugar: 2g
- Sodium: 100mg
- Fat: 0g
- Saturated Fat: 0g
- Unsaturated Fat: 0g
- Trans Fat: 0g
- Carbohydrates: 2g
- Fiber: 0g
- Protein: 0g
- Cholesterol: 0mg