
Oh, homemade jam—there’s nothing quite like it, is there? And when it’s made with ripe, juicy papaya? Absolute magic. I’ll never forget the first time I made papaya jam—it was during a sweltering summer visit to my aunt’s house in Florida. She had papayas falling off her trees faster than we could eat them, so we decided to turn them into this golden, sunny jam. Now every time I make it, I’m transported back to that sticky kitchen, laughing as we taste-tested spoonfuls straight from the pot. The best part? It’s embarrassingly easy—just papaya, sugar, lemon, and patience—but tastes like pure tropical sunshine in a jar.
Ingredients for Papaya Jam
Okay, let’s get our hands sticky! The beauty of this jam is its simplicity—you only need four things. But trust me, quality matters here. You’ll want 4 cups of perfectly ripe papaya (peeled, seeded, and diced into small chunks), 2 cups of plain granulated sugar, 1/4 cup of fresh lemon juice for that essential tang, and 1 teaspoon of finely grated lemon zest to really make the tropical flavors pop. That’s it! No weird pectin or preservatives, just honest, fruity goodness.
How to Make Papaya Jam
Alright, let’s turn those tropical ingredients into something magical! This is where the real fun begins. I promise, even if you’ve never made jam before, you’ve got this. Just follow these simple steps, and you’ll be spreading sunshine on your toast in no time.
Cooking the Jam Mixture
First, grab your biggest, heaviest pot – this stuff bubbles up like crazy! Dump in your diced papaya, sugar, lemon juice, and zest. Now, here’s the secret: start on medium heat and stir like your life depends on it for the first 5 minutes until the sugar dissolves completely. Once it starts bubbling, don’t wander off – keep stirring every few minutes to prevent scorching. After about 25 minutes, you’ll notice the mixture thickening and turning a gorgeous amber color. That’s when you know it’s getting close!

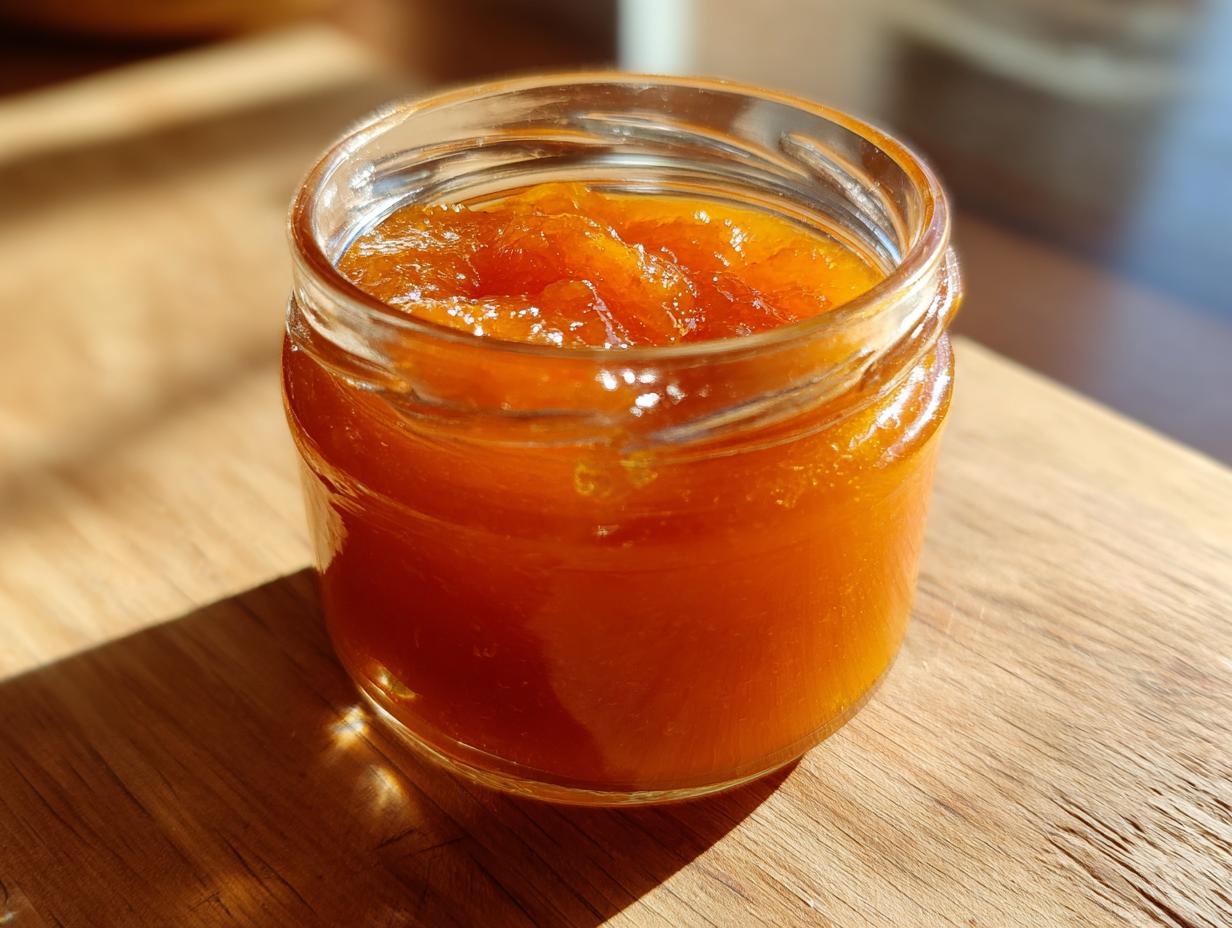
Testing and Jarring the Jam
Time for the magic trick! Grab a cold plate from the freezer and spoon a tiny bit of jam onto it. Let it sit for a minute, then push it with your finger. If it wrinkles slightly? Perfect! If it’s still runny, cook another 5 minutes and test again. Once it’s ready, turn off the heat and let it cool slightly while you prep your jars. Pour the hot jam into sterilized jars, leaving about 1/4 inch at the top, screw the lids on tight, and listen for that satisfying “pop” as they seal. Boom – you just made homemade jam!
Why You’ll Love This Papaya Jam
Let me count the ways this jam will steal your heart:
- Tropical sunshine in every bite – that sweet, floral papaya flavor transports you to paradise
- So easy a kid could make it – just four ingredients and one pot? Yes please!
- No weird additives – just real fruit, sugar, and lemon doing their delicious thing
- Versatile little darling – equally happy on toast, swirled into yogurt, or glazed on desserts
- Makes your kitchen smell amazing – like a tropical vacation with every bubble
Seriously, once you taste homemade, you’ll never go back to store-bought!
Tips for Perfect Papaya Jam
Listen, I’ve made every mistake in the book with this jam, so learn from my disasters! First, only use dead-ripe papayas – if they’re not fragrant and slightly soft, your jam will taste like disappointment. Second, don’t rush the cooking – that gelling test is your best friend. And for heaven’s sake, sterilize those jars properly unless you want a science experiment in your pantry. Store opened jars in the fridge (they’ll last weeks), or process unopened ones in a water bath for shelf-stable tropical goodness all year!
Papaya Jam Variations
Want to play with flavors? Oh, I’ve had fun with this! Try adding a thumb of grated ginger for a spicy kick, or a split vanilla bean for aromatic sweetness. Lime juice and zest make a zippy swap for lemon if you’re feeling tropical. My wildcard? A pinch of cardamom—it’s magical with papaya’s natural sweetness!
Serving Suggestions for Papaya Jam
Oh, the possibilities! This jam plays well with so many things:
- Morning MVP: Slathered on warm toast or swirled into oatmeal
- Yogurt’s best friend: Stirred into Greek yogurt with granola
- Dessert game-changer: Glazed over cheesecake or spooned onto vanilla ice cream
- Cheese plate star: Paired with brie and crackers for fancy snacking
Honestly? I’ve even eaten it straight from the jar with a spoon—no shame!
Storing and Reheating Papaya Jam
Here’s the scoop on keeping your jam perfect! If you’re eating it within 3 weeks (trust me, you will), just pop opened jars in the fridge. For long-term storage, process sealed jars in a boiling water bath for 10 minutes—they’ll last up to a year in your pantry! And reheating? Easy—just warm gently in a saucepan if it thickens too much in the fridge. That tropical sunshine flavor stays bright for months!
Papaya Jam FAQs
You’ve got questions? I’ve got answers—straight from my many jam-making adventures!
Can I reduce the sugar?
Technically yes, but hear me out—sugar isn’t just for sweetness! It helps preserve the jam and gives it that perfect glossy texture. I’ve tried cutting it to 1.5 cups, and while it works, the jam doesn’t keep as long. If you’re watching sugar, maybe make smaller batches you’ll eat quickly!
How long does homemade papaya jam last?
In the fridge? About 3 weeks (if it lasts that long!). Properly canned jars stay good up to a year in a cool, dark pantry. Just check for mold or weird smells before using—though mine never sticks around long enough to test!
Why isn’t my jam thickening?
Oh honey, we’ve all been there! Usually it needs more cooking time—papaya releases tons of water. Keep testing on that cold plate until it wrinkles. If it’s STILL runny after 45 minutes? No shame—just call it “papaya syrup” and pour it over pancakes!
Can I use frozen papaya?
Absolutely! Thaw and drain it well first—frozen fruit holds extra water. The flavor might be slightly less vibrant than fresh, but it’ll still make delicious jam. Perfect for when papayas aren’t in season!
Nutritional Information
Just so you know—these numbers are estimates since fruit sweetness can vary! Per tablespoon, this jam packs about 50 calories, 12g sugar (it’s fruit sugar, though!), and a sneaky 0.5g fiber from all that glorious papaya. Not bad for a spoonful of sunshine!
Share Your Papaya Jam Experience
Did your jam turn out golden and glorious? Snap a pic and tag me—I wanna see your tropical kitchen triumphs! Nothing makes me happier than seeing folks spread the papaya love. You can find more inspiration here!
Print“4-Ingredient Papaya Jam Recipe – Tropical Bliss in Every Bite”

A sweet and tropical jam made from ripe papaya, perfect for spreading on toast or pairing with desserts.
- Prep Time: 15 minutes
- Cook Time: 40 minutes
- Total Time: 55 minutes
- Yield: 2 cups 1x
- Category: Preserves
- Method: Stovetop
- Cuisine: International
- Diet: Vegetarian
Ingredients
- 4 cups ripe papaya, peeled and diced
- 2 cups granulated sugar
- 1/4 cup lemon juice
- 1 teaspoon lemon zest
Instructions
- Combine papaya, sugar, lemon juice, and lemon zest in a large pot.
- Cook over medium heat, stirring frequently, until the mixture thickens (about 30-40 minutes).
- Test the jam by placing a small amount on a cold plate—if it gels, it’s ready.
- Remove from heat and let cool slightly.
- Pour into sterilized jars and seal tightly.
Notes
- Use fully ripe papaya for the best flavor.
- Store in the refrigerator for up to 3 weeks.
- For longer storage, process jars in a water bath for 10 minutes.
Nutrition
- Serving Size: 1 tablespoon
- Calories: 50
- Sugar: 12g
- Sodium: 0mg
- Fat: 0g
- Saturated Fat: 0g
- Unsaturated Fat: 0g
- Trans Fat: 0g
- Carbohydrates: 13g
- Fiber: 0.5g
- Protein: 0g
- Cholesterol: 0mg