
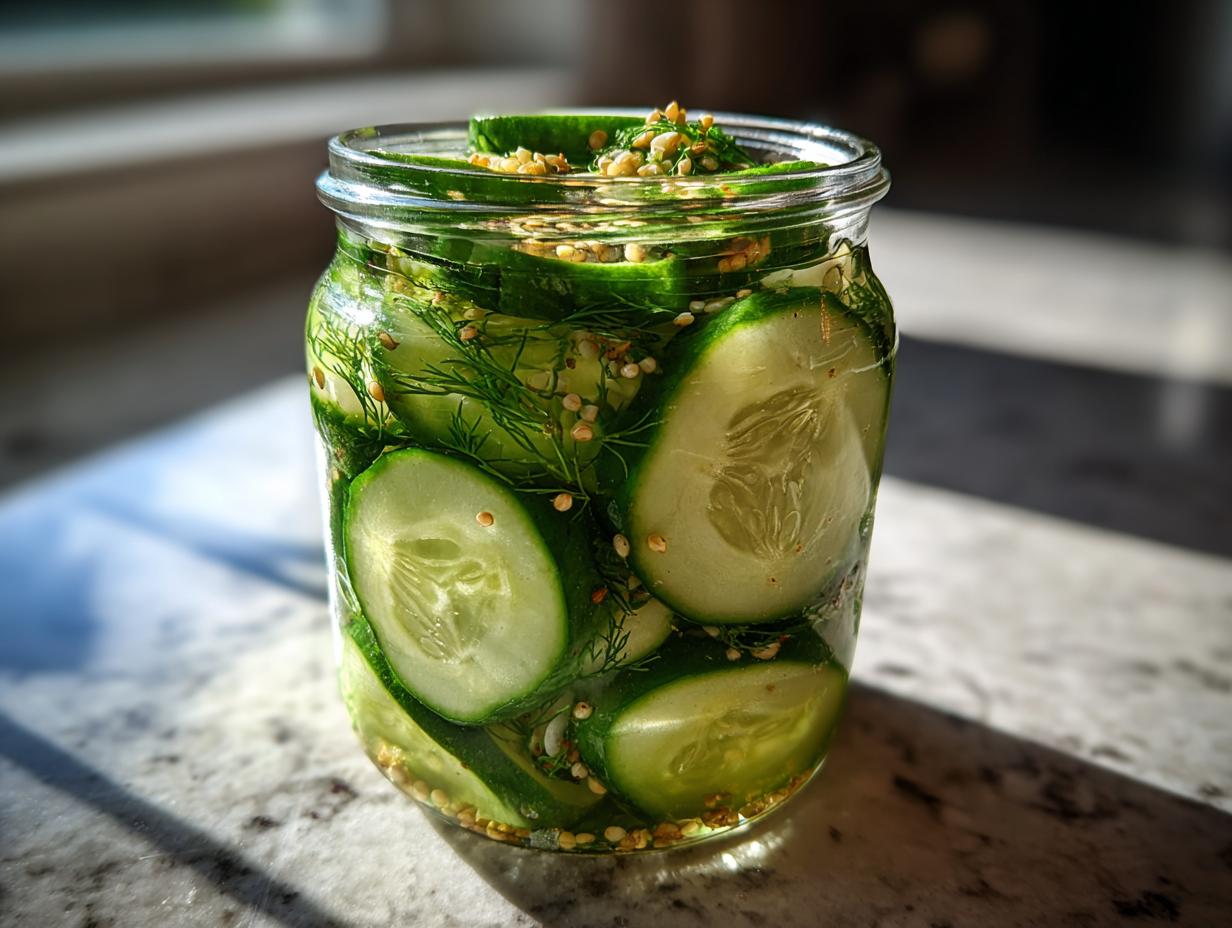
There’s something magical about homemade dill pickle slices—crisp, tangy, and packed with that irresistible garlic-dill punch. I’ll never forget the first time I made them; my kitchen smelled like a deli in the best way possible, and after one bite, I was hooked. Store-bought pickles just can’t compare to the freshness you get when you make them yourself. Plus, they’re ridiculously easy—no fancy canning equipment needed! Whether you’re stacking them on a juicy burger, tossing them into a salad, or sneaking slices straight from the jar (no judgment here), these dill pickle slices are about to become your new obsession.

Why You’ll Love These Dill Pickle Slices
These homemade dill pickle slices are about to become your new kitchen MVP. Here’s why:
- That crunch! No more soggy store-bought slices—these stay crisp for weeks.
- Bold, balanced flavor with just the right kick of garlic and dill.
- Ready in 2 days (though I promise they won’t last that long).
- No canning hassle—just mix, pour, and refrigerate. Even pickling newbies can nail this.
Perfect for Sandwiches and Snacks
I pile these onto Reubens, tuck them into grilled cheeses, and yes, eat them by the forkful straight from the jar. They’re killer on burgers, fantastic chopped into tuna salad, and even better alongside sharp cheddar on a lazy afternoon. My kids fight over who gets the last slice—that’s how good these are.
Quick and No Canning Required
Forget boiling water baths and special equipment! These refrigerator pickles are foolproof. The brine comes together in minutes, and your fridge does all the work. No worrying about botulism or proper sealing—just crisp, tangy perfection without the stress.
Ingredients for Dill Pickle Slices
Gather these simple ingredients—you might already have most in your pantry! The magic happens when they all come together:
- 4 cups cucumbers, thinly sliced (about 3 medium cukes—I like Kirby or Persian for extra crunch)
- 2 cups water (filtered if yours is heavily chlorinated)
- 1 cup white vinegar (5% acidity)—this is key for that classic pickle tang
- 1 tbsp salt (plain pickling or kosher salt—never iodized!)
- 2 cloves garlic, crushed (smash ’em with your knife to release more flavor)
- 1 tbsp dill seeds (not dill weed—those little seeds pack serious punch)
- 1 tsp black peppercorns (trust me, whole ones give better flavor than ground)
See? Nothing fancy—just good, honest ingredients that turn cucumbers into pickle heaven.
How to Make Dill Pickle Slices
Ready to transform those crisp cukes into pickle perfection? Follow these simple steps—I’ve made this so many times I could do it blindfolded (though I don’t recommend trying that with boiling brine!).
Prepare the Jars and Cucumbers
First, give your jars a good scrub and sterilize them by pouring boiling water inside and letting them sit for 5 minutes (or run them through the dishwasher). While they dry, slice those cucumbers about 1/8-inch thick—any thinner and they’ll go limp, any thicker and they won’t soak up enough flavor. Pack them into the jars tightly—like Tetris-level tight—with the garlic cloves tucked in between layers.
Make the Brine
In a saucepan, combine water, vinegar, salt, dill seeds, and peppercorns. Bring it to a rolling boil—you’ll know it’s ready when your kitchen smells like a pickle factory (in the best way). Stir just until the salt dissolves, then kill the heat. Don’t let it boil too long or you’ll lose too much liquid to evaporation!
Combine and Store
Carefully pour the hot brine over the cucumbers, leaving about ½ inch of headspace. Tap the jars gently to release any air bubbles—you should see little pockets rising to the surface. Screw the lids on fingertip-tight (not Hercules-tight), let them cool to room temp, then stash them in the fridge. Now comes the hardest part: waiting 48 hours before diving in. I know, torture! But trust me, that patience pays off in maximum crunch and flavor.
Tips for Perfect Dill Pickle Slices
After making countless batches of these pickles, I’ve picked up a few tricks to guarantee that perfect crunch and tang every time. Here are my can’t-live-without tips:
Use Fresh, Firm Cucumbers
This is non-negotiable—your pickles are only as good as your cukes! I always grab Kirby or Persian cucumbers from the farmers’ market when they’re in season. Avoid any that feel limp or have a waxy coating (that wax prevents brine absorption). If you can’t find pickling cucumbers, English cukes work in a pinch—just peel them first.
Adjust Spices to Taste
This recipe is your playground! Love garlic? Double it. Prefer less heat? Skip half the peppercorns. I sometimes throw in a pinch of red pepper flakes for a subtle kick, or swap half the dill seeds with mustard seeds for extra complexity. The brine is forgiving—tweak it until it makes your taste buds sing.
Sterilize Like a Pro
Don’t skip sterilizing those jars! I just pour boiling water into clean jars and let them sit while I prep the cukes. This little step prevents any weird bacteria from crashing your pickle party. And always use fresh lids—reused ones might not seal properly.
Storing and Serving Suggestions
These dill pickle slices stay crisp and delicious in the fridge for up to 2 months—if they last that long in your house! I love arranging them on charcuterie boards with sharp cheeses and cured meats, or chopping them into potato salad for an extra zing. For parties, I pour the brine into a pitcher and let guests spear pickle slices with toothpicks—disappears every time!
Dill Pickle Slices Variations
Once you’ve mastered the basic recipe, try these fun twists! I love tossing in a teaspoon of mustard seeds for extra bite, or adding a few red pepper flakes for heat. My adventurous friend swears by tossing in fresh horseradish slices—sounds wild, but the spicy kick is unreal. Feeling fancy? A bay leaf or two adds subtle herbal notes that make these pickles next-level. The best part? You can mix and match until you find your perfect combo!
Nutritional Information
Here’s the scoop on what’s in these tangy little slices—perfect if you’re keeping an eye on your intake but still want that irresistible pickle crunch:
- Serving Size: 1/4 cup (about 5-6 slices)
- Calories: 5
- Sodium: 290mg
- Carbohydrates: 1g
- Protein: 0g
- Fat: 0g
Now, don’t stress over exact numbers—nutrition varies based on your specific ingredients (like how much garlic you crammed in there!). But let’s be real: when something’s this low-cal and packed with flavor, it’s basically guilt-free snacking at its finest. I mean, five calories? That’s less than the energy you’ll burn opening the jar!
FAQ About Dill Pickle Slices
Got pickle questions? I’ve got answers! Here are the ones I get asked most—straight from my pickle-obsessed inbox to you:
Can I Use Apple Cider Vinegar?
Absolutely! It’ll work, but expect a mellower, slightly fruity flavor. For that classic dill pickle tang, stick with white vinegar—it’s got the right acidic punch.
How Long Until They’re Ready?
Hold your horses for at least 48 hours! That wait lets the flavors really sink in. Though if you sneak a taste sooner (I won’t tell), they’re still delicious.
Why Are My Pickles Soft?
Likely culprit? Overripe cucumbers or not packing them tight enough. Always use firm, fresh cukes and jam-pack those jars—they should practically squeak when you push them down!
Can I Double the Recipe?
Go for it! Just use a bigger pot for the brine. I regularly quadruple batches for summer BBQs—they disappear faster than you can say “pickleback shot.”
How Do I Know If They’ve Gone Bad?
Trust your senses: if they’re mushy, smell funky, or develop mold, toss ’em. But properly stored, they’ll stay crisp for months (if they last that long!).
Rate This Recipe
Did these dill pickle slices hit the spot? I’d love to hear how yours turned out—drop a quick rating below and tell me your favorite way to enjoy them!
Print2-Day Crunchy Dill Pickle Slices You Can’t Resist
Crisp and tangy dill pickle slices perfect for sandwiches, burgers, or snacks.
- Prep Time: 15 mins
- Cook Time: 10 mins
- Total Time: 25 mins
- Yield: 2 pints 1x
- Category: Condiment
- Method: Refrigeration
- Cuisine: American
- Diet: Vegan
Ingredients
- 4 cups cucumbers, thinly sliced
- 2 cups water
- 1 cup white vinegar
- 1 tbsp salt
- 2 cloves garlic, crushed
- 1 tbsp dill seeds
- 1 tsp black peppercorns
Instructions
- Sterilize jars and lids.
- Pack cucumber slices tightly into jars.
- Combine water, vinegar, salt, garlic, dill seeds, and peppercorns in a saucepan.
- Bring mixture to a boil.
- Pour hot liquid over cucumbers, leaving 1/2 inch headspace.
- Seal jars and refrigerate for at least 48 hours before serving.
Notes
- Use fresh cucumbers for best results.
- Flavor improves after 1 week.
- Store refrigerated for up to 2 months.
Nutrition
- Serving Size: 1/4 cup
- Calories: 5
- Sugar: 0g
- Sodium: 290mg
- Fat: 0g
- Saturated Fat: 0g
- Unsaturated Fat: 0g
- Trans Fat: 0g
- Carbohydrates: 1g
- Fiber: 0g
- Protein: 0g
- Cholesterol: 0mg