
I’ll never forget the summer I discovered corn cob jelly. My neighbor Mrs. Jenkins handed me a tiny jar of golden sweetness, grinning as she said, “Bet you can’t guess what this is made from.” When she told me it came from boiled corn cobs – the parts we usually toss! – my mind was blown. Turns out those leftover cobs hold magical sweetness just waiting to be transformed.
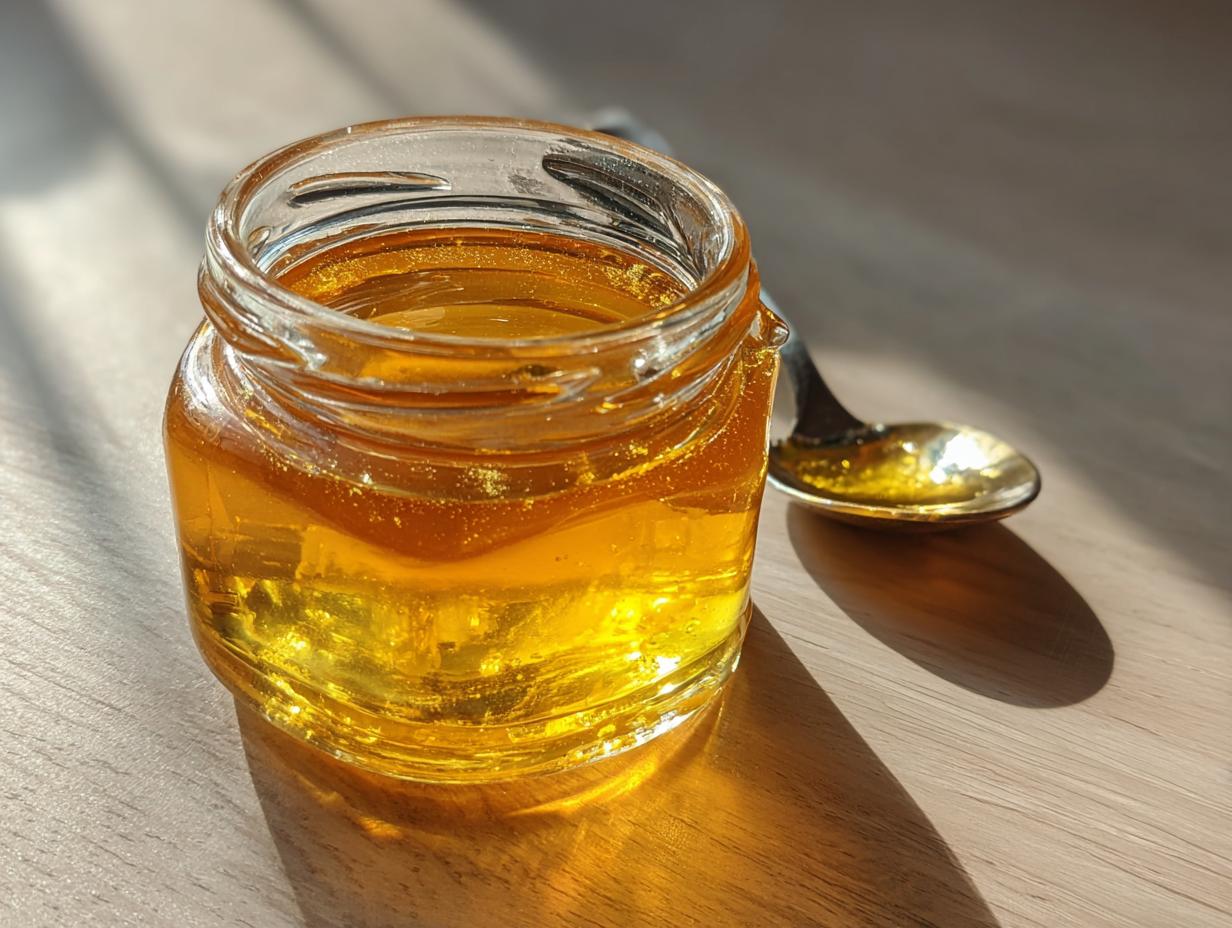
Corn cob jelly tastes like sunshine captured in a jar – lightly sweet with the faintest hint of summer corn. It’s thrifty kitchen magic at its best, turning what most people consider waste into something delicious. Spread it on biscuits, swirl it into yogurt, or pair it with sharp cheeses. One bite and you’ll understand why this old-fashioned preserve deserves a comeback!

Why You’ll Love This Corn Cob Jelly
This isn’t your average jelly – it’s pure magic in a jar! Here’s why it’ll become your new obsession:
- Waste nothing: Turns leftover corn cobs into something incredible – thrifty and delicious!
- Unique flavor: Sweet with a delicate corn essence that surprises everyone who tries it
- Super versatile: Perfect on toast, with cheese plates, or even glazed on meats
- Beautiful golden color: Looks as lovely as it tastes – makes fantastic homemade gifts
- Old-fashioned charm: Connects you to generations of smart cooks who wasted nothing
Trust me, once you taste that first spoonful, you’ll be hooked like I was!
Ingredients for Corn Cob Jelly
Gathering your ingredients is the first step to jelly magic! Here’s exactly what you’ll need to transform those humble corn cobs into golden sweetness:
- 12 fresh corn cobs (kernels removed and saved for another recipe – don’t toss them!)
- 4 cups water (just regular tap water works fine here)
- 1 package (1.75 oz) powdered pectin (I always use Sure-Jell – it never lets me down)
- 4 cups granulated sugar (measure carefully – this affects the jelly’s texture)
- 1 tablespoon lemon juice (fresh squeezed gives the brightest flavor)
A quick tip from my kitchen to yours – use the freshest corn cobs you can find. Older cobs won’t give you that lovely delicate corn flavor we’re after. And don’t skip the lemon juice! It’s not just for flavor – it helps the pectin do its thickening magic.
Equipment Needed for Corn Cob Jelly
You won’t need anything fancy to make this magical jelly – just a few basic kitchen tools. Here’s what I always grab:
- Large pot (at least 6 quarts – this stuff bubbles up!)
- Fine mesh strainer (or cheesecloth for super clear jelly)
- Sterilized jars with lids (I use half-pint jars – perfect size for gifting)
- Water bath canner (or any deep pot with a rack for processing)
- Ladle and funnel (trust me, pouring hot jelly without these is messy business)
The best part? You probably already have most of this in your kitchen. Now let’s turn those cobs into gold!
How to Make Corn Cob Jelly
Alright, let’s turn those corn cobs into liquid gold! This process is easier than you think, but there are a few key steps you don’t want to rush. I’ll walk you through each stage so your jelly turns out perfect – just like my neighbor Mrs. Jenkins taught me all those years ago.
Preparing the Corn Cobs
First things first – we need naked cobs! Slice those golden kernels off (save them for chowder or salads) until you’ve got 12 bare cobs. Here’s my trick: stand each cob upright on a cutting board and slice downward with a sharp knife. Works like a charm!
Now break those cobs into 2-3 inch pieces. I just snap them with my hands – so satisfying! The smaller pieces help extract maximum flavor. Freshness matters here – old, dried-out cobs won’t give you that wonderful corn essence we’re after.
Simmering the Corn Liquid
Toss your cob pieces into a big pot with 4 cups water. Bring it to a lively simmer – not a rolling boil – and let those cobs work their magic for a full 30 minutes. You’ll know it’s ready when the water turns a beautiful pale gold and smells faintly sweet.
Now strain it through a fine mesh sieve into another pot. Press gently on the cobs to get all that flavorful liquid, but don’t squeeze too hard or your jelly might get cloudy. Toss the spent cobs (or compost them – zero waste!).
Adding Pectin and Sugar
Here comes the jelly magic! Stir in your pectin until dissolved, then crank the heat to high. Wait for a proper rolling boil that doesn’t stop when you stir – this is crucial for the pectin to activate.
Now dump in all the sugar at once along with the lemon juice. Stir constantly as it returns to that vigorous boil. Time it for exactly 1 minute – set a timer! The mixture will thicken slightly and take on a gorgeous golden sheen.
Jarring and Processing
Quickly skim off any foam with a spoon (makes for clearer jelly), then ladle the hot liquid into sterilized jars, leaving ¼-inch headspace. Wipe the rims clean – any stickiness can prevent sealing. Screw on lids fingertip-tight.
Process in a water bath canner for 10 minutes (start timing when water boils). Then remove the jars and listen for that satisfying “ping” as they seal! Let them cool completely before storing. The jelly will continue thickening as it cools – patience is key!
Tips for Perfect Corn Cob Jelly
After making dozens of batches, I’ve learned a few secrets for foolproof corn cob jelly every time:
- Fresh is best: Use cobs within a day of shucking – older ones lose their delicate sweetness
- Watch your boil: That rolling boil after adding sugar should be vigorous – if it’s not, your jelly might not set
- Adjust to taste: Reduce sugar by ½ cup if you prefer less sweetness (but don’t go below 3½ cups)
- Patience pays: Let the jelly cool completely before judging the set – it thickens as it cools
- Storage smarts: Store sealed jars in a cool, dark place – the jelly keeps beautifully for a year
My biggest tip? Make extra – this jelly disappears fast once people taste it!
Variations for Corn Cob Jelly
Once you’ve mastered the basic recipe, try these fun twists! I love adding 1 cinnamon stick while simmering the cobs – it gives the jelly warm, cozy notes. For vanilla lovers, stir in 1 teaspoon vanilla extract with the sugar. Feeling adventurous? A pinch of red pepper flakes makes a sweet-spicy version that’s incredible with goat cheese!
Serving Suggestions for Corn Cob Jelly
Oh, the possibilities with this golden goodness! My absolute favorite? Slathered thick on warm buttermilk biscuits right out of the oven – the way the sweet jelly melts into those flaky layers is pure bliss. But don’t stop there! Try it:
- Swirled into plain yogurt for breakfast
- Paired with sharp cheddar on crackers
- Glazed over roasted chicken or pork chops
- As a surprise filling between cake layers
Last summer, I even stirred some into my lemonade – game changer! Once you start experimenting, you’ll find a hundred ways to enjoy it.
Storing Corn Cob Jelly
Proper storage keeps your corn cob jelly delicious for months! Once those jars seal with that satisfying “ping,” store them in a cool, dark place like your pantry. The jelly stays perfect for up to a year this way. After opening, just pop it in the fridge – it’ll keep happily for about a month. Pro tip: Always check seals before storing – if the lid flexes when pressed, that jar needs refrigerating right away!
Nutritional Information for Corn Cob Jelly
Let’s talk numbers – but don’t worry, this sweet treat is surprisingly simple when it comes to nutrition! Here’s what you’re getting in each tablespoon of that golden goodness:
- Calories: About 50
- Sugar: 12g (hey, it is jelly after all!)
- Fat: 0g
- Sodium: 0mg
- Protein: 0g
Now, here’s my kitchen confession – these numbers can wiggle a bit depending on your exact ingredients. Used a heaping cup of sugar? Might be tad sweeter. Skipped the lemon juice? Probably won’t change much. That’s the beauty of homemade – every batch has its own personality!
The best part? Unlike store-bought jellies with ingredients I can’t pronounce, you know exactly what’s going into your jar. Just corn cobs, sugar, lemon, and pectin – that’s it! So go ahead and enjoy that spoonful guilt-free.
Frequently Asked Questions About Corn Cob Jelly
I get so many questions about this magical jelly – here are the ones that pop up most often in my kitchen!
Can I use frozen corn cobs?
You bet! Frozen cobs work in a pinch, but fresh really does give the best flavor. If using frozen, don’t thaw them first – just toss those icy cobs straight into the pot. The freezing actually helps break down the fibers to release more corn goodness!
How long does corn cob jelly last?
Sealed jars keep beautifully for a year in the pantry. Once opened, pop it in the fridge and enjoy within a month. My jars never last that long though – we go through them embarrassingly fast!
Why didn’t my jelly set properly?
Usually it’s one of three things: not bringing the mixture to a full rolling boil after adding sugar, not using enough pectin, or judging the set too soon (it thickens as it cools). If it’s still runny after 24 hours, you can reboil it with a bit more pectin.
Can I reduce the sugar?
You can cut back to 3½ cups, but any less and the jelly might not set right. The sugar isn’t just for sweetness – it works with the pectin to create that perfect jelly texture we love.
PrintMagical Corn Cob Jelly Recipe with 12 Cobs You’ll Love
A sweet and unique jelly made from fresh corn cobs, perfect for spreading on toast or pairing with cheeses.
- Prep Time: 15 mins
- Cook Time: 45 mins
- Total Time: 1 hour
- Yield: 4 half-pint jars 1x
- Category: Preserves
- Method: Stovetop
- Cuisine: American
- Diet: Vegetarian
Ingredients
- 12 fresh corn cobs
- 4 cups water
- 1 package (1.75 oz) powdered pectin
- 4 cups granulated sugar
- 1 tablespoon lemon juice
Instructions
- Remove kernels from corn cobs and set aside for other uses. Break cobs into smaller pieces.
- Place corn cobs in a large pot with water. Simmer for 30 minutes, then strain the liquid into a clean pot.
- Add pectin to the corn liquid and bring to a rolling boil.
- Stir in sugar and lemon juice. Boil for 1 minute, stirring constantly.
- Remove from heat, skim off foam, and pour into sterilized jars. Seal and process in a water bath for 10 minutes.
Notes
- Use only fresh corn cobs for best flavor.
- Adjust sugar to taste if desired.
- Store sealed jars in a cool, dark place for up to a year.
Nutrition
- Serving Size: 1 tablespoon
- Calories: 50
- Sugar: 12g
- Sodium: 0mg
- Fat: 0g
- Saturated Fat: 0g
- Unsaturated Fat: 0g
- Trans Fat: 0g
- Carbohydrates: 13g
- Fiber: 0g
- Protein: 0g
- Cholesterol: 0mg