
There’s something deeply satisfying about opening your pantry to see rows of golden jars filled with homemade goodness. My journey with chicken canning recipes started years ago when I wanted to preserve our summer harvest bounty. Now, it’s become my favorite way to keep high-quality protein on hand for busy nights. Let me share what I’ve learned about safe, delicious home canning – because trust me, once you taste your own canned chicken in soups, casseroles, or tacos, you’ll never go back to store-bought. The key is starting with proper techniques (I’m a stickler for USDA guidelines) and quality ingredients. Ready to fill your shelves with this kitchen staple?
Why You’ll Love These Chicken Canning Recipes
Oh, where do I even start? This chicken canning recipe is about to become your new kitchen bestie—here’s why:
- Pantry power: Shelf-stable protein at your fingertips means no more last-minute grocery runs when dinner inspiration strikes. (Hello, 10pm taco cravings!)
- Meal prep magic: Imagine pulling a jar of tender chicken straight into soups, salads, or casseroles—zero defrosting, zero fuss.
- Budget win: Stock up when chicken’s on sale and preserve it at peak freshness. It’s like giving future-you a high-five every time you cook.
Plus, that moment when you pop open a jar and smell home-cooked goodness? Pure satisfaction.
Ingredients for Chicken Canning Recipes
Here’s the beautiful simplicity of this recipe – just three key ingredients, but each one matters:
- 4 lbs chicken pieces (bone-in for richer flavor or boneless for convenience – I usually use thighs because they stay so tender)
- 1 tsp salt per pint jar (don’t skip this! It’s not just for flavor – it helps preserve the chicken)
- Boiling water (freshly boiled – I keep my kettle humming while prepping jars)
That’s it! Well, besides your clean jars – I swear by wide-mouth pints for easy packing, but quarts work great too if you’ve got a bigger family to feed.
Equipment Needed for Chicken Canning Recipes
Listen, I learned the hard way that shortcuts with canning equipment just lead to heartbreak (and potentially wasted chicken). Here’s what you absolutely need:
- Pressure canner (not a water bath! Chicken requires those high temps only pressure canning provides)
- Glass jars & new lids (I always keep extras – nothing worse than realizing you’re one lid short mid-process)
- Non-metallic bubble remover (my wooden chopstick lives permanently in my canning drawer)
Pro tip: Double-check your canner’s manual – outdated equipment terrifies me more than horror movies!
How to Make Chicken Canning Recipes
Okay, let’s get down to the good stuff! I’ll walk you through each step like we’re standing side by side in my kitchen (just imagine the delicious smell of simmering jars!). Follow these steps carefully, and you’ll have perfect canned chicken every time.
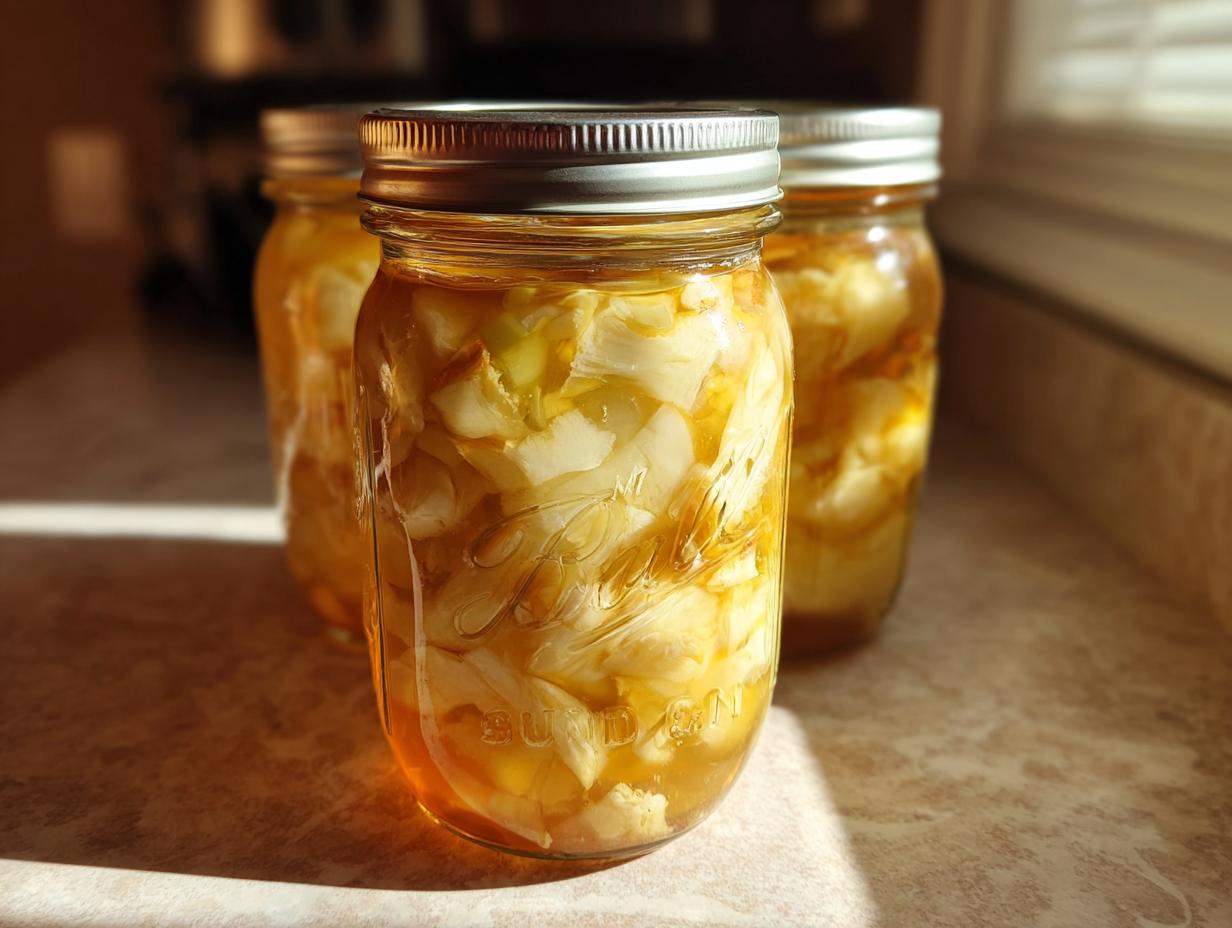
Preparing the Jars
First things first – we need squeaky clean jars! I always start by washing jars in hot soapy water, then sterilizing them in boiling water for 10 minutes. Keep those babies hot until filling – cold jars plus hot food equals cracked glass (learned that the hard way!). And don’t forget to simmer your lids – just 5 minutes in hot (not boiling!) water to soften those sealing compounds.
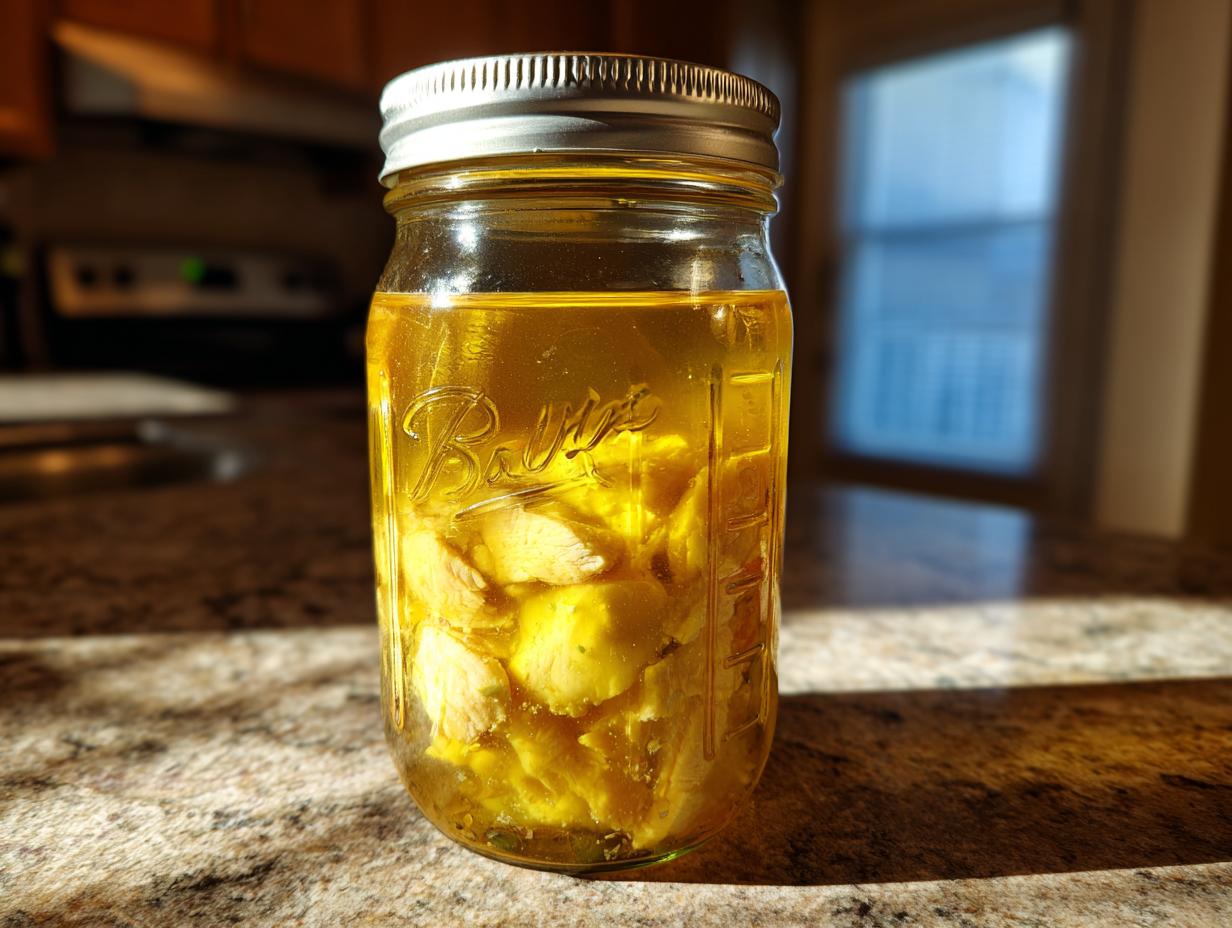
Packing the Chicken
Now for the fun part! Cut your chicken into pieces that’ll fit through the jar mouth (about 2-inch chunks work great). Pack them in snugly but don’t squish – leave that precious 1-inch headspace! Sprinkle 1 tsp salt per pint jar right over the chicken (it’ll distribute as it processes). Pro tip: I use a wide-mouth funnel to keep those jar rims clean – less wiping later!
Processing in the Canner
Here’s where the magic happens! Fill your jars with boiling water (again, that 1-inch headspace!), remove air bubbles with your trusty chopstick, and wipe rims spotless. Process pints for 75 minutes and quarts for 90 minutes at 10-11 psi (adjust for altitude!). The wait is torture – my kitchen smells like the best chicken soup ever – but resist peeking! Let that canner do its thing undisturbed.
Tips for Perfect Chicken Canning Recipes
After years of trial and (a few) errors, here are my golden rules for foolproof canned chicken:
- Listen for the “ping”: That sweet sound of lids sealing is music to a canner’s ears. If any jars don’t seal, refrigerate and use within 3 days.
- Respect the headspace: I swear by using a headspace measurer – too full risks siphoning, too empty might not seal properly.
- Dark & cool wins: Store your bounty in a pantry away from light – those golden jars stay perfect for up to a year!
Trust me, following these tips makes all the difference between “good” and “grandma-worthy” results!
Storing and Using Canned Chicken
Oh, the possibilities! Your beautifully canned chicken will keep for a solid year in a cool, dark pantry (though mine never lasts that long – it’s too handy!). Once opened, refrigerate and use within 4 days. My favorite quick meals? Chicken salad sandwiches with cranberries, creamy chicken noodle soup (just add broth and noodles!), or toss it straight into enchiladas. The broth in the jar? Liquid gold for gravy or rice cooking. Pro tip: Label jars with dates – future you will be grateful!
Chicken Canning Recipes FAQs
I get asked these questions all the time from fellow canning enthusiasts – here’s what my years of experience have taught me:
Can I use frozen chicken?
Absolutely! Just thaw it completely first (overnight in the fridge works best). Never can partially frozen chicken – it messes with processing times and safety. Bonus: frozen chicken often goes on sale, making it perfect for stocking up!
How long does canned chicken last?
Properly processed jars stay good for 1 year, but honestly? The quality peaks around 6-9 months. I date all my jars with a grease pencil – first in, first out!
Is the broth in the jar safe to use?
You bet! That golden liquid is packed with flavor. I use it in everything from gravy to rice dishes. Just give the jar a gentle shake before opening to redistribute any settled juices.
Can I add spices or herbs?
While you can, I keep mine plain for maximum versatility. Season later when cooking – that way one jar works for tacos tonight and chicken salad tomorrow!
Nutritional Information
Just a heads up – these numbers are estimate since chicken fat content varies. But here’s the breakdown per 1/2 cup serving of my canned chicken:
- 120 calories (all that good protein keeps you full!)
- 18g protein (hello, muscle fuel!)
- 5g fat (mostly the healthy unsaturated kind)
- 0g carbs (perfect for low-carb meal plans)
Remember, the sodium comes mostly from the preserving salt – rinse the chicken if you’re watching your intake!
Share Your Experience
Did your chicken canning adventure turn out golden? I’d love to hear about it! Drop a comment below with your favorite way to use canned chicken or any questions – your tips might help fellow home canners too! Find more inspiration on Pinterest.
Print3 Must-Try Chicken Canning Recipes for Flavorful Meals
Learn how to safely can chicken at home with this simple recipe.
- Prep Time: 30 minutes
- Cook Time: 90 minutes
- Total Time: 2 hours
- Yield: 4 pints 1x
- Category: Preserving
- Method: Pressure Canning
- Cuisine: American
- Diet: Low Lactose
Ingredients
- 4 lbs chicken pieces (bone-in or boneless)
- 1 tsp salt per pint jar
- Water (as needed)
Instructions
- Prepare your jars and lids by sterilizing them in boiling water.
- Cut chicken into pieces that fit your jars.
- Pack raw chicken into jars, leaving 1-inch headspace.
- Add salt to each jar.
- Fill jars with boiling water, maintaining 1-inch headspace.
- Remove air bubbles with a non-metallic tool.
- Wipe jar rims clean.
- Place lids and rings on jars.
- Process pints for 75 minutes and quarts for 90 minutes in a pressure canner.
Notes
- Use only USDA-approved canning methods.
- Check jar seals after cooling.
- Store canned chicken in a cool, dark place.
Nutrition
- Serving Size: 1/2 cup
- Calories: 120
- Sugar: 0g
- Sodium: 300mg
- Fat: 5g
- Saturated Fat: 1.5g
- Unsaturated Fat: 3g
- Trans Fat: 0g
- Carbohydrates: 0g
- Fiber: 0g
- Protein: 18g
- Cholesterol: 50mg