
There’s nothing like opening a jar of homemade white chicken chili on a busy weeknight—trust me, it’s a game-changer. I remember the first time I tried canning it; I was skeptical, but one snowy evening when dinner needed to happen fast, that jar saved the day. Now, my pantry always has a few tucked away, ready to warm us up with tender chicken, creamy beans, and just the right kick of green chiles. Whether you’re a canning pro or a newbie, this recipe is foolproof and so worth the little extra effort. Let’s make sure you’ve got a stash of this hearty goodness for those “no-time-to-cook” moments!
Why You’ll Love Canning White Chicken Chili
This isn’t just another chili recipe—it’s your future self’s best friend! Here’s why:
- Meal prep magic: One afternoon of cooking means ready-to-eat meals for months
- Flavor that holds up: The spices meld beautifully while stored, tasting even better over time
- Pantry superhero: No freezer space needed—just grab a jar whenever hunger strikes
- Your heat, your way: Start mild, then amp up the spice when reheating with extra chiles or hot sauce
- Weeknight lifesaver: From jar to table in minutes—top with cheese and call it dinner
Trust me, once you taste that first spoonful of homemade canned chili on a rainy Tuesday, you’ll wonder how you ever lived without it.
Ingredients for Canning White Chicken Chili
Here’s the beauty of this recipe—simple ingredients that transform into something extraordinary in the jar. But listen closely: quality matters here. I learned the hard way that shortcuts with canned beans or bland broth lead to sad, watery chili. Here’s what you’ll need:
- 2 lbs cooked chicken, shredded by hand (those uneven pieces hold onto flavor better than uniform shreds)
- 4 cups cooked white beans (I’m team Great Northern, but navy beans work too—just please, no mushy canned ones!)
- 1 large onion, diced small (your future self will thank you for not getting stringy onion bites)
- 4 cloves garlic, minced fresh (none of that jarred stuff—it makes all the difference)
- 2 cans (4 oz) diced green chiles (mild for most folks, but swap in hot if you like a kick)
- 1 tsp cumin (toasted whole seeds and ground fresh if you’re feeling fancy)
- 1 tsp oregano (rub it between your palms first to wake up the oils)
- 1/2 tsp salt (adjust later when serving—better safe than salty)
- 1/2 tsp black pepper (freshly cracked, obviously)
- 4 cups chicken broth (homemade if you’ve got it—that gelatin makes the texture dreamy)
- 1 tbsp lime juice (brightens everything up at the end)
- 1/4 cup fresh cilantro, chopped (stems and all—that’s where the flavor hides)
See? Nothing weird or hard-to-find. Just good, honest ingredients that’ll make your jars taste like a hug from the inside.
Equipment Needed for Canning White Chicken Chili
Okay, let’s talk tools—because you can’t wing it with canning equipment (trust me, I’ve tried). Here’s what you absolutely need:
- Pressure canner (not a water bath canner—this is non-negotiable for safety with low-acid foods like chili!)
- Large stockpot for cooking the chili (mine’s always splattered with evidence of good meals)
- Clean jars, lids & bands (I reuse jars but never lids—they’re a one-and-done deal)
- Canning funnel (unless you enjoy wiping chili off jar rims for 20 minutes)
- Ladle (a silicone one won’t scratch your precious jars)
Nice-to-haves: magnetic lid lifter (for your sanity), jar lifter (no second-degree burns), and bubble remover tool (or just use a chopstick like I do). Don’t stress if you’re missing extras—Grandma canned without ’em for decades!
How to Make Canning White Chicken Chili
Alright, let’s get to the fun part—turning those simple ingredients into pantry gold! I’ve made this recipe so many times I could do it in my sleep, but I’ll walk you through every step to ensure your white chicken chili turns out perfect.
Preparing the Chili
First things first—heat a glug of oil in your biggest pot over medium heat. Toss in those diced onions and let them sweat until they’re translucent (about 5 minutes). That magical moment when the garlic hits the pan? *Chef’s kiss*—just 30 seconds until fragrant. Now, the good stuff: add your shredded chicken, beans, green chiles, and all those spices. Stir like you mean it!
Here’s my pro tip: pour in the broth slowly while scraping up any tasty browned bits from the pot’s bottom—that’s flavor, baby! Let it all simmer gently for 20 minutes (set a timer—overcooked beans turn to mush). Right before canning, stir in the lime juice and cilantro. Taste it? That’s happiness in a spoon.
Canning the White Chicken Chili
While the chili simmers, get your jars sterilized—I run mine through the dishwasher’s sanitize cycle or boil them for 10 minutes. Keep everything hot! Using your funnel, ladle the bubbling chili into jars, leaving 1-inch headspace (no eyeballing—use a ruler!). Wipe those rims spotless with a damp cloth before placing lids.
Process pints at 10 psi for 75 minutes, quarts for 90 minutes (adjust for altitude if needed). When time’s up, turn off the heat and let the canner depressurize naturally—no peeking! Once safe, remove jars with a lifter and let them cool undisturbed for 24 hours. That satisfying *pop* means you’ve just stocked your pantry with homemade goodness!
Tips for Perfect Canning White Chicken Chili
After burning through more jars than I’d like to admit, here are my hard-earned lessons for chili that’ll make you proud:
- Bean prep is key: Soak dried beans overnight—they hold shape better than canned in processing. If you’re in a rush, use the quick soak method (boil 2 minutes, then steep 1 hour).
- Spice it smart: Underseason slightly—flavors intensify over time. I add extra cumin or chile powder when reheating.
- Seal check: Press lids after 24 hours—if they flex, refrigerate and eat within a week. Properly sealed jars store for a year (but never last that long in my house!).
- Texture trick: Mash a cup of beans before adding to thicken naturally without flour or cornstarch.
- Safety first: Always verify your pressure canner’s gauge annually—no guessing with low-acid foods!
Follow these, and you’ll be the envy of every pantry-prepper you know!
Variations for Canning White Chicken Chili
Oh, the fun part—making this recipe your own! Here are my favorite twists:
- Corn lovers: Toss in 1 cup frozen corn with the beans—adds sweet pops of texture
- Bean swap: Cannellini beans bring creaminess, or mix in chickpeas for fun
- Heat it up: Double the green chiles or add diced jalapeños (seeds in if you’re brave!)
- Creamy dream: Stir in 4 oz cream cheese at the end—just don’t can it (add when reheating)
- Smoky twist: A teaspoon of smoked paprika takes it campfire-cozy
See? One recipe, endless possibilities—just keep the liquid ratios safe for canning!
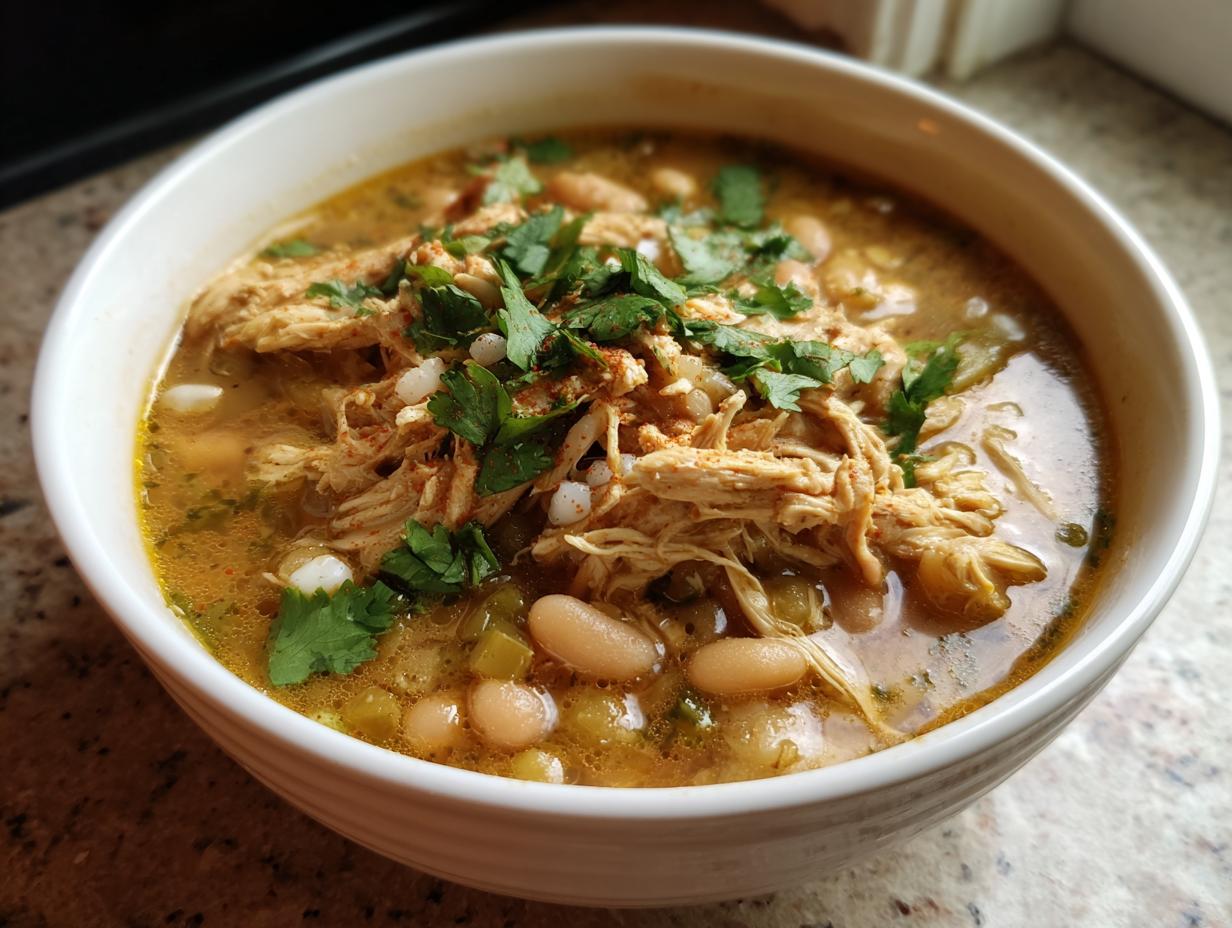
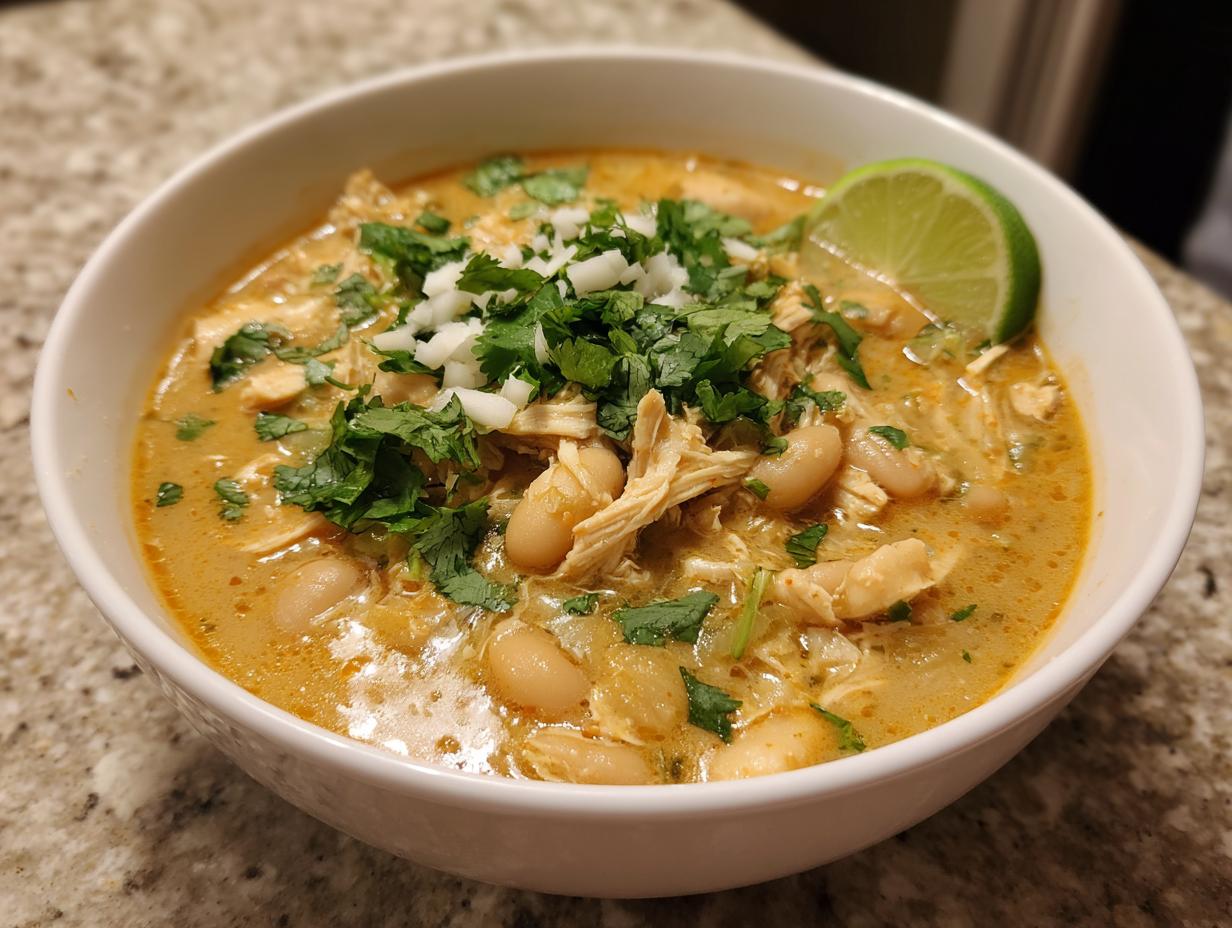
Serving Suggestions for Canning White Chicken Chili
Oh, the joy of cracking open a jar of this chili—now let’s make it a meal! My family goes wild for it served over fluffy rice (instant pot jasmine is our fave), but here’s how we dress it up:
- Cornbread crumbles on top for that sweet-salty crunch
- A dollop of cool sour cream to tame the heat
- Handfuls of shredded Monterey Jack that melt into gooey perfection
- Diced avocado for creamy contrast (add right before serving)
- Tortilla chips for scooping—because sometimes spoons are too civilized
Weeknight dinner solved, with zero fuss. Just heat, top, and devour!
Storing and Reheating Canning White Chicken Chili
Here’s the beautiful part—your hard work now pays off for months! Properly sealed jars keep safely for 1 year in a cool, dark place (my basement shelves are lined with these beauties). When hunger strikes, just pop open a jar and reheat gently on the stovetop—microwaving can make the beans mushy. I always give it a splash of broth or water if it thickens too much in storage. Pro tip: Stir in fresh cilantro or a squeeze of lime when reheating to wake up all those delicious flavors!
Nutritional Information for Canning White Chicken Chili
Here’s the skinny on this hearty chili (per 1-cup serving): 280 calories, 26g protein, and 7g fiber—pretty great for something this satisfying! Remember, these are estimates—your exact numbers will dance a bit depending on your chicken’s leanness or bean choice. But hey, with numbers like these, you can enjoy that second helping guilt-free!
Frequently Asked Questions About Canning White Chicken Chili
Over the years, I’ve fielded every question imaginable about this recipe—here are the ones that pop up most often (and my tried-and-true answers):
Can I use canned beans instead of dried?
Technically yes, but I don’t recommend it—canned beans turn to mush during processing. If you must, reduce simmer time to 10 minutes and handle jars gently. But really, take the extra hour to soak dried beans—your future chili texture will thank you!
How spicy is this chili?
As written, it’s mild enough for kids but flavorful. The magic happens when you customize during reheating—stir in extra chiles, hot sauce, or even a diced jalapeño to kick it up!
Can I freeze instead of canning?
Absolutely! Skip the pressure canning and freeze in airtight containers for up to 3 months. Thaw overnight in the fridge before reheating—just know the beans may soften a bit more than canned versions.
Why pressure canning? Can’t I use a water bath?
Safety first! Low-acid foods like chili must be pressure canned to prevent botulism. Water bath canning won’t reach the necessary temperature—trust me, it’s worth investing in the right equipment.
My jars didn’t seal—what now?
No panic! Refrigerate and eat within a week, or reprocess with new lids within 24 hours. I keep a few spare lids on hand for exactly this scenario.
Share Your Experience
Did your white chicken chili turn out perfectly? I’d love to hear! Leave a comment below with your twists or tips—your kitchen wins (and happy accidents) might just help another home canner. Now go enjoy that delicious reward! Check out more canning ideas.
PrintSavory Canning White Chicken Chili Recipe for 12 Jars

A hearty and flavorful white chicken chili perfect for canning, featuring tender chicken, white beans, and mild spices.
- Prep Time: 20 minutes
- Cook Time: 30 minutes
- Total Time: 50 minutes
- Yield: 6 pints 1x
- Category: Main Dish
- Method: Pressure Canning
- Cuisine: American
- Diet: Low Fat
Ingredients
- 2 lbs cooked chicken, shredded
- 4 cups cooked white beans
- 1 large onion, diced
- 4 cloves garlic, minced
- 2 cans (4 oz) diced green chiles
- 1 tsp cumin
- 1 tsp oregano
- 1/2 tsp salt
- 1/2 tsp black pepper
- 4 cups chicken broth
- 1 tbsp lime juice
- 1/4 cup fresh cilantro, chopped
Instructions
- In a large pot, sauté onion and garlic until softened.
- Add shredded chicken, beans, green chiles, and spices.
- Pour in chicken broth and bring to a simmer.
- Cook for 20 minutes, stirring occasionally.
- Stir in lime juice and cilantro.
- Ladle hot chili into sterilized jars, leaving 1-inch headspace.
- Process jars in a pressure canner at 10 psi for 75 minutes (pints) or 90 minutes (quarts).
- Remove jars and let cool completely before storing.
Notes
- Use dried beans soaked overnight for better texture.
- Adjust spice levels to taste.
- For thicker chili, mash some beans before adding.
- Always follow safe canning practices.
Nutrition
- Serving Size: 1 cup
- Calories: 280
- Sugar: 3g
- Sodium: 480mg
- Fat: 6g
- Saturated Fat: 1.5g
- Unsaturated Fat: 3g
- Trans Fat: 0g
- Carbohydrates: 28g
- Fiber: 7g
- Protein: 26g
- Cholesterol: 50mg