

Oh, the joy of biting into a juicy raspberry in the middle of winter! That’s exactly why I fell in love with canning raspberries—it’s like bottling up summer to enjoy all year long. I remember the first time I opened a jar of my own homemade canned raspberries in January—the burst of sweetness and that vibrant red color made me feel like I’d cracked open a little jar of sunshine. And guess what? It’s way easier than you’d think. Just a few simple steps, some fresh berries, and a bit of patience (okay, and maybe a little sugar) and you’ve got yourself a pantry full of summer, ready to brighten up oatmeal, yogurt, or even just a spoon when you need a sweet pick-me-up. Trust me, once you try it, you’ll never let raspberry season pass by without putting up a few jars!
Why You’ll Love Canning Raspberries
Let me tell you why this is my favorite way to preserve summer’s bounty—you’re going to love it too!
- Summer in a jar: Nothing beats opening a jar of raspberries in December and tasting that fresh-picked flavor
- So easy even I can’t mess it up: Just berries, simple syrup, and a quick water bath—no fancy skills needed
- Breakfast game-changer: Instant fruit topping for pancakes, yogurt, or oatmeal—no thawing required
- Gift goldmine: Pretty jars make the most thoughtful (and impressive) homemade presents
- Waste not: Save every last berry from your u-pick haul before they go bad
See? Told you you’d love it. Now let’s get those berries in jars!
Ingredients for Canning Raspberries
Here’s all you need to capture that perfect raspberry flavor—just four simple ingredients that you probably already have in your kitchen. Trust me, the simpler the better when it comes to canning!
- 4 cups fresh raspberries – the star of the show! Look for plump, ripe berries (a few underripe ones help with texture)
- 1 cup granulated sugar (optional) – adjust to taste; I like mine slightly tart so I often use just ¾ cup
- 2 cups water – for creating our simple syrup
- 1 tablespoon lemon juice – the secret weapon that keeps the color vibrant and adds brightness
That’s it! No fancy ingredients, no weird additives—just pure, simple goodness ready to be preserved.
Equipment Needed for Canning Raspberries
Don’t worry—you don’t need a fancy canning setup to preserve those gorgeous raspberries. Here’s what I always gather before starting (and yes, I’ve learned the hard way that forgetting even one item leads to a chaotic kitchen dance!)
- Sterilized jars with lids & bands – Pint or half-pint mason jars work perfectly
- Large pot with rack – For the boiling water bath (a pasta pot with insert works great)
- Jar lifter – Those boiling jars are HOT—this $5 tool saves burned fingers
- Clean towels – For drying jars and creating a soft landing spot
Nice-to-haves: A canning funnel makes filling mess-free, and a bubble remover/chopstick helps release trapped air. But really? You can totally improvise with what’s in your kitchen!
How to Can Raspberries Step by Step
Alright, let’s get these beautiful berries into jars! I’ll walk you through each step—just like I do with my sister every summer when we turn our kitchen into a canning factory. Follow along and you’ll have shelf-stable raspberry happiness in no time!
Preparing the Raspberries
Here’s the golden rule: treat your raspberries like delicate little treasures. I gently rinse them under cool running water in a colander—no vigorous shaking! Let them drain thoroughly (about 10 minutes) while you prep everything else. A few water droplets won’t hurt, but soggy berries make for mushy canned fruit.
Making the Syrup
In a saucepan, combine water and sugar (if using) over medium heat. Stir just until the sugar dissolves—no need to boil it to death! I usually take it off the heat when tiny bubbles form around the edges. Let it cool slightly (about 5 minutes) so it doesn’t cook the berries when we pour it in.
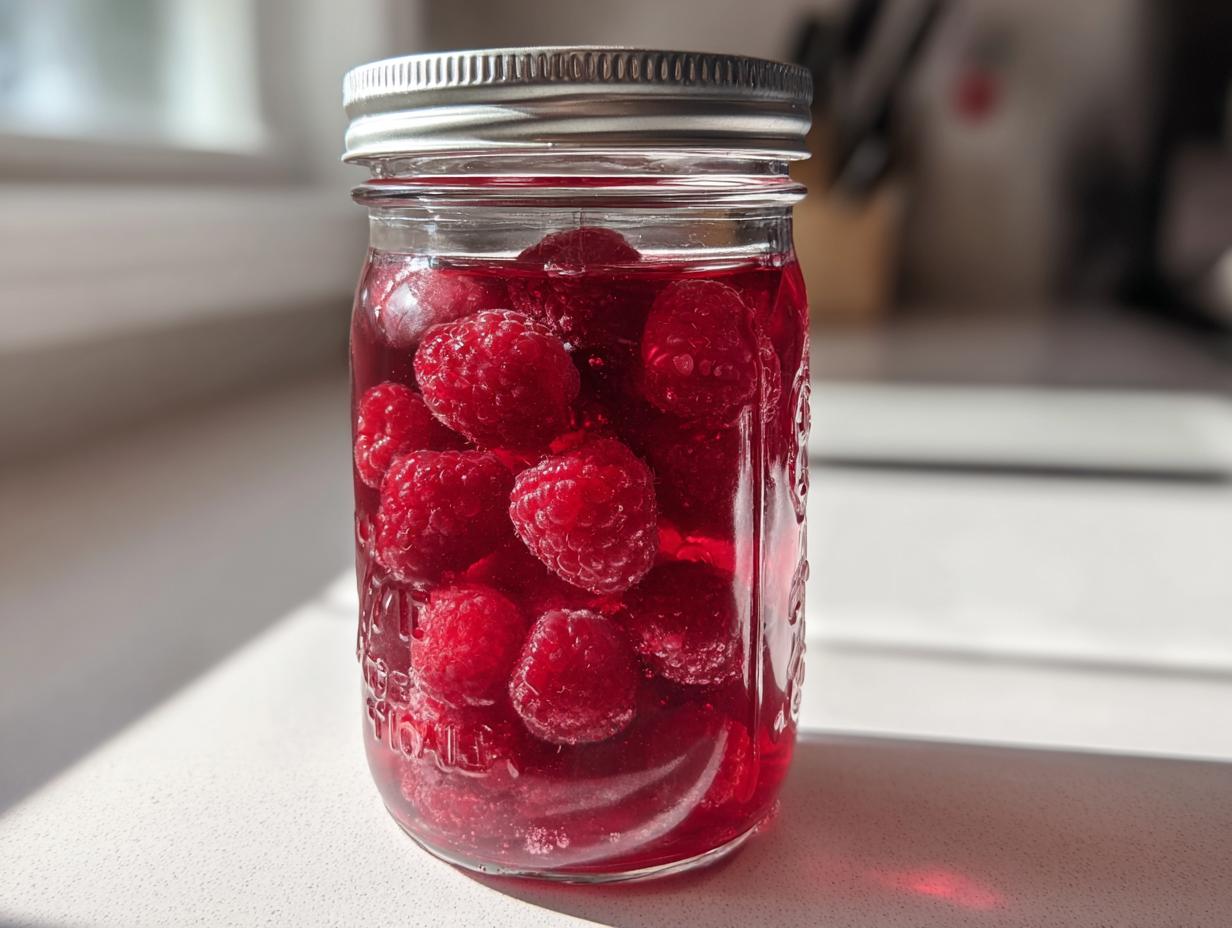
Packing the Jars
Now the fun part! Pack those ruby-red berries into sterilized jars, leaving ½ inch headspace at the top. Add ¼ teaspoon lemon juice per half-pint jar (trust me, it makes a difference!). Slowly pour the warm syrup over the berries, covering them completely. Run a chopstick around the inside to release any trapped air bubbles—I call this the “raspberry whisperer” step.
Processing the Jars
Wipe the jar rims clean (even one stray raspberry seed can ruin your seal!), then screw on the lids fingertip-tight. Lower them into your boiling water bath using the jar lifter—the water should cover the jars by 1-2 inches. Process for 10 minutes (start timing when water returns to a full boil), then remove and let them cool undisturbed for 24 hours. That satisfying “pop” of lids sealing is your reward!
Tips for Perfect Canning Raspberries
After years of canning raspberries (and yes, a few hilarious failures), I’ve learned these foolproof tricks that guarantee perfect jars every time:
- Berry selection is everything: Use ripe-but-firm raspberries—a few slightly underripe ones help maintain texture during processing
- Sweeten to your taste: Start with less sugar—you can always add more when serving, but you can’t take it out!
- Keep it bright: That lemon juice isn’t optional—it prevents discoloration and adds the perfect tang
- Storage matters: Store your cooled jars in a dark, cool place—my basement shelves work perfectly
- Label love: Always date your jars—those beauties will last a year, but you’ll want to eat them long before then!
Follow these simple tips, and you’ll be the raspberry canning champion of your friend group—I promise!
Serving Suggestions for Canned Raspberries
Oh, the possibilities! My favorite part of canning raspberries is dreaming up all the delicious ways to use them. Here are my go-to ideas:
- Drizzle over vanilla ice cream for an instant fancy dessert
- Swirl into morning yogurt or oatmeal—no sugar needed!
- Top cheesecake or pound cake for a showstopping presentation
- Mix into sparkling water for a homemade raspberry soda
- Eat straight from the jar when nobody’s looking (my guilty pleasure)
Trust me, once you taste them, you’ll find excuses to add these ruby gems to everything!
Storing and Reheating Canned Raspberries
Here’s the beautiful thing about properly canned raspberries—they’ll keep that summer flavor locked in tight! Store your sealed jars in a cool, dark place (like a pantry or basement) and they’ll stay perfect for up to a year. Once opened, refrigerate and use within a week. No need to reheat—they’re delicious cold straight from the jar! But if you want them warm, just pop them in the microwave for 15-second bursts until they reach your perfect temperature. Easy peasy!
Nutritional Information for Canned Raspberries
Here’s the scoop on what’s in those beautiful jars of ruby goodness! Per ½ cup serving of my canned raspberries (with light syrup), you’re looking at about 60 calories, 15g carbs (12g natural sugars), and a fantastic 4g fiber. They’re fat-free, sodium-free, and pack 1g protein—not bad for a sweet treat! Remember, these numbers can change slightly based on how much sugar you use (or skip). The best part? All those antioxidants and vitamins from fresh raspberries stay locked in when you can them properly—nature’s candy at its finest!
Frequently Asked Questions About Canning Raspberries
I get questions all the time from friends trying this for the first time—here are the ones that pop up most often!
Can I use honey instead of sugar?
Absolutely! Swap in ¾ cup honey for the sugar—just know it’ll give a slightly different flavor. I love it with raspberries though!
How long do they last?
Properly sealed jars will keep for a whole year in a cool, dark place. But let’s be real—they never last that long in my house!
Why didn’t my jars seal?
Don’t panic! Usually it’s just a dirty rim or a too-tight band. Pop those unsealed jars in the fridge and enjoy them first.
Can I freeze instead of can?
You can, but the texture changes. Canning keeps them plump and juicy—like they just came off the bush!
Are mushy berries okay?
Not really—they’ll turn to jam in the jar. Save those for smoothies and pick the firmest berries for canning.
Share Your Canning Raspberries Experience
Did you try canning raspberries? I’d love to hear how it went! Drop me a comment below—tell me about your favorite way to enjoy them or any clever twists you added. Happy canning, friends! You can also find more canning inspiration on Pinterest.
PrintCanning Raspberries: 4 Steps to Bottle Summer’s Sweetness

Learn how to can raspberries to preserve their freshness and enjoy them year-round.
- Prep Time: 15 minutes
- Cook Time: 10 minutes
- Total Time: 25 minutes
- Yield: 2 pints 1x
- Category: Preserving
- Method: Boiling Water Bath
- Cuisine: American
- Diet: Vegetarian
Ingredients
- 4 cups fresh raspberries
- 1 cup granulated sugar (optional)
- 2 cups water
- 1 tablespoon lemon juice
Instructions
- Wash the raspberries gently under cold water and drain well.
- Prepare a light syrup by boiling water and sugar (if using) until dissolved. Let it cool slightly.
- Pack the raspberries into sterilized jars, leaving 1/2 inch of headspace.
- Add lemon juice to each jar.
- Pour the syrup over the raspberries, covering them completely.
- Remove air bubbles by running a knife along the inside of the jar.
- Wipe the jar rims clean and seal with lids and bands.
- Process the jars in a boiling water bath for 10 minutes.
- Remove the jars and let them cool for 24 hours before storing.
Notes
- Use fresh, ripe raspberries for best results.
- Adjust sugar quantity based on your preference.
- Store canned raspberries in a cool, dark place.
Nutrition
- Serving Size: 1/2 cup
- Calories: 60
- Sugar: 12g
- Sodium: 0mg
- Fat: 0g
- Saturated Fat: 0g
- Unsaturated Fat: 0g
- Trans Fat: 0g
- Carbohydrates: 15g
- Fiber: 4g
- Protein: 1g
- Cholesterol: 0mg