
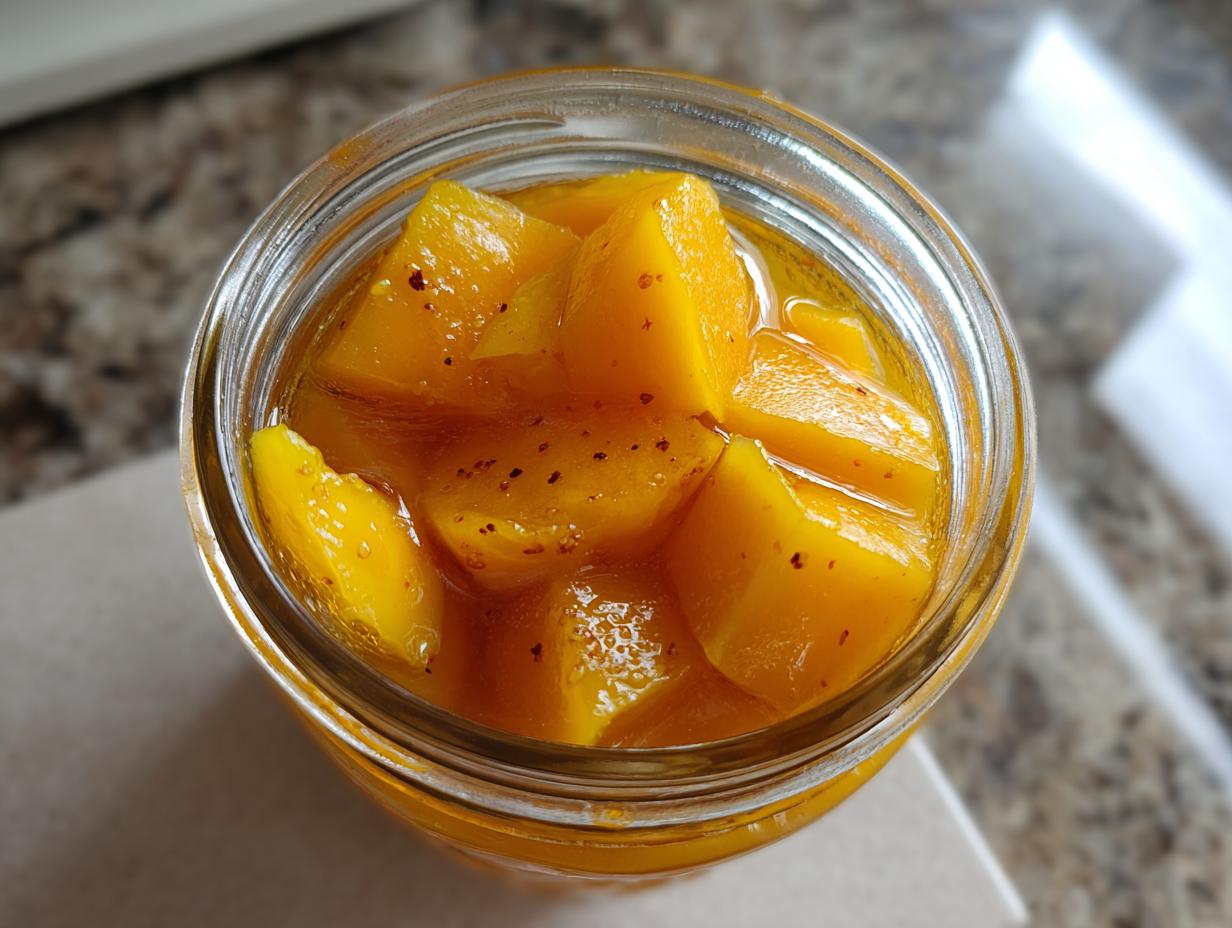
I’ll never forget the first time I tasted home-canned papaya – it was like biting into sunshine in the middle of winter! Canning papaya became my obsession after that first jar, and now I always keep a stash in my pantry. There’s something magical about preserving that tropical sweetness to enjoy year-round. My kids go crazy for it on their oatmeal, and I love having this golden goodness ready for quick smoothies or desserts.
Once you try canning papaya yourself, you’ll understand why I’m so passionate about it. It’s easier than you think, and the reward is jars of bright, flavorful fruit that last for months. No fancy equipment needed – just some ripe papayas, basic canning supplies, and about an hour of your time. Let me show you how I do it!

Why You’ll Love Canning Papaya
Trust me – once you start canning papaya, you’ll wonder how you ever lived without it! Here’s why I’m obsessed:
- Sunshine in a jar: It locks in that tropical sweetness at its peak ripeness (way better than store-bought!)
- Pantry power: Shelf-stable for up to a year – no more wasted fruit
- Instant dessert: Ready to top yogurt, ice cream, or eat straight from the jar
- So versatile: Throw it in smoothies, salsas, or even cocktails
Plus, it makes your kitchen smell amazing while you’re making it – bonus!
Ingredients for Canning Papaya
Here’s everything you’ll need to capture that perfect tropical flavor – I’ve learned through trial and error that quality ingredients make all the difference when canning papaya!
- 4 cups ripe papaya – peeled and cut into 1-inch cubes (look for golden yellow skin with slight softness)
- 1 cup sugar – white granulated works best, but you can reduce this if your papaya is super sweet
- 2 cups water – filtered if your tap water has strong flavors
- 1 tablespoon lemon juice – fresh squeezed gives the brightest flavor
- 1/2 teaspoon cinnamon (optional) – my secret for adding warmth without overpowering the fruit
Pro tip: Always taste your papaya before starting – sweetness varies so much by variety!
Equipment Needed for Canning Papaya
Don’t worry – you don’t need fancy gadgets to start canning papaya! Here’s what I always have ready on my counter:
- 2 pint-sized mason jars (or 4 half-pints) with new lids and rings
- Large saucepan (at least 3 quarts) for making syrup
- Canning tongs – trust me, regular tongs just don’t grip jars safely!
- Clean kitchen towel for wiping rims
- Bubble remover/chopstick – my grandma’s trick for perfect seals
- Large stockpot with rack for water bath processing
That’s it! Everything else is probably already in your kitchen.
Step-by-Step Guide to Canning Papaya
Okay friends, let’s get these golden beauties into jars! I’ve made every mistake possible with canning papaya (hello, sticky kitchen ceiling!), so follow my foolproof steps:
Preparing the Jars and Syrup
First things first – we need squeaky-clean jars and that sweet, sweet syrup. I always start by washing my jars in hot soapy water, then boiling them for 10 minutes to sterilize (keep them in the hot water until ready to fill). Meanwhile, mix your water, sugar, and lemon juice in the saucepan. Bring it to a rolling boil – that means bubbles you can’t stir down – and let it go for 2 full minutes. The syrup should look clear and slightly thickened.
Cooking and Packing the Papaya
Now the fun part! Gently slide your papaya cubes into the boiling syrup. Don’t stir too much or you’ll break the fruit – just a gentle swirl every minute. After 5 minutes, the papaya will soften slightly but still hold its shape. Use a slotted spoon to pack the warm cubes into your hot jars, leaving about half an inch of space at the top (that’s called headspace – crucial for sealing!).
Sealing and Processing the Jars
Almost there! Pour the hot syrup over the papaya, covering it completely but keeping that half-inch headspace. Here’s my trick: run a clean butter knife around the inside edge to release any trapped air bubbles. Wipe the jar rims spotless – even a tiny bit of stickiness can ruin your seal. Screw on the lids finger-tight (not too tight – they need to “breathe” during processing). Now lower them into your boiling water bath with the canning tongs, making sure they’re covered by at least an inch of water. Process for 15 minutes, then remove and let them cool undisturbed for 24 hours – that satisfying “ping” means you’ve succeeded!
Tips for Perfect Canning Papaya
After canning countless batches of papaya (and yes, learning from some messy failures), here are my golden rules:
- The squeeze test: Your papaya should yield slightly to pressure – rock hard means flavorless, mushy means jammy texture
- Taste before you sugar: Some varieties are crazy sweet! Adjust syrup sugar by 1/4 cup increments
- Prevent siphoning: Let jars rest in the water bath for 5 minutes after turning off heat – this keeps liquid from escaping
- Work fast: Have everything prepped before starting – papaya hates waiting!
Oh, and always process more jars than you think – they disappear fast!
Storing and Using Canned Papaya
Those jewel-toned jars of papaya deserve prime real estate in your pantry! Store them in a cool, dark place (I tuck mine next to the pickles) and they’ll keep beautifully for up to a year. Once opened, refrigerate and use within a week – though mine never last that long!
Here’s how we enjoy our canned papaya:
- Breakfast boost: Swirl into yogurt or oatmeal with toasted coconut
- Quick dessert: Warm with vanilla ice cream and a drizzle of the syrup
- Tropical twist: Add to smoothies or blend into piña coladas
- Savory surprise: Chop fine for salsa with jalapeños and lime
Pro tip: That leftover syrup? Gold! Use it in cocktails, lemonade, or to glaze roasted carrots.
Canning Papaya Variations
Once you’ve mastered basic canning papaya, try these fun twists! My favorite is adding a 1-inch knob of fresh ginger to the syrup – it gives the sweet fruit a lovely zing. A split vanilla bean works magic too, or for holiday batches, a pinch of nutmeg or cardamom. Feeling adventurous? Swap half the water with pineapple juice for a tropical explosion!
Nutritional Information
Here’s the scoop on what’s in that delicious canned papaya (per 1/2 cup serving): About 120 calories, 30g carbs, and 2g fiber – plus a vitamin C boost! Remember, values are estimates and vary by ingredients.
Common Questions About Canning Papaya
Can I use unripe papaya?
Oh honey, don’t do it – unripe papaya stays hard and bitter after canning! Trust me, I learned the hard way. You want fruit that’s fragrant and gives slightly when pressed, with at least 80% golden yellow skin.
Why did my syrup turn cloudy?
That usually means the papaya wasn’t ripe enough or you overcooked it. No worries though – it still tastes great! Next time, simmer just until the cubes soften at the edges.
Can I skip the water bath?
Nope! The boiling water bath is what makes canned papaya shelf-stable. Without it, you’re just making fridge jam (and risking spoilage). Those 15 minutes are non-negotiable for safety.
How do I know if my jars sealed properly?
After cooling, press the center of each lid – if it doesn’t pop, you’re golden! Unsealed jars go straight in the fridge. Pro tip: The satisfying “ping” sound means success!
Can I double the recipe?
Absolutely! Just use two pots so you don’t overcrowd the fruit. I always make extra – they make the best last-minute gifts (if I can bear to part with them).
Share Your Experience
Did your canned papaya turn out golden and delicious? I’d love to hear! Drop a comment below with your twists or tips – let’s swap canning stories! You can also find more canning inspiration on Pinterest.
Print4 Easy Steps for Canning Papaya – Sunshine in Every Jar
Learn how to can papaya for long-term storage.
- Prep Time: 20 minutes
- Cook Time: 20 minutes
- Total Time: 40 minutes
- Yield: 2 pints 1x
- Category: Preserves
- Method: Boiling Water Bath
- Cuisine: International
- Diet: Vegetarian
Ingredients
- 4 cups ripe papaya, peeled and cubed
- 1 cup sugar
- 2 cups water
- 1 tablespoon lemon juice
- 1/2 teaspoon cinnamon (optional)
Instructions
- Sterilize jars and lids in boiling water for 10 minutes.
- Combine sugar, water, and lemon juice in a saucepan. Bring to a boil.
- Add papaya cubes and simmer for 5 minutes.
- Pack hot papaya into jars, leaving 1/2 inch headspace.
- Pour hot syrup over papaya, covering it completely.
- Remove air bubbles with a clean knife.
- Wipe jar rims and seal with lids.
- Process jars in a boiling water bath for 15 minutes.
- Remove jars and let cool for 24 hours.
- Check seals before storing.
Notes
- Use ripe but firm papaya for best results.
- Adjust sugar to taste.
- Store in a cool, dark place.
Nutrition
- Serving Size: 1/2 cup
- Calories: 120
- Sugar: 25g
- Sodium: 5mg
- Fat: 0g
- Saturated Fat: 0g
- Unsaturated Fat: 0g
- Trans Fat: 0g
- Carbohydrates: 30g
- Fiber: 2g
- Protein: 1g
- Cholesterol: 0mg