
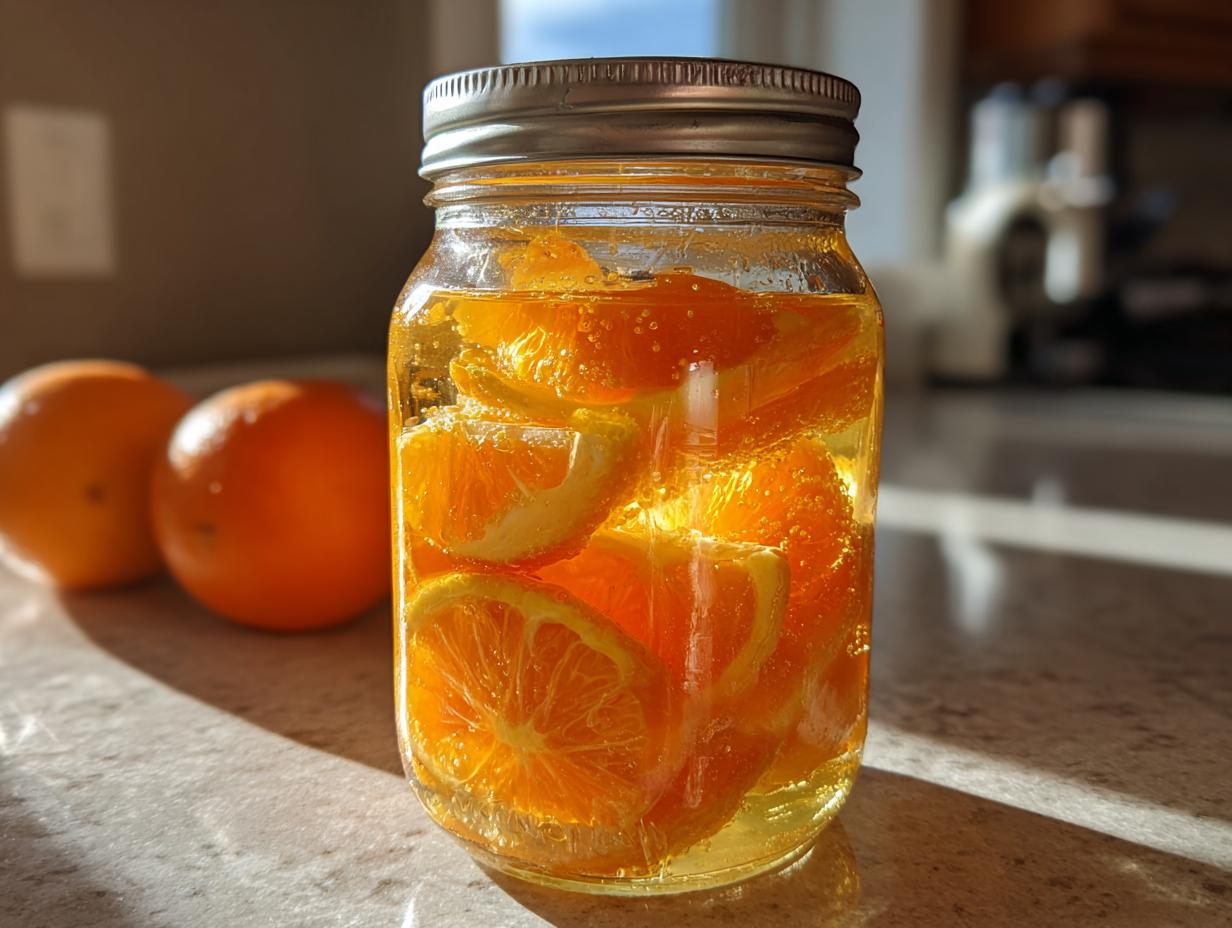
There’s something magical about opening a jar of sunshine in the middle of winter – that’s exactly what canned oranges feel like to me! I still remember the first time I tried canning oranges at home. The kitchen smelled like a citrus grove, and those bright orange segments looked like little jewels floating in golden syrup. Now it’s my go-to method for preserving that fresh orange flavor all year round.
Canning oranges couldn’t be simpler, and the results are so versatile. You can use them in cakes, top your morning yogurt, or just enjoy them straight from the jar. Unlike store-bought versions, you control the sweetness (I sometimes skip the sugar entirely). The best part? These beauties keep for up to a year in your pantry, ready to bring a burst of summer whenever you need it.

Why You’ll Love Canning Oranges
Trust me, once you try homemade canned oranges, you’ll wonder why you didn’t start sooner. Here’s what makes them so special:
- Pantry sunshine: Nothing beats opening a jar of bright orange segments when fresh ones are out of season
- Breakfast boost: Perfect for topping pancakes, yogurt, or oatmeal when you’re rushing in the morning
- Baking buddy: Adds moisture and flavor to cakes, muffins, and fruit breads (my orange pound cake recipe NEEDS these!)
- Custom sweetness: You decide how much sugar goes in – or leave it out entirely
- No waste solution: Preserve that citrus bounty before it goes bad
Seriously, your future self will thank you when you’re enjoying these in December!
Ingredients for Canning Oranges
You only need a handful of simple ingredients to make these sunshine jars – I bet you’ve got most in your kitchen already! Here’s what you’ll need:
- 4-5 medium oranges (peeled and segmented – Navels work great, but use whatever looks fresh)
- 1 cup water (just plain tap water is fine)
- 1 cup granulated sugar (optional – I sometimes use half this amount)
- 1 tbsp lemon juice (fresh squeezed gives the best flavor, but bottled works in a pinch)
That’s it! The oranges are obviously the star, but don’t skip the lemon juice – it helps keep everything bright and stops the fruit from browning.
Equipment You’ll Need for Canning Oranges
Don’t worry – you don’t need fancy gadgets to can oranges like a pro! Here’s what I always grab from my kitchen:
- Boiling water canner (or any large pot with a rack – I’ve even used my stockpot with a folded towel on the bottom!)
- Pint or half-pint jars with new lids and rings (sterilized – more on that later)
- Medium saucepan for making the syrup
- Wide-mouth funnel (a lifesaver for keeping jar rims clean)
- Jar lifter (those boiling jars get HOT – trust me, I’ve learned this the hard way)
- Bubble remover (a chopstick works in a pinch)
The funnel and jar lifter are my canning must-haves – they make the whole process so much easier!
How to Prepare Canning Oranges
Ready to capture that citrusy goodness? Here’s my tried-and-true method that never fails me. Just follow these simple steps, and you’ll have jars of sunshine ready for your pantry in no time!
Step 1: Sterilize Jars and Prepare Oranges
First things first – wash those jars! I run mine through the dishwasher or boil them for 10 minutes. While they’re heating, get to work on the oranges. Peel them completely (no white pith!), then carefully separate the segments. Remove any sneaky seeds – they can make your preserves bitter. I like to do this over a bowl to catch all that precious juice!
Step 2: Make the Syrup
Now for the magic potion! In your saucepan, combine water, sugar (if using), and lemon juice. Bring it to a rolling boil, stirring until the sugar dissolves completely. Taste test here – want it sweeter? Add more sugar. Less sweet? You’re in control! This syrup will keep your oranges plump and delicious.
Step 3: Pack and Seal Jars
Carefully pack your orange segments into the hot jars, leaving about ½-inch space at the top. Pour the hot syrup over them, covering completely but maintaining that headspace. Here’s my secret – run a chopstick around the inside to release any trapped air bubbles. Wipe the rims spotless (this is crucial!), then screw on the lids finger-tight – not too loose, not too tight.
Step 4: Process and Cool
Time for the hot tub treatment! Lower your jars into the boiling water canner, making sure they’re covered by at least 1 inch of water. Boil for 10 minutes (set a timer!), then turn off the heat. Let them sit for 5 minutes before removing. Place the jars on a towel to cool for 24 hours – resist the urge to poke them! When cool, check that the lids have sealed (they shouldn’t pop when pressed).
Tips for Perfect Canning Oranges
After dozens of batches (and a few learning experiences!), here are my golden rules for canning oranges like a pro:
- Pick perfect oranges: Use firm, ripe fruit without bruises – the fresher they are, the better they’ll hold up!
- Go easy on the pith: That white stuff can make your oranges bitter – peel it all off carefully
- The sugar sweet spot: Start with half the sugar, then taste – you can always add more next time
- Listen for the “ping”: That satisfying pop when jars seal is music to a canner’s ears
- Test your seals: Press the center of cooled lids – if it doesn’t flex, you’re golden!
These little tricks make all the difference between good and great canned oranges!
Storing and Using Canned Oranges
Once those beautiful jars are sealed, tuck them away in a cool, dark place – my pantry shelves are always lined with these golden treasures! They’ll keep their bright flavor for up to a year, though mine never last that long before I’m dipping into them. Refrigerate after opening and use within two weeks – not that you’ll need reminding once you taste them!
Oh, the possibilities! I love spooning these over vanilla ice cream for a quick dessert, or stirring them into my morning yogurt. They’re fantastic in muffins (just fold some into the batter) or as a topping for pancakes. My favorite? Eating them straight from the jar when no one’s looking – pure sunshine in every bite!
Canning Oranges FAQs
I get asked these questions all the time – here are my quick answers from years of orange canning adventures!
Can I use bottled lemon juice? Absolutely! While fresh tastes slightly brighter, bottled works perfectly fine in a pinch. Just make sure it’s pure lemon juice with no additives.
How do I know if jars are sealed? After cooling, press the lid center – if it doesn’t pop back, you’re sealed! Another test: try lifting the jar by just the lid (carefully!).
Can I skip the sugar? You bet! The syrup helps preserve texture, but the sugar’s optional. Try honey or leave it out entirely – the oranges will still taste amazing.
Why did my oranges float? Don’t worry – this happens sometimes! Just flip the jar upside down occasionally during storage to redistribute them.
Nutritional Information for Canning Oranges
Here’s the scoop on what’s in those sunny orange jars! A half-cup serving (about 4-5 segments) clocks in at roughly 90 calories – mostly from natural fruit sugars. The exact numbers dance around depending on how much extra sugar you add (or skip!). You’re looking at about 20g of carbs per serving, with a nice 2g fiber boost from all that citrus goodness. Best part? Zero fat, sodium, or cholesterol – just pure vitamin C-packed sunshine!
(Note: These estimates can vary based on your specific ingredients – I’m no nutrition lab, just sharing ballpark figures from my kitchen experiments!)
Share Your Canning Oranges Experience
I’d love to hear about your orange canning adventures! Did you try a fun variation? Have a brilliant serving idea? Drop me a comment below – let’s swap citrusy stories and tips! You can also find more canning inspiration on Pinterest.
PrintBright Summer Canning Oranges in 4 Easy Steps with Amazing Results
Learn how to preserve oranges by canning them for long-term storage. This method keeps oranges fresh and ready for use in recipes or as a snack.
- Prep Time: 20 minutes
- Cook Time: 15 minutes
- Total Time: 35 minutes
- Yield: 2 pint jars 1x
- Category: Preserves
- Method: Boiling Water Canning
- Cuisine: American
- Diet: Vegetarian
Ingredients
- 4–5 medium oranges, peeled and segmented
- 1 cup water
- 1 cup granulated sugar (optional)
- 1 tbsp lemon juice
Instructions
- Prepare a boiling water canner and sterilize jars.
- Peel and segment the oranges, removing any seeds.
- In a saucepan, combine water, sugar, and lemon juice. Bring to a boil.
- Add orange segments to the syrup and simmer for 2-3 minutes.
- Pack oranges into sterilized jars, leaving ½-inch headspace.
- Cover with syrup, remove air bubbles, and seal jars.
- Process in a boiling water canner for 10 minutes.
- Remove jars and let cool for 24 hours before storing.
Notes
- Use fresh, ripe oranges for best results.
- Adjust sugar to taste or omit for a less sweet preserve.
- Store in a cool, dark place for up to 1 year.
Nutrition
- Serving Size: ½ cup
- Calories: 90
- Sugar: 20g
- Sodium: 0mg
- Fat: 0g
- Saturated Fat: 0g
- Unsaturated Fat: 0g
- Trans Fat: 0g
- Carbohydrates: 23g
- Fiber: 2g
- Protein: 1g
- Cholesterol: 0mg