
There’s nothing quite like opening your pantry to find rows of homemade goodness ready to go—and that’s exactly why I fell in love with canning mushroom soup base. Picture this: a chilly evening, and instead of scrambling for ingredients, you just pop open a jar of this rich, earthy base, and dinner practically makes itself. I started canning years ago after a bumper crop of mushrooms from our garden, and now I always have a stash for quick meals. This versatile base is my secret weapon—whether I’m making creamy soups, sauces, or even gravy. Plus, having it shelf-stable means delicious flavor all year, no freezer space required!
Why You’ll Love This Canning Mushroom Soup Base
Let me tell you why this mushroom soup base is about to become your new pantry hero. First off, it’s crazy versatile—stir it into risottos, use it as a gravy starter, or just add cream for instant creamy soup. When life gets busy (and when doesn’t it?), having jars ready means dinner in minutes. The flavor? Deep, earthy, and way richer than anything from a can. And here’s the kicker—properly canned, it keeps for a whole year without losing that fresh-picked mushroom magic. Trust me, once you taste homemade, you’ll never go back to store-bought again!
Ingredients for Canning Mushroom Soup Base
Alright, let’s gather our mushroomy treasures! Here’s what you’ll need to make this magical soup base—and trust me, every single ingredient plays a starring role. I’ve tested this so many times, and these amounts give you that perfect balance of earthy depth and savory brightness. Pro tip: lay everything out before you start—it makes the whole process feel like a cozy cooking show in your own kitchen.
- 2 lbs fresh mushrooms, sliced (I use a mix of cremini and button, but shiitakes add amazing depth if you’ve got them)
- 1 large onion, diced (about 2 cups—yellow or white both work beautifully)
- 4 cloves garlic, minced (or hey, go wild with 5 if you’re a garlic fiend like me)
- 4 cups vegetable broth (homemade is gold, but good quality store-bought works too)
- 2 tbsp olive oil (or butter if you want extra richness)
- 1 tsp salt (start with this—you can always adjust later)
- 1/2 tsp black pepper (freshly cracked makes all the difference)
- 1 tsp dried thyme (or 1 tbsp fresh if you’ve got it)
Quick note about the mushrooms: don’t stress about perfect slices—rustic chunks are totally fine! And if you spot wild mushrooms at the farmer’s market, grab them! More varieties mean more complex flavor. Just avoid any super delicate ones that might disappear during canning.
Equipment You’ll Need
Before we dive in, let’s round up the tools—nothing fancy, just the essentials to make your canning adventure smooth and safe. I can’t tell you how many times I’ve started cooking only to realize I’m missing something crucial (oops!). Here’s what you’ll need:
- Large heavy-bottomed pot (for simmering that mushroomy goodness)
- Blender or immersion blender (to get that perfect creamy-chunky texture)
- Sterilized jars with lids (pint-sized are my go-to for this recipe)
- Pressure canner (must-have for safe low-acid foods like mushrooms)
- Ladle and funnel (trust me, the funnel prevents messy jar rims)
- Jar lifter and canning tongs (safety first—those jars get hot!)
Quick tip: If your canner’s been collecting dust, give it a quick test run with water to make sure the gauge is accurate. Nothing worse than realizing mid-process that your equipment’s acting up!
How to Make Canning Mushroom Soup Base
Okay, let’s get cooking! This process is like a little dance—sautéing, simmering, blending—but don’t worry, I’ll walk you through every step. Just follow along, and soon you’ll have jars of liquid gold ready for your pantry shelf. The key is taking your time with each stage—this isn’t a recipe to rush (though trust me, the results are worth every minute).
Preparing the Mushroom Mixture
First, grab that big pot and heat your olive oil over medium heat. Toss in the diced onions and minced garlic—ohhh, that sizzle is the sound of flavor building! Stir them around until they turn soft and translucent, about 5 minutes. Now comes the star: those gorgeous mushrooms. Pile them all in (yes, it’ll look like too much at first) and stir occasionally as they cook down. You’ll see them release their juices and shrink by half—that’s your cue to add the vegetable broth, salt, pepper, and thyme.
Here’s my trick: let this simmer uncovered for 20 minutes. Not boiling, just a gentle bubble. This concentrates the flavors beautifully. Stir occasionally to prevent sticking, and inhale deeply—your kitchen should smell like a cozy forest bistro by now!
Blending and Canning the Soup Base
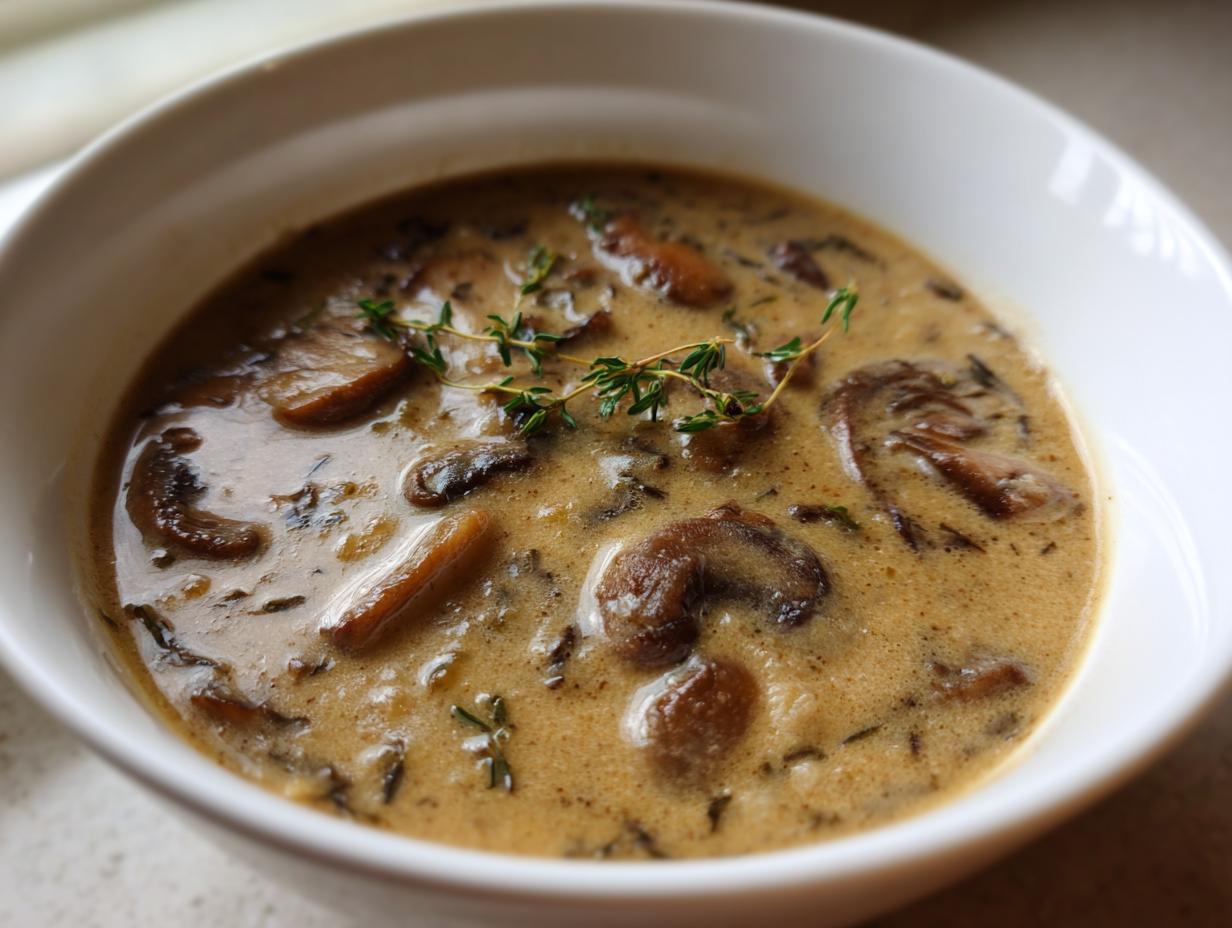
Time for texture magic! Carefully ladle about half the soup into your blender (or use an immersion blender right in the pot). Blend until smooth, then pour it back with the chunky bits. This gives you that perfect balance—creamy but with satisfying mushroom pieces.
While the soup’s still piping hot, ladle it into your sterilized jars, leaving a 1-inch headspace (that’s the space between the soup and the rim—crucial for safe canning!). Wipe the rims with a clean damp cloth to ensure perfect seals. Screw on the lids finger-tight—no need to wrestle them closed.
Now the important part: pressure canning. Process pints at 10 psi for 75 minutes (adjust for altitude if needed). Let the canner depressurize naturally—no peeking! When you hear that glorious “ping” of sealing jars, you’ll know you’ve just created pantry gold that’ll keep for a year. Just imagine all the future meals you’ve made easier with this one afternoon’s work!

Tips for Perfect Canning Mushroom Soup Base
Want to take your mushroom soup base from good to knock-your-socks-off amazing? Here are my hard-earned secrets: First, mix mushroom varieties—I throw in wild mushrooms when I can find them for extra depth. Go easy on salt before canning—you can always add more when reheating. After processing, always check seals by pressing the center of each lid—no clicking means success! And here’s my favorite trick: toss in a bay leaf when reheating for an aromatic boost. Happy canning!
Storage and Reheating
Once your jars have sealed properly (listen for that satisfying “ping!”), store them in a cool, dark place—my pantry shelf works perfectly. They’ll keep for up to a year, though mine never last that long! When you’re ready to use, simply reheat on the stovetop—low and slow prevents scorching. Want it creamier? Stir in milk or cream after opening. Pro tip: always check seals before storing and refrigerate any jars that didn’t seal properly—better safe than sorry!
Nutritional Information
Okay, let’s talk numbers—but remember, these are just estimates since mushroom sizes and broth brands can vary slightly. That said, here’s the scoop per 1-cup serving of this magical mushroom base (before you add any cream or extras):
- Calories: 80
- Protein: 3g
- Carbohydrates: 8g
- Fiber: 2g (thank you, mushrooms!)
- Sugar: 3g (all natural from those sweet onions)
- Fat: 4g
- Saturated Fat: 0.5g
- Sodium: 400mg
What I love is how this base keeps things light yet packed with flavor—perfect for dressing up or keeping simple. And hey, compare that to canned cream of mushroom soup from the store (which averages about 120 calories and way more sodium per half-cup!), and you’ll see why homemade wins every time.
Common Questions About Canning Mushroom Soup Base
Over years of canning this mushroom soup base (and sharing jars with curious friends), I’ve heard every question under the sun. Let me save you some trial and error with answers to the most common head-scratchers—straight from my kitchen to yours!
Can I freeze this instead of canning?
Oh, I wish! But freezing changes the texture—mushrooms turn rubbery and the broth separates weirdly when thawed. Pressure canning keeps everything stable and shelf-ready for months. Trust me, I learned this the hard way after a freezer mishap ruined a batch!
When should I add cream?
Always after opening the jar! Dairy and canning don’t play nice together—it’s a safety thing. But here’s the joy: you can customize each serving. Whisk in cream, milk, or even coconut milk when reheating for silky richness. Sometimes I swirl in a spoonful of sour cream right before serving—heaven!
My soup base seems too thick—help!
No stress! Just thin it with broth or water when reheating. The beauty of canning is you control the final texture. I often keep mine thick as a gravy starter, then adjust as needed. Pro tip: warm your liquid first so it blends smoothly.
Can I use different mushrooms?
Please do! Mixing varieties adds incredible depth—I adore throwing in some dried porcini (soaked first, of course) for umami punch. Just avoid super delicate mushrooms like enoki—they practically disappear during processing.
How do I know if my jars sealed properly?
That satisfying “ping” is music to a canner’s ears! But test each cooled jar by pressing the lid center—no movement means success. Unsealed jars? Refrigerate and use within a few days. Safety first!
Serving Suggestions
Oh, the possibilities! This mushroom soup base transforms like magic—serve it straight-up with crusty bread dunked right in (my lazy Sunday favorite), or ladle over roasted potatoes for instant comfort. Thin it slightly for elegant mushroom bisque, or use as a gravy base for pot pies. Pro tip: stir into risotto during the last few minutes—game changer!
Share Your Results
I can’t wait to hear about your mushroom soup adventures! Did you try mixing wild mushrooms? Found a brilliant new way to use this base? Drop a comment below—your tips might spark someone else’s kitchen magic. And if you snapped pics of those beautiful jars lining your pantry (we all do it—no shame!), share those too! Nothing makes me happier than seeing how this recipe comes alive in different kitchens. Happy canning, friends—may your shelves always be stocked with homemade goodness!
Looking for more canning inspiration? Check out our Pinterest boards for endless ideas!
Print1-Year Shelf Life Canning Mushroom Soup Base Magic

A simple and versatile mushroom soup base perfect for canning and storing for future use.
- Prep Time: 15 mins
- Cook Time: 35 mins
- Total Time: 50 mins
- Yield: 4 pints 1x
- Category: Soup
- Method: Pressure Canning
- Cuisine: American
- Diet: Vegetarian
Ingredients
- 2 lbs fresh mushrooms, sliced
- 1 large onion, diced
- 4 cloves garlic, minced
- 4 cups vegetable broth
- 2 tbsp olive oil
- 1 tsp salt
- 1/2 tsp black pepper
- 1 tsp dried thyme
Instructions
- Heat olive oil in a large pot over medium heat.
- Add onions and garlic, sauté until soft.
- Add mushrooms, cook until they release their juices.
- Pour in vegetable broth and add seasonings.
- Simmer for 20 minutes.
- Blend half the soup for a creamy texture.
- Pour into sterilized jars, leaving 1-inch headspace.
- Process in a pressure canner for 75 minutes at 10 psi.
Notes
- Use a mix of mushroom varieties for deeper flavor.
- Adjust seasoning before serving.
- Store in a cool, dark place for up to a year.
Nutrition
- Serving Size: 1 cup
- Calories: 80
- Sugar: 3g
- Sodium: 400mg
- Fat: 4g
- Saturated Fat: 0.5g
- Unsaturated Fat: 3g
- Trans Fat: 0g
- Carbohydrates: 8g
- Fiber: 2g
- Protein: 3g
- Cholesterol: 0mg