
There’s something incredibly satisfying about pulling a jar of perfectly preserved lamb mutton from your pantry—ready to transform into a hearty stew or curry at a moment’s notice. Canning lamb mutton has been my go-to for years, especially when I find a great deal at the butcher or after a successful hunting trip. It’s not just about saving money or reducing waste (though that’s a big perk!); it’s about locking in that rich, savory flavor for months to come. But here’s the thing—safety comes first. Pressure canning is non-negotiable for meats, and I’ll walk you through every step to make sure your jars are as safe as they are delicious. Trust me, once you taste that tender, home-canned mutton in the dead of winter, you’ll be hooked.
Why You’ll Love Canning Lamb Mutton
Listen, I know canning might seem like a lot of work at first glance, but once you taste the results, you’ll be as obsessed as I am. Here’s why:
- It lasts forever (almost): Properly canned lamb mutton stays good for 1-2 years—perfect for stocking up when prices drop or after a big harvest.
- Ready when you are: No thawing needed! Just pop open a jar for instant stew meat, curry base, or shepherd’s pie filling.
- Tastes like you just cooked it: Pressure canning locks in that rich, meaty flavor better than freezing ever could. The texture? Fall-apart tender every time.
Seriously, your future self will thank you when dinner’s ready in 10 minutes on a busy weeknight!
Ingredients for Canning Lamb Mutton
Let’s talk ingredients—because skimping here means sacrificing flavor later. Every time I can mutton, I stick to this simple but mighty list (and yes, I’ve learned the hard way that measurements matter!):
- 2 lbs lamb mutton, cubed: Shoulder or leg works best. Trim that thick fat cap (leave just a whisper for flavor), then chop into 1-inch cubes—any bigger, and they won’t pack right.
- 1 tsp fine salt: Not kosher, not flakes. Fine grain dissolves evenly into every bite.
- ½ tsp black pepper: Freshly ground if you’re fancy, but pre-ground works in a pinch.
- 1 tbsp olive oil: Just enough to brown without swimming the meat. Save your fancy EVOO for salads.
- 1 cup water or broth: Homestock if you’ve got it, but boxed works. Skip the bouillon—too salty after processing.
See? No fancy ingredients, just good meat and smart seasoning. That’s the beauty of canning—simple starts, spectacular finishes.
Equipment Needed for Canning Lamb Mutton
Gather these trusty tools before you start—I learned the hard way that scrambling mid-process leads to chaos (and possibly a meat disaster). Here’s what you can’t skip:
- Pressure canner: Not a pressure cooker! You need the real deal that reaches 10+ psi for safety. My ancient Presto still gets the job done.
- Glass jars (pints/quarts): Mason jars only—no random spaghetti sauce containers! I reuse lids for dry storage, but always use new sealing lids for canning.
- Jar lifter & funnel: Burns from hot jars aren’t a badge of honor. The funnel keeps rims clean for perfect seals.
That’s it! Well, plus a knife and cutting board—but you’ve got those, right?
Step-by-Step Guide to Canning Lamb Mutton
Alright, let’s get down to business! I’ve ruined enough batches to know where things go wrong, so follow these steps closely. We’ll keep it safe, simple, and—most importantly—delicious.
Preparing the Lamb Mutton
First things first: that gorgeous hunk of meat needs some love. Grab your sharpest knife (dull blades are dangerous—trust me, I’ve got the scars to prove it) and start trimming. You want to remove any thick fat caps or silvery sinew, but leave just a whisper of fat for flavor. Now, cube it into 1-inch pieces—no bigger, or they won’t cook evenly in the jar. Toss the cubes with salt and pepper like you’re seasoning the heck out of tomorrow’s dinner (because you are!).
Browning and Packing the Meat
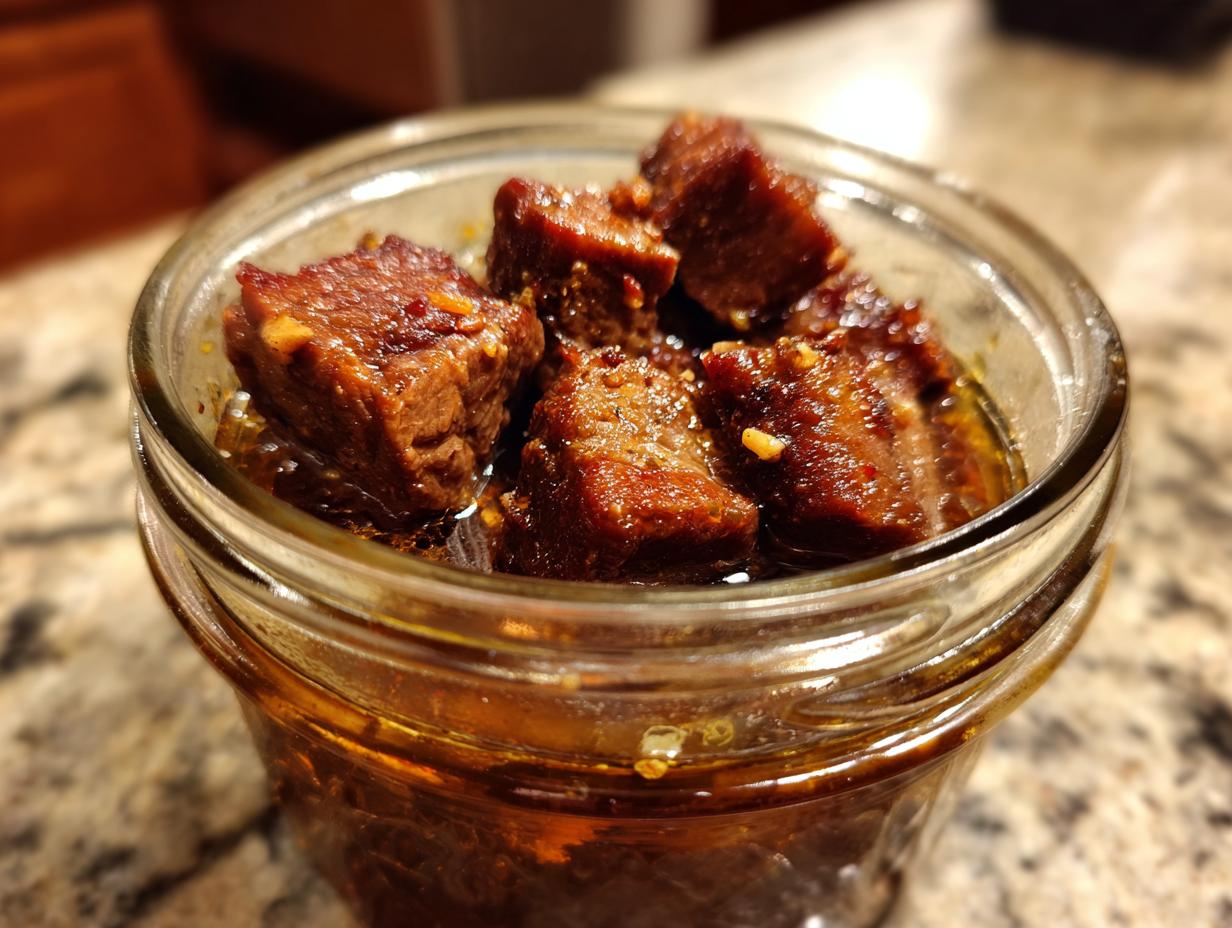
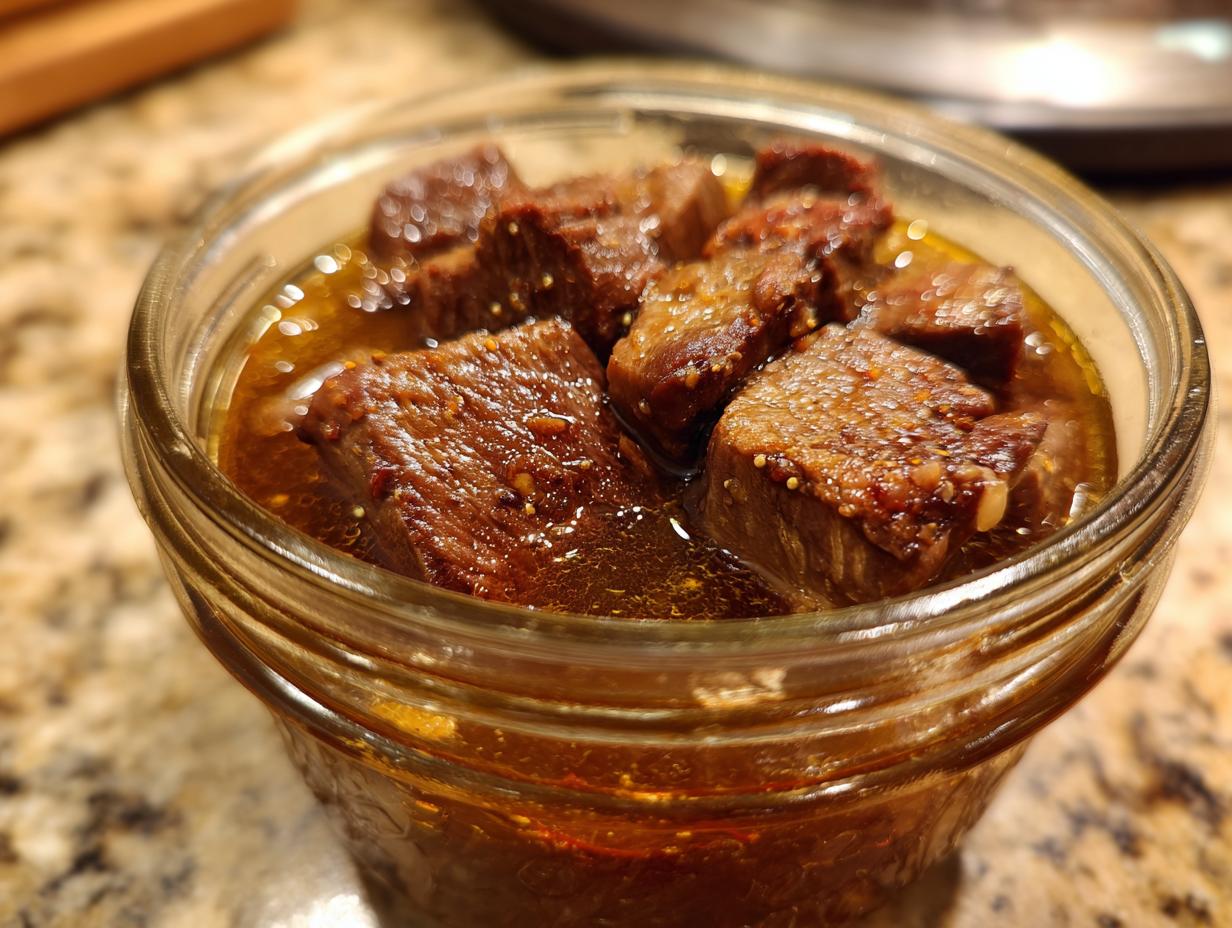
Heat your oil in a heavy skillet until it shimmers, then brown the meat in batches—don’t crowd the pan, or you’ll steam instead of sear. About 3 minutes per side gives you perfect caramelization without drying it out. Now, pack those golden cubes into sterilized jars, leaving a full 1-inch headspace. Press down gently to eliminate gaps, but don’t smash them—think “cozy,” not “cramped.” Pour in your hot broth or water until it just covers the meat, then run a chopstick around the edges to release any sneaky air bubbles.
Pressure Canning Process
Here’s where patience pays off. Wipe those rims spotless (even one stray grain of salt can ruin your seal), then screw on the lids fingertip-tight. Load your canner with the recommended water (check your manual—every model’s different), and process pints at 10 psi for 75 minutes or quarts for 90. When time’s up, turn off the heat and walk away—let that canner cool naturally until the pressure drops to zero. No peeking! Once it’s safe, remove the jars and listen for that sweet “ping” of success as they seal. But wait 24 hours before testing the seals—good things come to those who wait.
Tips for Perfect Canning Lamb Mutton
After years of trial and (mostly delicious) error, I’ve nailed down these game-changing tricks for foolproof canned mutton:
- Fresh is best: Never can meat that’s been frozen first—it changes the texture. I always use meat processed within 2 days.
- Season boldly: Flavors mellow during canning, so I add 50% more seasoning than usual. Rosemary or garlic powder are my secret weapons.
- Label religiously: Write the date AND cut type on lids—trust me, you won’t remember if that’s shoulder or leg six months later!
Oh, and always store jars out of sunlight—those UV rays are flavor thieves! You can find more canning inspiration on Pinterest.
Storing and Using Canned Lamb Mutton
Once those jars seal, tuck them away in a cool, dark pantry—sunlight and heat are the enemies of long-term storage. Properly canned mutton stays delicious for 1-2 years (though mine never lasts that long!). When you’re ready to use it, the possibilities are endless: whip up a quick Irish stew, fold tender meat into flaky hand pies, or stir it into a spiced curry. My favorite? A lazy shepherd’s pie—just dump a jar over mashed potatoes and bake!
Nutritional Information for Canned Lamb Mutton
Now, I’m no nutritionist—just a home cook who likes knowing what’s in my food—but here’s the scoop on canned lamb mutton’s goodness. Keep in mind these numbers can wiggle a bit depending on your specific ingredients (that grass-fed mutton from Farmer Joe’s might differ from the grocery store stuff).
Per half-cup serving, you’re looking at a protein powerhouse that’ll keep you full for hours. The natural fats in lamb give it that rich mouthfeel we all love, while the canning process locks in nutrients without adding any weird preservatives. I always think of it as nature’s perfect fast food—just without the drive-thru!
Important note: If you’re watching sodium, you might tweak the salt in your recipe. The beauty of home canning? You control exactly what goes in those jars. My aunt swears by adding a pinch of turmeric for extra health perks—not traditional, but hey, it’s your kitchen!
Common Questions About Canning Lamb Mutton
I get asked about canning lamb mutton all the time—here are the questions that pop up most often from fellow home preservers:
“Can I use frozen lamb mutton?”
Nope! Freezing changes the meat’s cell structure, which can lead to mushy results after canning. Always start with fresh, never-frozen cuts for the best texture.
“What if my altitude’s over 1,000 feet?”
Great catch! Above 1,000 feet, you’ll need to increase pressure—add 1 psi per 2,000 feet elevation. My Colorado cousin swears by this adjustment.
“How do I know if a jar spoiled?”
Trust your senses: bulging lids, funky smells, or cloudy liquid mean toss it immediately. But proper processing gives you solid odds—I’ve only had one failed seal in ten years!
“Can I sub beef broth?”
Absolutely! I’ve used chicken, beef, even mushroom broth—just avoid anything super salty. The meat’s flavor still shines through.
“Why brown first if it’s getting cooked anyway?”
That Maillard reaction magic! Browning adds depth you just can’t get from straight-up boiled meat. Skipping this step is why some folks think canned meat tastes “flat.”
Share Your Experience
Did you try canning lamb mutton this way? I’d love to hear how it turned out! Drop a comment below with your favorite way to use it, or tag me on social media with your proudest jar shots. Happy canning, friends—may your shelves stay stocked and your meals stay delicious!
PrintPerfect Canning Lamb Mutton: 5 Foolproof Steps to Tender Meals
A guide to canning lamb mutton for long-term storage.
- Prep Time: 20 mins
- Cook Time: 90 mins
- Total Time: 110 mins
- Yield: 4 pints 1x
- Category: Preserving
- Method: Pressure Canning
- Cuisine: Global
- Diet: Halal
Ingredients
- 2 lbs lamb mutton, cubed
- 1 tsp salt
- 1/2 tsp black pepper
- 1 tbsp olive oil
- 1 cup water or broth
Instructions
- Trim excess fat from the lamb mutton and cut into cubes.
- Season the meat with salt and black pepper.
- Heat olive oil in a pan and brown the meat on all sides.
- Pack the browned meat into sterilized canning jars, leaving 1-inch headspace.
- Pour water or broth into the jars to cover the meat.
- Wipe the jar rims clean and seal with lids.
- Process in a pressure canner at 10 psi for 75 minutes for pints or 90 minutes for quarts.
- Remove jars and let cool before storing.
Notes
- Use fresh lamb mutton for best results.
- Adjust seasoning to your taste.
- Check seals before storing.
Nutrition
- Serving Size: 1/2 cup
- Calories: 250
- Sugar: 0g
- Sodium: 300mg
- Fat: 15g
- Saturated Fat: 6g
- Unsaturated Fat: 7g
- Trans Fat: 0g
- Carbohydrates: 0g
- Fiber: 0g
- Protein: 25g
- Cholesterol: 80mg