
I’ll never forget the first time I tried canning duck – my kitchen smelled like a cozy hunting lodge, and those golden jars of meat looked like treasure! Canning duck goose is my go-to method for preserving that rich, gamey flavor all year round. Whether you’ve got extra birds from hunting season or scored a great deal at the market, pressure canning locks in the goodness so you can enjoy it whenever the craving hits. It’s perfect for quick weeknight dinners too – just pop open a jar and you’re halfway to an amazing stew or pasta sauce. Trust me, once you taste home-canned duck, you’ll be hooked!
Why You’ll Love Canning Duck Goose
Listen, once you try this method, you’ll wonder how you ever lived without it! Here’s why canning duck goose is an absolute game-changer:
- Meal prep magic: Having ready-to-use meat means dinner comes together in minutes – just grab a jar when you’re in a pinch
- Flavor that lasts: Properly canned duck keeps that rich, gamey taste for up to a year (if you can resist eating it all sooner!)
- No freezer burn worries: Unlike frozen meat, canned stays perfectly textured and delicious
- Endless possibilities: Use it in everything from tacos to ramen – the tender meat melts into any dish
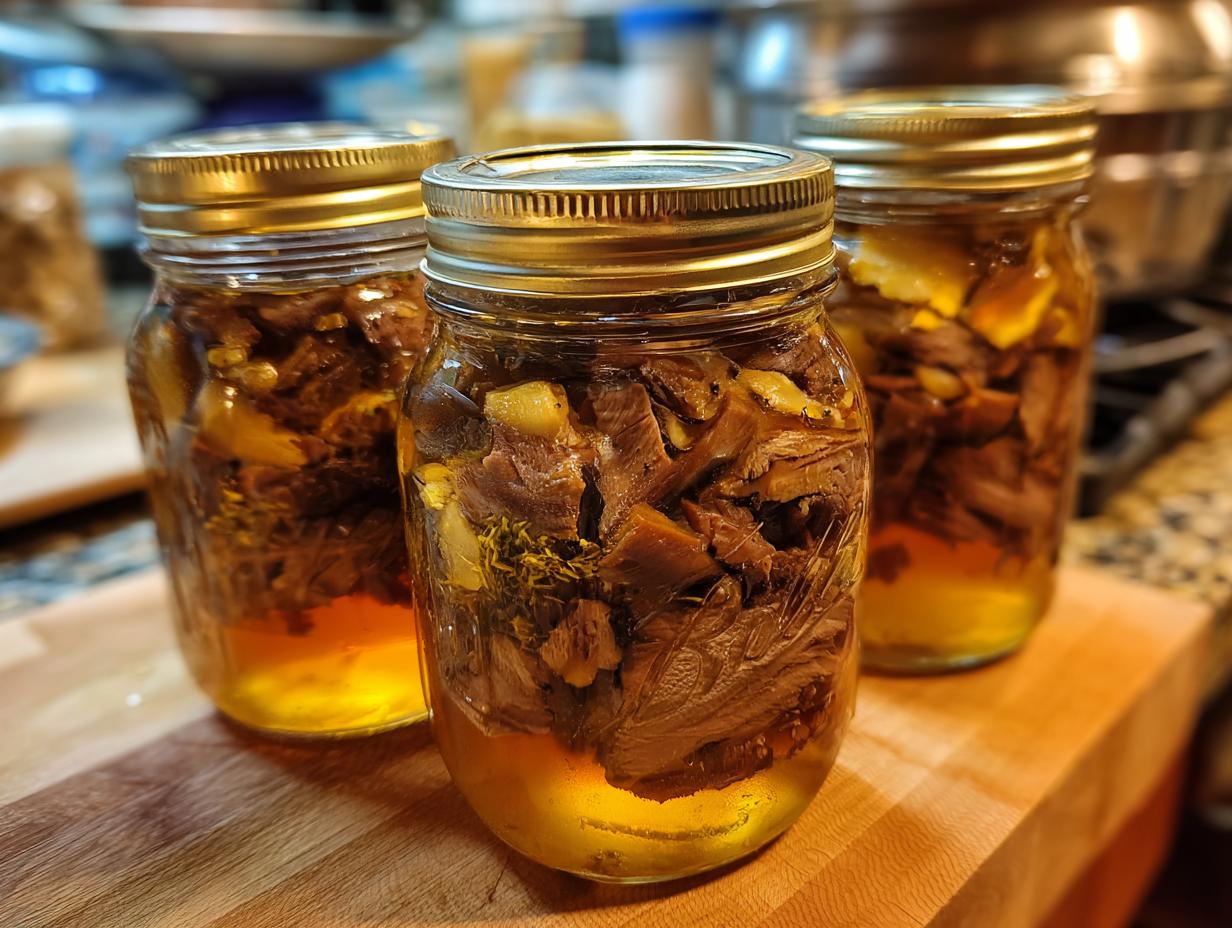
Seriously, those little glass jars of golden meat will become your secret weapon in the kitchen!
Ingredients for Canning Duck Goose
Okay, let’s talk ingredients – and don’t worry, this is the simplest shopping list ever! You’ll need:
- 2-3 lbs duck or goose meat – cut into 1-2 inch chunks (I leave some skin on for flavor, but trim excess fat)
- 1 tsp salt per pint jar – totally optional, but I love how it enhances the natural richness
- Water or broth – just enough to cover the meat in jars (homemade duck stock makes it extra special!)
That’s it! The magic happens when these simple ingredients meet your pressure canner. Pro tip: hunt sales after the holidays – you’ll often find ducks at amazing prices!
Equipment Needed for Canning Duck Goose
Don’t stress – you probably have most of this stuff already! Here’s what you’ll need to turn that duck into shelf-stable gold:
- Pressure canner – absolutely essential (water bath canning won’t cut it for meat!)
- Pint or quart mason jars – I prefer wide-mouth for easier packing
- New lids and bands – never reuse lids, trust me on this
- Jar lifter and funnel – saves so much mess and burned fingers
- Bubble remover/chopstick – my grandma’s trick for perfect seals
Optional but nice: a headspace tool and magnetic lid lifter. Honestly though, I’ve made do with just the basics many times!
How to Prepare Canning Duck Goose
Alright, let’s get down to business! Canning duck goose might sound fancy, but I promise it’s just a matter of following these simple steps. The first time I tried it, I was shocked at how easy it was to turn fresh meat into shelf-stable deliciousness. Here’s exactly how to do it:
Preparing the Meat
First things first – let’s prep that beautiful bird! I like to cut the meat into 1-2 inch chunks, leaving some skin on for flavor (but trimming excess fat – too much can make the jars greasy). If you’re using bone-in pieces, that’s fine too – just make sure they’ll fit in your jars! A little trick I learned? Chill the meat slightly before cutting – it makes those clean cuts so much easier.
Packing the Jars
Now for the fun part – packing those jars! I always use wide-mouth jars for this – way easier to fill. Pack the meat in firmly but don’t smash it down. Leave a good 1-inch headspace at the top (I use my finger as a quick measure). Here’s where you can add that optional teaspoon of salt per pint if you want – just sprinkle it right over the meat before adding liquid. Then pour in your water or broth to cover the meat, keeping that precious headspace.
Processing in the Pressure Canner
Safety first – this is where your pressure canner shines! After wiping the rims and sealing the jars, load them into your canner with the proper amount of water (check your manual). The magic numbers: process pints for 75 minutes and quarts for 90 minutes at 10 pounds pressure. Now, here’s the important part – if you’re above 1,000 feet elevation, you’ll need to adjust the pressure (usually increase by 1 pound for every 2,000 feet). Don’t rush the cooling process either – let that canner depressurize naturally. The wait is torture (my kitchen smells amazing!), but it’s worth it for perfect, safe results every time!
Tips for Successful Canning Duck Goose
After years of trial and error (and a few messy lessons!), I’ve learned these can’t-miss tricks for perfect duck goose every time:
- Fresh is best: Use meat within 2 days of hunting or purchase – it makes all the difference in flavor and texture
- Test those seals: After cooling, press each lid – if it pops, refrigerate and eat within a week
- Label everything: Write the date with a grease pencil – even if you think you’ll remember (you won’t!)
- Store smart: Keep jars in a cool, dark place – my basement shelf works perfectly
- Fat matters: Leave some skin for flavor but remove large fat deposits to prevent siphoning
Follow these, and you’ll be enjoying that rich, tender meat all year long!
Storing and Using Canned Duck Goose
Those beautiful jars of duck deserve proper care! Store them in a cool, dark place (like a pantry or basement) where they’ll keep for a solid year – though in my house, they never last that long! The magic happens when you pop open a jar – the tender meat transforms into incredible tacos, rich pasta sauces, or my favorite: a quick duck ramen that tastes like it simmered all day. Pro tip: save that golden liquid in the jar – it’s liquid gold for soups and gravies!
Nutritional Information for Canning Duck Goose
Now listen – nutrition facts can vary based on your duck’s diet and how much fat you leave on, but generally, you’re looking at lean protein packed with flavor! Remember, exact numbers depend on your specific ingredients and jar size, so consider this a rough guide rather than medical advice. Always check with your doctor if you’ve got special dietary needs!
Frequently Asked Questions About Canning Duck Goose
Over the years, I’ve gotten the same great questions from friends trying canning duck goose for the first time. Here are the answers that’ll save you some head-scratching:
How long does canned duck stay good?
Properly processed jars will keep for about a year at peak quality (stored in a cool, dark place). Though honestly? Mine never last that long – the meat’s too delicious!
Do I really need a pressure canner?
Absolutely! Water bath canning isn’t safe for meat. The high heat from pressure canning destroys bacteria that could survive in low-acid foods like duck.
What’s the best cut of duck for canning?
I use a mix – breasts for tender bites, legs for richer flavor. Just trim excess fat (about 1/4 inch is perfect) and cut into uniform pieces so everything processes evenly.
Why did some liquid siphon out during processing?
Don’t panic! This happens sometimes if jars were overfilled or had too much fat. As long as the seal is good, the meat’s still safe to eat – just use those jars first.
3 Simple Steps for Perfect Canning Duck Goose Every Time
Learn how to can duck or goose meat for long-term storage. This method preserves the meat for future use in soups, stews, and other dishes.
- Prep Time: 30 minutes
- Cook Time: 90 minutes
- Total Time: 2 hours
- Yield: 4-6 pints 1x
- Category: Preserving
- Method: Pressure Canning
- Cuisine: General
- Diet: Low Lactose
Ingredients
- 2–3 lbs duck or goose meat, cut into pieces
- 1 tsp salt per pint jar (optional)
- Water or broth for filling jars
Instructions
- Prepare your pressure canner and jars by washing and sterilizing them.
- Cut the duck or goose meat into pieces, removing excess fat.
- Pack the meat into jars, leaving 1-inch headspace.
- Add salt if desired.
- Fill jars with water or broth, maintaining 1-inch headspace.
- Remove air bubbles and wipe jar rims.
- Seal jars with lids and bands.
- Process in a pressure canner at 10 lbs pressure for 75 minutes (pints) or 90 minutes (quarts).
- Let jars cool naturally before storing.
Notes
- Use only fresh, high-quality meat.
- Follow proper canning safety procedures.
- Adjust processing time for altitude if needed.
Nutrition
- Serving Size: 1/2 cup
- Calories: 250
- Sugar: 0g
- Sodium: 300mg
- Fat: 15g
- Saturated Fat: 5g
- Unsaturated Fat: 8g
- Trans Fat: 0g
- Carbohydrates: 0g
- Fiber: 0g
- Protein: 25g
- Cholesterol: 80mg