
You know those nights when you’re staring into the fridge, willing dinner to magically appear? That’s exactly why I fell in love with canning chicken taco meat. One lazy Sunday spent prepping this savory protein powerhouse means I’ve got instant taco nights, quick quesadilla fillings, or burrito bowl toppings ready to go for months. I’ll never forget the first time I popped open a jar during a hectic week – that glorious smell of cumin and garlic filling my kitchen while my hungry kids cheered. Now my pantry always holds a few precious jars of this golden goodness, each one packed with tender shredded chicken infused with just the right amount of southwest spice. Trust me, once you taste homemade canned taco meat that’s been preserved at its peak flavor, you’ll wonder how you ever settled for last-minute fast food.
Why You’ll Love This Canning Chicken Taco Meat Recipe
Oh, where do I even start? This recipe is a total game-changer for busy weeknights, and here’s why:
- Meal prep magic: Spend one afternoon canning, and you’ve got ready-to-eat taco meat whenever hunger (or chaos) strikes!
- Flavor that lasts: The pressure canning locks in all those delicious spices—no sad, dried-out chicken here.
- Endless possibilities: Tacos tonight, enchiladas tomorrow, or toss it into a salad for lunch. It’s your kitchen—get creative!
- No freezer burn: Unlike frozen meat, canned chicken stays tender and juicy for months (if it lasts that long!).
Honestly? The first time I pulled a jar off the shelf for a 10-minute dinner, I did a little happy dance. You will too.
Ingredients for Canning Chicken Taco Meat
Okay, let’s talk ingredients—because I’ve learned the hard way that quality matters when canning! Here’s what you’ll need for that perfect taco flavor:
- 2 lbs boneless chicken breasts (thighs work too for extra richness!)
- 1 tbsp olive oil (the good stuff—it makes a difference)
- 1 packet taco seasoning (or 3 tbsp homemade mix, packed)
- 1 cup chicken broth (low-sodium if you’re watching salt)
- 1 medium onion, diced (I like yellow for sweetness)
- 2 garlic cloves, minced (fresh only—no jarred stuff here!)
Pro tip: Double the batch if you’ve got extra chicken—you’ll thank yourself later when taco cravings hit!
Equipment Needed for Canning Chicken Taco Meat
Alright, let’s gather our canning gear! You’ll need:
- Pressure canner (must-have for safe meat preservation)
- Pint jars with lids/rings (sterilized and ready to go)
- Canning tongs (trust me, regular tongs won’t cut it)
- Jar funnel (keeps those jar rims clean)
- Bubble remover tool (or a clean chopstick works in a pinch)
That’s it! Just five simple tools stand between you and pantry magic. Now let’s get cooking!
How to Prepare Canning Chicken Taco Meat
Alright, let’s dive into the good stuff! I’ve made this recipe more times than I can count, and I’ve learned a few tricks to get that perfect texture and flavor every time. Follow these steps, and you’ll have tender, flavorful taco meat ready for the canner in no time.
Step 1: Sauté Onions and Garlic
First, heat your olive oil in a large skillet over medium heat—not too hot, or you’ll burn those precious aromatics! Add your diced onions and let them cook until they’re soft and translucent, about 3-4 minutes. Then toss in the minced garlic (my favorite part—that smell is heavenly!) and cook for just 30 seconds more until fragrant.
Step 2: Brown the Chicken
Now, add your chicken pieces to the skillet. Here’s my secret: you want to brown them lightly on all sides—just a couple minutes per side—but don’t cook them all the way through yet! We’re going for golden color here, not tough, dry chicken. The real cooking happens in the next step.
Step 3: Add Seasonings and Broth
Time for flavor! Sprinkle your taco seasoning evenly over the chicken, then pour in that chicken broth. Use a wooden spoon to scrape up any tasty browned bits from the bottom of the pan—that’s pure gold for flavor! Stir everything together until the spices are well distributed.
Step 4: Simmer and Shred
Reduce the heat to low, cover, and let the magic happen for about 15-20 minutes. You’ll know it’s ready when the chicken shreds easily with two forks—no resistance! Don’t rush this part; that gentle simmer is what makes the meat so tender.
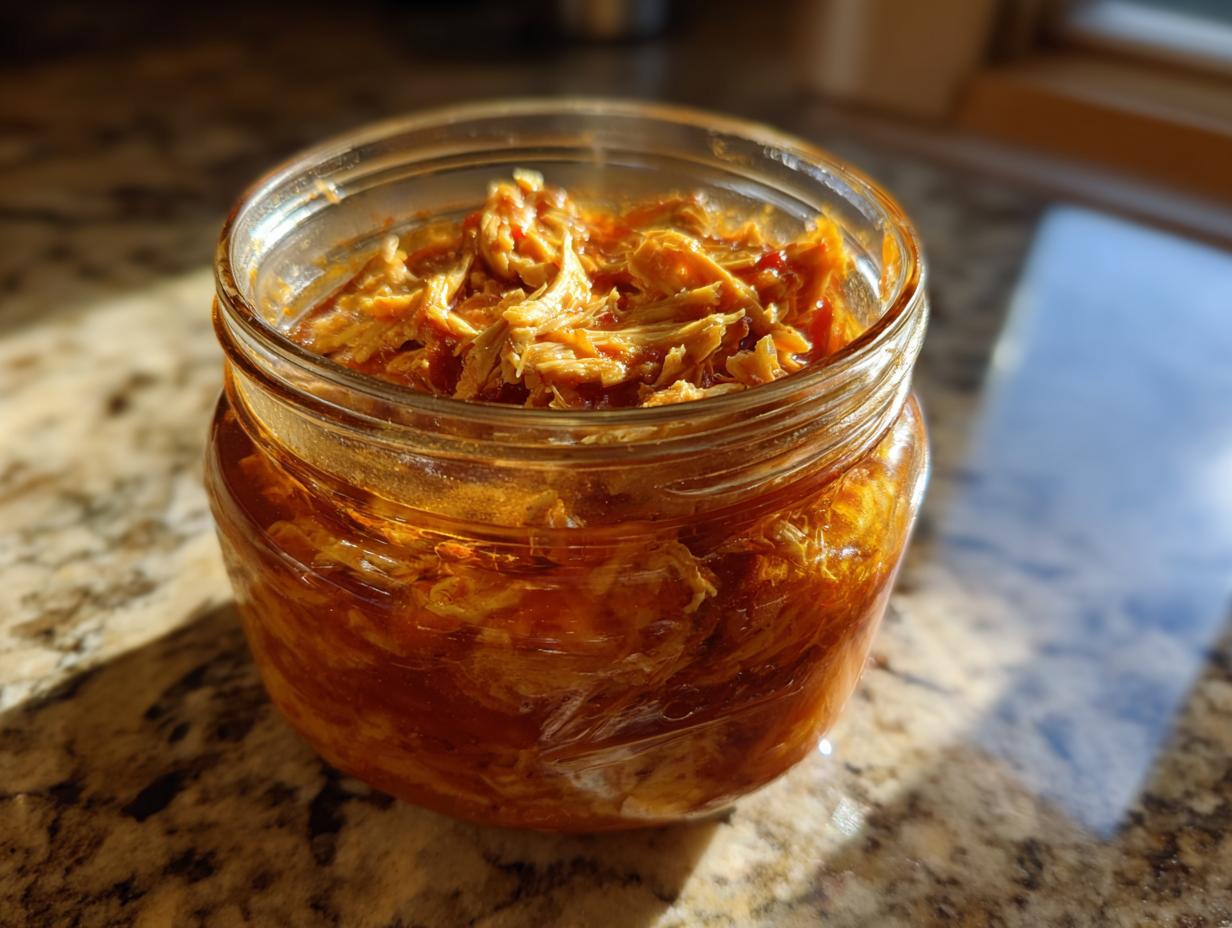
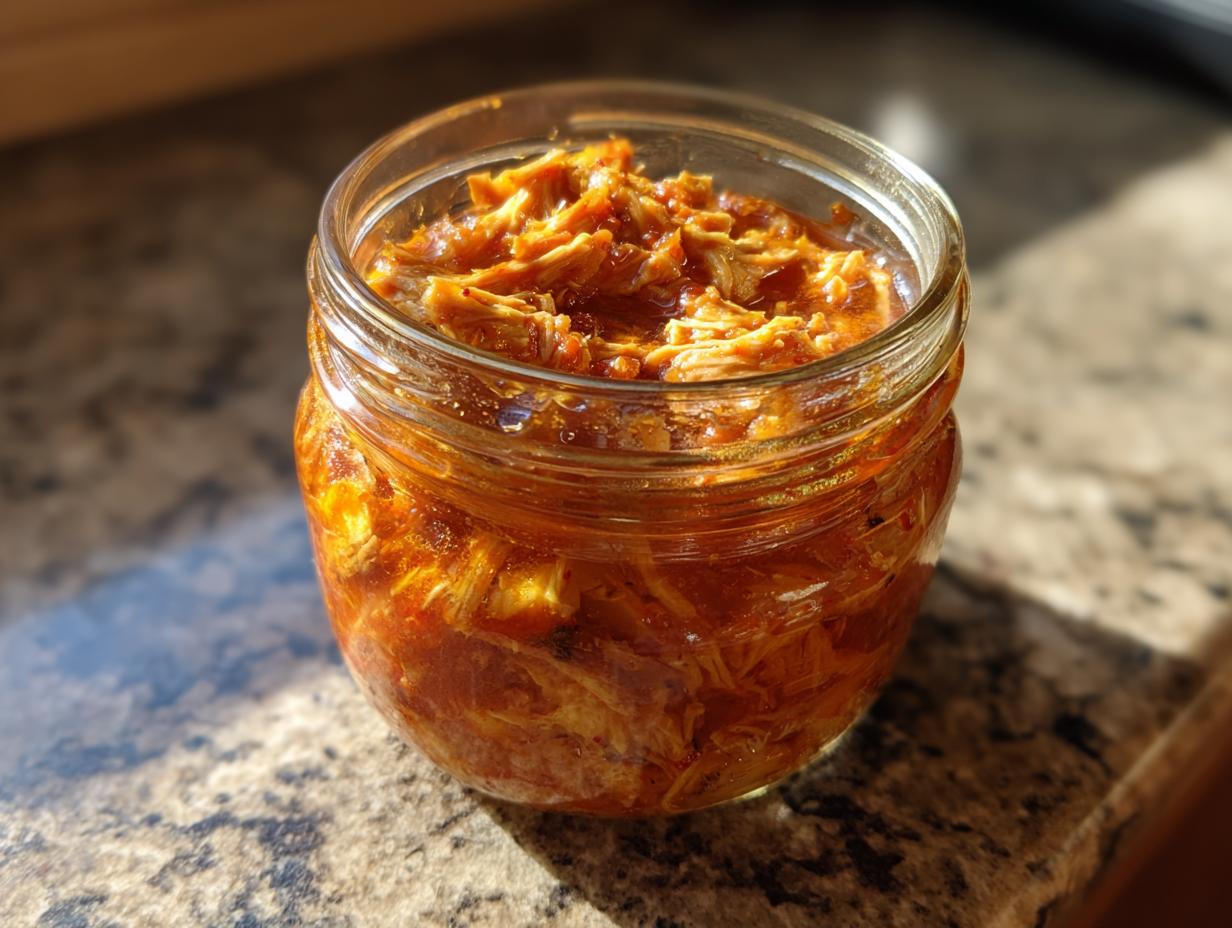
Step 5: Jar and Process
Working quickly while everything’s hot, pack your shredded chicken mixture into sterilized pint jars, leaving 1-inch headspace. Wipe the rims clean, apply lids and rings, and process in your pressure canner according to manufacturer’s instructions (usually about 75 minutes at 10-11 psi). The wait is worth it—you’re preserving deliciousness!
Tips for Perfect Canning Chicken Taco Meat
After dozens of batches, I’ve picked up some canning wisdom you won’t find on the seasoning packet:
- Spice it your way: The taco seasoning packet is just a starting point—I often add extra cumin or a pinch of smoked paprika for depth.
- Label like a pro: Write the date and spice level on lids with a grease pencil—future you will appreciate it at 6pm on a Tuesday!
- Fresh is best: That jarred minced garlic? Skip it. The slight effort of fresh garlic makes a HUGE flavor difference after months in the jar.
- Safety first: Always check jar seals before storing—that satisfying “pop” means you did it right!
Little touches make each batch better than the last—happy canning!
Serving Suggestions for Canned Chicken Taco Meat
Oh, the possibilities! That beautiful jar of taco meat is your ticket to instant mealtime wins. Obviously, you can’t go wrong with classic tacos—just warm and pile onto fresh tortillas with your favorite toppings. But my family’s favorite surprise? Stirring it into mac and cheese for a southwest twist! Here are more ways we use it:
- Taco salads: Toss with crisp lettuce, black beans, and avocado
- Breakfast scrambles: Mix with eggs and peppers for hearty mornings
- Loaded nachos: The perfect quick party snack
- Stuffed peppers: Mixed with rice and cheese—so easy!
Honestly? I’ve even stirred it into soup when I was feeling lazy. That jar is pure gold in my kitchen!
Storing and Reheating Canned Chicken Taco Meat
Here’s the beautiful part—properly canned taco meat stays delicious for up to a year in your pantry! Store those sealed jars in a cool, dark place (my basement shelves are packed with them). When you’re ready to feast, just pop open a jar and heat the meat in a skillet over medium until steaming hot—about 5 minutes does the trick. No thawing, no fuss! Pro tip: The liquid in the jar makes the perfect sauce—don’t drain it!
Nutritional Information for Canning Chicken Taco Meat
Here’s the scoop on what’s in that delicious jar! Each ½-cup serving packs about 180 calories with a solid 25g of protein—perfect for keeping you full. You’re looking at 6g fat (mostly the good kind from olive oil and chicken), 5g carbs, and 450mg sodium (adjust seasoning if needed). Now, these are estimates—your exact numbers might dance a bit depending on chicken size or broth brands. But one thing’s certain: it’s way healthier than drive-thru tacos!
Common Questions About Canning Chicken Taco Meat
I get asked about this recipe all the time—here are the answers to those burning questions!
Can I Use Frozen Chicken?
Absolutely! Just thaw it completely first—I pop mine in the fridge overnight. Frozen-to-thawed chicken works great, but never try canning it straight from frozen. Trust me, I learned that lesson the hard way!
How Long Does It Last?
Properly canned taco meat stays delicious for up to a year in your pantry. After opening, refrigerate and use within 5 days—though mine never lasts that long!
Can I Skip the Pressure Canner?
Don’t even think about it! Meat requires pressure canning for safety—no shortcuts here. That boiling water bath your grandma used for jam? Won’t cut it for chicken. Safety first, friends!
Share Your Canning Chicken Taco Meat Experience
I’d love to hear how your canning adventure turns out! Did you add a secret spice? Discover a genius way to use the meat? Drop me a comment below—your tips might just become someone else’s kitchen game-changer. Happy canning! You can also find more great canning ideas on Pinterest.
PrintUltimate Canning Chicken Taco Meat Recipe Ready in 2 Hours

Preserve tender chicken taco meat for quick meals.
- Prep Time: 15 mins
- Cook Time: 30 mins
- Total Time: 45 mins
- Yield: 4 pints 1x
- Category: Main Dish
- Method: Canning
- Cuisine: Mexican
- Diet: Low Fat
Ingredients
- 2 lbs boneless chicken breasts
- 1 tbsp olive oil
- 1 packet taco seasoning
- 1 cup chicken broth
- 1 diced onion
- 2 minced garlic cloves
Instructions
- Heat oil in a skillet over medium heat.
- Cook onions until soft, then add garlic.
- Add chicken and brown lightly.
- Mix in taco seasoning and broth.
- Simmer until chicken shreds easily.
- Pack hot meat into sterilized jars.
- Process jars in pressure canner.
Notes
- Use pint jars for best results.
- Adjust spice level to preference.
- Label jars with date.
Nutrition
- Serving Size: 1/2 cup
- Calories: 180
- Sugar: 2g
- Sodium: 450mg
- Fat: 6g
- Saturated Fat: 1g
- Unsaturated Fat: 4g
- Trans Fat: 0g
- Carbohydrates: 5g
- Fiber: 1g
- Protein: 25g
- Cholesterol: 70mg