
Let me tell you about the magic of canning Cajun red beans – it’s like bottling up Louisiana in a jar! I learned this trick from my Aunt Lila, who always had rows of these spicy, flavorful beans ready in her pantry. “Never know when you’ll need a quick pot of beans and rice,” she’d say with a wink. And she was right! Canning Cajun red beans gives you that deep, smoky flavor whenever you want it, without the overnight soak. Just pop open a jar, and boom – instant dinner starter. It’s the kind of kitchen magic that turns “what’s for dinner?” into “something amazing” in minutes.
Back home, we’d make big batches when the weather turned cool, filling the kitchen with the smell of garlic, paprika, and just enough cayenne to make you sit up straight. Now my pantry’s always stocked with these ruby-red beauties – perfect for busy nights, surprise guests, or when I’m craving that authentic Cajun taste. Trust me, once you try home-canned red beans, those bland store-bought ones will never compare. The best part? They’re shelf-stable for over a year, but in my house? They never last that long.
Why You’ll Love Canning Cajun Red Beans
Once you start canning Cajun red beans, you’ll wonder how you ever lived without them. Here’s why this recipe is a game-changer:
- Shelf-stable magic: These jars stay good for over a year (if you can resist eating them all at once), making pantry emergencies a thing of the past.
- Real-deal flavor: That spicy, smoky Cajun taste? It’s all in there, locked in and ready to wake up your taste buds.
- Dinner in a dash: Forget overnight soaking—just grab a jar, heat, and serve over rice for an instant Southern feast.
- Budget-friendly: Dried beans cost pennies, and home-canning beats store prices (especially for authentic Cajun-style beans!).
Seriously, it’s like having a Louisiana kitchen assistant working for you 24/7.
Ingredients for Canning Cajun Red Beans
Now let’s talk about what makes these beans sing! The ingredient list is short and sweet, but every single one plays a starring role. I learned the hard way – skip one, and the whole symphony falls flat. Here’s exactly what you’ll need:
- 2 lbs dried red beans – Look for plump, unbroken beans (give ’em a quick sort to weed out any pebbles – trust me, your teeth will thank you)
- 8 cups water – Good old H2O is all you need for the perfect bean bath
For that signature Cajun kick:
- 1 tbsp salt – Non-iodized only! Regular table salt can cloud your jars (I use canning or kosher salt)
- 1 tsp black pepper – Freshly ground if you’re feeling fancy
- 1 tsp cayenne pepper – This is where the heat happens! Scale back if you’re spice-shy
- 1 tsp garlic powder – The lazy cook’s best friend (but oh-so-flavorful)
- 1 tsp onion powder – Adds that deep, savory backbone
- 1 tsp paprika – Smoked paprika takes it next-level if you’ve got it
See? Nothing weird or hard-to-find. Just honest ingredients that, when combined with a little patience, transform into pure Cajun gold. Pro tip: Measure your spices into a little bowl before starting – it keeps the canning chaos to a minimum when you’re in the zone!
Equipment Needed for Canning Cajun Red Beans
Listen, you don’t need fancy gadgets to can these beans – just the basics that’ll make your life easier. Here’s what I always have ready:
- Pressure canner – This isn’t optional, folks! Regular pots won’t cut it for safe bean canning
- Canning jars – Pint or quart sizes work great (I prefer pints for quicker reheating)
- New lids – Never reuse old ones – they won’t seal right
- Canning funnel – Saves your counter from bean splatter disasters
- Ladle – For scooping those saucy beans into jars
- Jar lifter – Trust me, you don’t want to handle hot jars bare-handed
That’s it! With these tools, you’re ready to can like a pro. Just don’t forget the most important equipment – your patience!
How to Prepare Canning Cajun Red Beans
Alright, let’s get these beans ready for their long shelf life! I’ll walk you through each step like I’m right there in your kitchen with you. Don’t let the canning part scare you – if I can do it (after that one messy attempt in 2014), you’ve got this!
Soaking and Cooking the Beans
First things first – we gotta wake those beans up from their dried slumber:
- Rinse and sort – Dump your beans on the counter and spread ’em out. Pick through for any odd bits (I’ve found everything from tiny pebbles to a rogue lentil!). Rinse under cool water in a colander until the water runs clear.
- The long soak – Transfer beans to a big bowl and cover with at least 2 inches of cold water. Let them soak for 8 hours or overnight. You’ll be amazed how they plump up – like little flavor sponges!
- Drain and rinse – Next morning (or 8 hours later), pour off that cloudy soaking water and give the beans another quick rinse. This helps reduce… ahem… musical aftereffects.
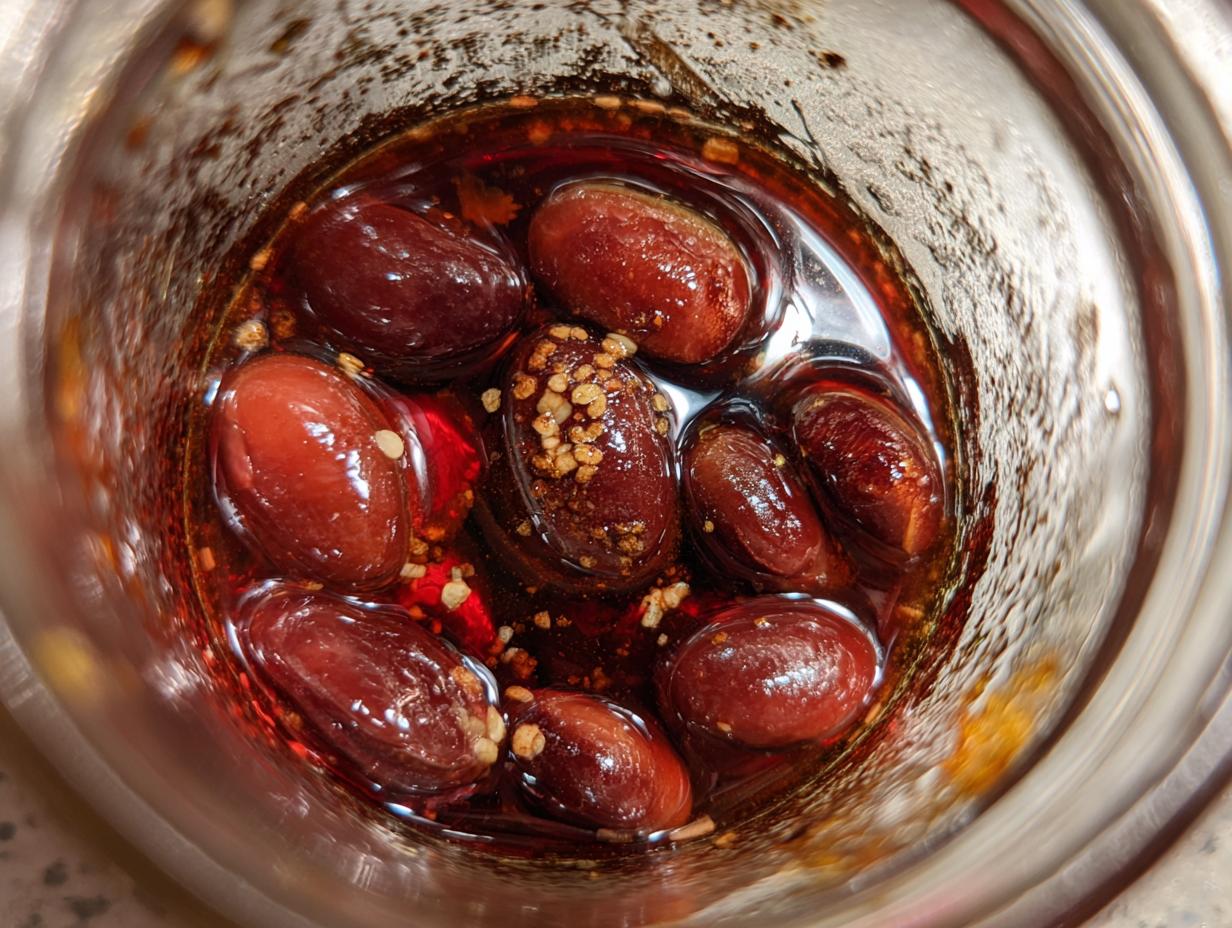
- Spice it up – In your largest pot, combine soaked beans, 8 cups fresh water, and all those glorious spices. Bring to a rolling boil, then reduce to a lively simmer. Let them bubble away for about an hour until tender but not mushy – test a bean between your fingers; it should give with slight resistance.
Pressure Canning the Beans
Now the magic happens! Safety first – no shortcuts here:
- Prepare jars – While beans cook, sterilize jars and keep them hot. I leave mine in the canner with simmering water until ready to fill.
- Fill with care – Using your funnel, ladle hot beans into jars, covering with cooking liquid. Leave 1-inch headspace (I use a chopstick to measure – no fancy tools needed!). Wipe rims with a clean damp cloth – one tiny speck can ruin your seal.
- Process properly – Place lids on finger-tight (not cranked down!), and load into your pressure canner with 2-3 inches of water. Process pints for 75 minutes at 10 psi (adjust for altitude if needed). Don’t peek! That pressure needs to stay steady.
- The grand finale – When time’s up, turn off heat and let pressure drop naturally. Once the canner unlocks, carefully remove jars and let them cool undisturbed for 12-24 hours. You’ll hear the most satisfying “pop” as they seal!
Word to the wise: Never skip the pressure canning step with beans. Water bath canning just doesn’t get hot enough to kill potential baddies. Your future self will thank you for doing it right!
Tips for Perfect Canning Cajun Red Beans
After canning more beans than I can count, I’ve picked up some tricks that make all the difference. First, always start with the freshest dried beans you can find – older beans take forever to soften. The spice blend is your playground – dial up the cayenne if you like it fiery, or cut back if feeding sensitive palates.
Here are my canning commandments:
- Test those seals! After cooling, press each lid’s center – if it pops, that jar didn’t seal and needs refrigerating.
- Label like a librarian – Write contents and date on each lid with permanent marker (future you will be grateful).
- Leave that headspace – Filling jars too full can cause siphoning during processing.
- Check for bean freshness – If your beans won’t soften after soaking, they’re probably too old.
One last tip? Make double batches – these disappear faster than you’d think!
Storing and Using Canned Cajun Red Beans
Now that you’ve got these gorgeous jars of Cajun goodness, let’s talk about keeping them happy and putting them to work! Properly sealed jars will keep for at least a year in your pantry – though in my house, they rarely last six months before we crack into them. Store them in a cool, dark place (no, the top of the fridge doesn’t count – too much heat fluctuation!). A basement shelf or back of a cupboard works perfectly.
When it’s finally time to enjoy your handiwork, here’s how we do it:
- Reheating: Just pop open a jar, dump the contents into a saucepan, and warm gently over medium heat. No need to drain – that flavorful liquid is liquid gold for cooking!
- Quick meal magic: Stir heated beans into cooked rice for instant red beans and rice (my Tuesday night lifesaver). Add some sliced sausage if you’re feeling fancy.
- Soup starter: Use a jar as the base for incredible soups – just add broth, veggies, and maybe some shredded chicken.
- Humble upgrade: Mash slightly for a killer vegetarian refried bean alternative in tacos or burritos.
Pro tip from my Cajun friend Pierre: Always give the jars a quick sniff when opening – if anything smells “off” (you’ll know), toss it immediately. But honestly? I’ve never had a spoiled jar when following proper canning methods. These babies are made to last!
One of my favorite tricks? Keep a jar or two at the back of the pantry for “emergencies” (like unexpected guests or those nights when cooking motivation is at zero). They’re like culinary insurance – a guaranteed way to whip up something delicious in minutes. Last Christmas, I saved dinner with a jar of these beans, some rice, and leftover ham – everyone thought I’d been cooking all day!
Cajun Red Beans Nutrition Information
Now let’s talk about what’s inside those beautiful jars – beyond just amazing flavor! Before we dive in, remember: Nutritional values are estimates. Exact amounts vary based on ingredient brands and how much liquid you eat with your beans.
Here’s the breakdown per ½ cup serving of these Cajun red beans:
- Calories: 120 – Makes a hearty side or light meal base
- Protein: 8g – Nearly as much as an egg!
- Fiber: 6g – That’s about a quarter of your daily needs
- Sugar: Just 1g naturally occurring
- Sodium: 300mg – Less than most canned beans at the store
The best part? These nutritional powerhouses come without all the junk – no preservatives, no weird additives, just honest ingredients. My aunt used to call them “poor man’s protein,” but honestly? With numbers like these, they’re more like smart cook’s gold!
Fun fact: That fiber content means these beans help keep you full longer while supporting gut health. And all that plant-based protein makes them fantastic meatless Monday material. Pair them with rice (like traditional red beans and rice) and you’ve got a complete protein source!
FAQs About Canning Cajun Red Beans
I get asked these questions all the time – let me save you the trouble of making the same mistakes I did when I first started!
Can I skip the cayenne if I don’t like spicy food?
Absolutely! The cayenne gives that classic Cajun kick, but the recipe still works without it. Try adding a pinch more paprika instead for depth without heat. (Though between us? The spice mellows beautifully during canning!)
How long do home-canned red beans actually last?
Properly sealed jars stay good for 12-18 months in a cool, dark place. But here’s my rule: if it looks or smells odd when you open it, toss it. That said, I’ve never had a jar go bad before we ate it all!
Can I use a water bath canner instead of pressure canning?
Oh honey, no! Beans are low-acid foods that require pressure canning to be safe. Water bath canning doesn’t get hot enough to kill potential bacteria. Trust me – it’s worth borrowing or investing in a pressure canner for this.
Why is pressure canning essential for beans?
Two words: botulism risk. The pressure canner reaches temperatures (240°F+) that regular boiling can’t, ensuring any nasty bacteria spores are destroyed. My grandma always said, “Better safe than sorry” – and she canned beans for 60 years without incident!
Can I add sausage or other meats when canning?
I don’t recommend it unless you’re using a USDA-approved recipe. Meats change processing times and safety considerations. It’s safer to can plain beans, then add cooked meats when reheating. (My trick? Keep some cooked andouille in the freezer to toss in later!)
Try This Recipe and Share Your Results in the Comments!
Alright, my fellow bean enthusiasts – it’s your turn to work some Cajun magic in your kitchen! I want to hear all about your canning adventures. Did you crank up the cayenne for extra heat? Discover a genius new way to use these beans? Maybe even convince a skeptical family member that home-canned goods are amazing? Drop your stories (and any questions) in the comments below!
And hey – if this is your first time pressure canning, don’t be shy. We were all beginners once (my first batch looked more like bean soup than proper canned goods!). The important thing is you’re keeping traditions alive and filling your pantry with delicious, homemade goodness. Now grab those jars and get canning – I can’t wait to hear how yours turn out!
P.S. Snap a photo of your beautiful jars all lined up – nothing beats that satisfying sight of a pantry stocked with home-canned treasures!
PrintSavory Canning Cajun Red Beans in 5 Simple Steps
Canning Cajun red beans preserves their rich flavor for long-term storage. This recipe ensures you have a staple ingredient ready for meals.
- Prep Time: 8 hours (soaking)
- Cook Time: 1 hour 15 minutes
- Total Time: 9 hours 15 minutes
- Yield: 6 pints 1x
- Category: Preserving
- Method: Pressure Canning
- Cuisine: Cajun
- Diet: Vegetarian
Ingredients
- 2 lbs dried red beans
- 1 tbsp salt
- 1 tsp black pepper
- 1 tsp cayenne pepper
- 1 tsp garlic powder
- 1 tsp onion powder
- 1 tsp paprika
- 8 cups water
Instructions
- Rinse and sort the beans to remove debris.
- Soak beans in water for 8 hours or overnight.
- Drain and rinse the beans.
- Add beans, water, and spices to a large pot.
- Bring to a boil, then reduce heat and simmer for 1 hour.
- Sterilize canning jars and lids.
- Fill jars with beans, leaving 1-inch headspace.
- Process jars in a pressure canner for 75 minutes at 10 psi.
Notes
- Use fresh, high-quality beans for best results.
- Adjust spices to your taste preference.
- Label jars with the date for tracking.
Nutrition
- Serving Size: 1/2 cup
- Calories: 120
- Sugar: 1g
- Sodium: 300mg
- Fat: 0.5g
- Saturated Fat: 0g
- Unsaturated Fat: 0.3g
- Trans Fat: 0g
- Carbohydrates: 22g
- Fiber: 6g
- Protein: 8g
- Cholesterol: 0mg