
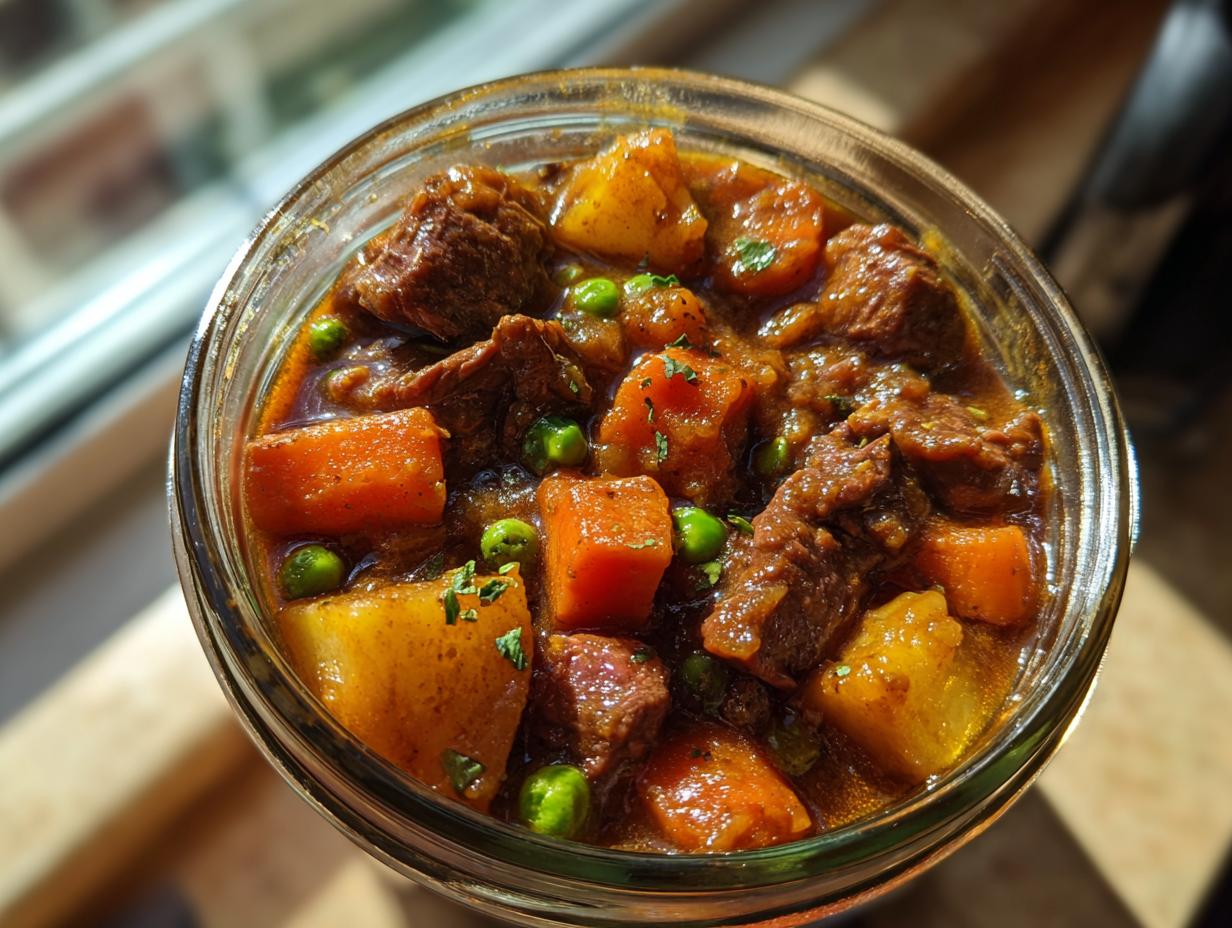
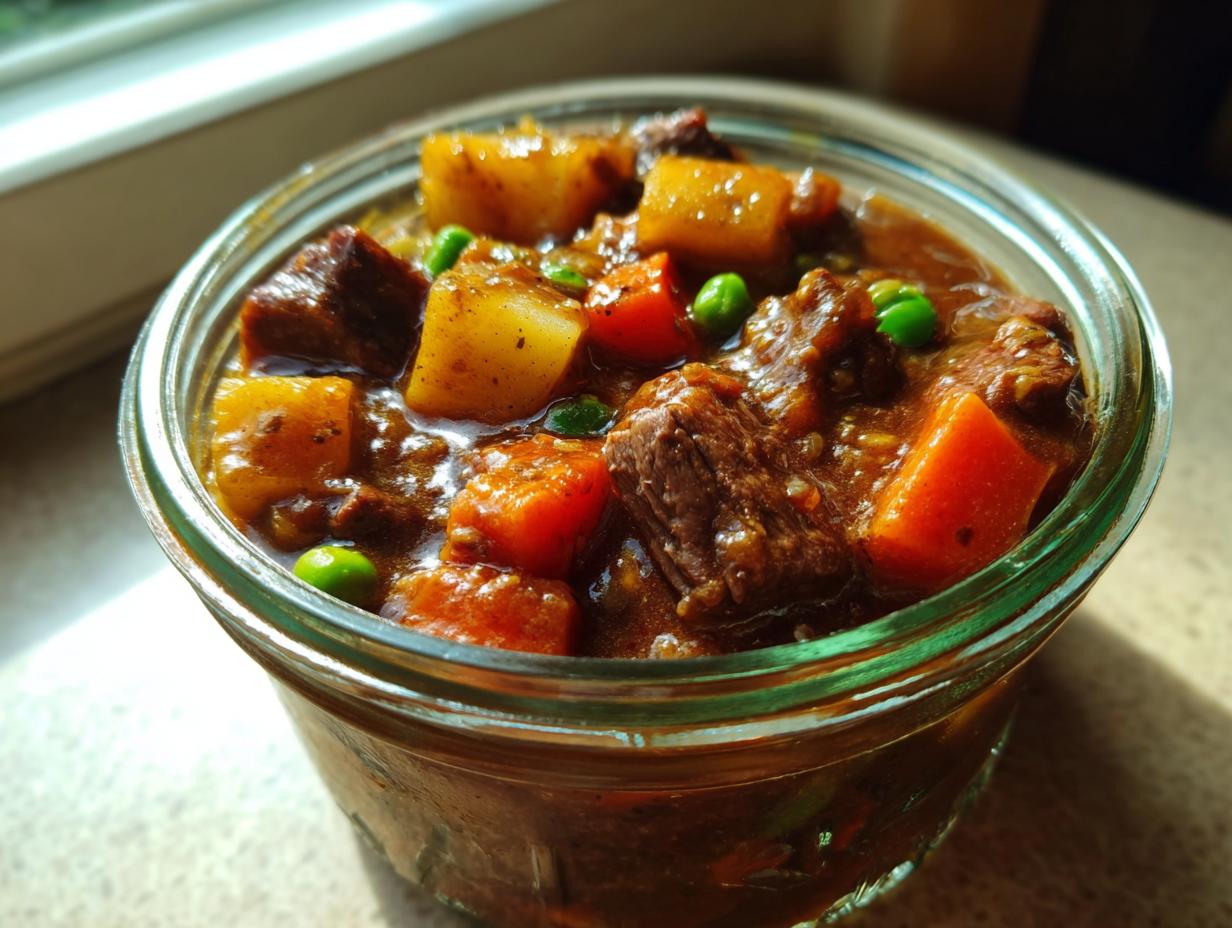
Nothing beats opening a jar of homemade beef pot pie filling on a busy weeknight – it’s like giving future-you the best gift! I started canning this hearty filling years ago when my kids’ sports schedules got crazy, and wow, did it save my sanity. That rich aroma of tender beef, savory gravy, and garden-fresh veggies bubbling away? Pure comfort food magic ready in minutes.
Canning beef pot pie filling lets you capture that slow-cooked flavor when you’ve got time, so you can enjoy it whenever the craving hits. I always make big batches in fall when local beef is at its best, following USDA guidelines to ensure safe preservation. My pressure canner works overtime during harvest season! The key is using quality ingredients and proper processing times – trust me, it’s worth learning for the convenience alone.
One bite of this chunky, flavorful filling over flaky pastry, and you’ll understand why I’m obsessed. It’s home cooking at its simplest – just open, heat, and serve. No more takeout guilt when you’ve got jars of this gold waiting in your pantry!
Why You’ll Love Canning Beef Pot Pie Filling
Once you try stocking your pantry with this beef pot pie filling, you’ll wonder how you ever lived without it. Here’s why I’m completely hooked:
- Weeknight superhero: Nothing beats dumping a jar into a pie crust after a long day – dinner’s ready before the oven finishes preheating!
- Flavor that deepens: Like a good stew, the thyme-kissed gravy gets richer the longer it sits in the jar. My secret? The beef broth reduces into pure umami magic during processing.
- Veggie freedom: Swap peas for corn, add mushrooms – I tweak the mix based on what’s fresh. Last summer’s zucchini version was a game-changer.
- No freezer burn drama: Unlike frozen meals, these shelf-stable jars keep their texture perfect for a full year (if they last that long in my house!).
Seriously, the first time you pull a jar off the shelf during a snowstorm, you’ll do a happy dance in your slippers.
Ingredients for Canning Beef Pot Pie Filling
Gathering the right ingredients makes all the difference between a good pot pie filling and a knock-your-socks-off one. Here’s exactly what I use – and yes, I’m picky about every item:
- 2 lbs beef stew meat, cubed into 1-inch pieces (look for marbling – those little fat streaks mean flavor!)
- 1 cup diced carrots (I grab the crunchiest ones from the farmer’s market – no bendy carrots allowed!)
- 1 cup diced potatoes (Yukon Golds are my go-to – they hold their shape beautifully)
- 1 cup frozen peas (straight from the bag works great – no need to thaw)
- 1/2 cup diced onions (about 1 small onion – I cry every time but it’s worth it)
- 1/4 cup all-purpose flour (this is our gravy magic maker)
- 3 cups beef broth (homemade if you’ve got it, but low-sodium store-bought works in a pinch)
- 1 tsp salt (I use kosher – it distributes better than table salt)
- 1/2 tsp black pepper (freshly ground – that pre-ground dust just doesn’t cut it)
- 1 tsp thyme (rub it between your fingers before adding to wake up the oils)
Pro tip: Measure your veggies after dicing – I learned this the hard way when my “cup of carrots” turned into two cups once chopped! Freshness matters most with the vegetables, so give them a good sniff test before adding to your pot.
Essential Equipment for Canning Beef Pot Pie Filling
Listen, I learned the hard way that you can’t just grab any old pot and call it a canning setup. After my first disastrous attempt with a water bath canner (hello, mushy beef and floating jars!), I invested in the right tools. Here’s exactly what you’ll need to can beef pot pie filling safely and successfully:
- Pressure canner (not cooker!) – This is non-negotiable. Mine’s an All-American 921 that I call “Bertha.” You need one that hits 10 psi consistently – check that gauge yearly!
- Glass canning jars – Pint or quart-sized Mason jars with new lids. I reuse rings, but never lids – that little sealing compound wears out.
- Canning funnel – Saves so many messes! The wide mouth fits perfectly over jars to keep those rims clean for sealing.
- Bubble remover & headspace tool – That little plastic wand is worth its weight in gold for getting rid of trapped air pockets.
- Jar lifter – Trust me, trying to fish out hot jars with tongs is a recipe for burns and heartbreak.
- Ladle & large pot – For filling jars and cooking your filling. I use my biggest stainless steel stockpot.
Safety first: Always check that your equipment meets current USDA guidelines. I keep a cheat sheet from my extension office taped inside my canner lid. And never, ever try to can meat in a water bath – that’s how my great-aunt Ethel gave the whole family food poisoning in ’78!
Step-by-Step Guide to Canning Beef Pot Pie Filling
Alright, let’s get our hands dirty! I’ve made this beef pot pie filling more times than I can count, and I’ve learned a few tricks along the way. Follow these steps carefully – trust me, it’s worth taking your time for perfect results every time.
Preparing the Filling
First things first – get that beef nice and brown! I use a heavy-bottomed pot over medium heat (not too hot, or you’ll toughen the meat). Toss in your cubed beef in batches – overcrowding the pan just steams the meat instead of browning it. You want those gorgeous caramelized bits on the bottom – that’s pure flavor gold!
Once the beef is browned, add your onions, carrots, and potatoes. Sauté them for about 5 minutes – just until the onions turn translucent. This step wakes up all those wonderful aromas and softens the veggies slightly. Don’t rush it – those few extra minutes make all the difference in texture later!
Thickening and Seasoning
Here’s where the magic happens! Sprinkle your flour evenly over the meat and veggie mixture. Stir it well – you want every little piece coated. This creates the base for our luscious gravy. Now, here’s the trick: add your beef broth slowly, stirring constantly. I pour in about 1/2 cup at a time, letting it fully incorporate before adding more. This prevents lumps better than any whisk!
Bring everything to a gentle boil, then reduce the heat to a simmer. Let it bubble away for 15 minutes – this thickens the gravy beautifully. Now add your peas, salt, pepper, and thyme. Simmer for another 5 minutes – just until the peas are heated through. Taste it now and adjust seasoning if needed – remember, flavors concentrate during canning!
Canning Process
Safety first! While your filling simmers, sterilize your jars in boiling water for 10 minutes. Keep them hot until you’re ready to fill. Ladle the hot filling into your jars, leaving 1-inch headspace – I use my handy headspace tool to check. Run that bubble remover around the inside to release any trapped air – this prevents seal failures later.
Wipe those rims spotless with a damp cloth – any food residue can prevent sealing. Place your lids on snugly (but don’t overtighten!) and load them into your pressure canner. Process pints for 75 minutes and quarts for 90 minutes at 10 psi. When time’s up, turn off the heat and let the pressure drop naturally – no peeking!
Pro tip: Resist the urge to test your seals for at least 12 hours. Those jars need time to cool properly and form that satisfying “ping” we all love!
Pro Tips for Perfect Canning Beef Pot Pie Filling
After years of trial and error (and a few messy kitchen disasters), here are my hard-won secrets for flawless beef pot pie filling every time:
- Trim that fat! I cut visible fat from the beef cubes – too much makes the gravy greasy during storage. A little marbling is fine, but big chunks? Nope.
- Cool jars slowly – Leave them undisturbed overnight on a towel-lined counter. Rushing this step can cause siphoning (when liquid leaks out).
- Check seals properly – Press the center of cooled lids – if it pops, it didn’t seal. Also look for concave shapes – that satisfying “ping” means success!
Remember: Patience makes perfect when canning. Your future self will thank you!
Storing and Reheating Canned Beef Pot Pie Filling
Now that you’ve got those beautiful jars of beef pot pie filling, let’s talk about keeping them at their best! I’ve learned a few storage tricks the hard way – like the time I lost a whole batch to a damp basement. Here’s how I handle my precious canned goods:
For unopened jars: Store them in a cool, dark place (my pantry shelves work perfectly). They’ll stay fresh for up to 1 year – though in my house, they never last that long! I always label mine with the date using a grease pencil – no more guessing games when I’m rummaging through my stash.
After opening: Transfer any leftovers to the fridge immediately and use within 3-4 days. That creamy gravy makes the perfect quick lunch over toast, by the way – not that I’ve ever eaten it straight from the jar with a spoon…
Reheating tips:
- For pot pies: Empty the jar into your crust and bake at 375°F until bubbly (about 20 minutes).
- For quick meals: Dump the contents into a saucepan and heat gently over medium-low, stirring occasionally. Add a splash of broth if it thickens too much.
- My lazy hack: Microwave in 1-minute bursts, stirring between each. Works great for single servings when I’m starving after canning all day!
Safety note: If a jar ever looks suspicious (bulging lid, strange odor, or spurting liquid when opened), toss it immediately. As my grandma always said: “When in doubt, throw it out!” Not worth the risk with home-canned goods.
Nutritional Information for Canning Beef Pot Pie Filling
Let’s be real – we’re not eating beef pot pie filling for diet food, but it’s nice to know what’s in those delicious jars! Keep in mind these numbers can vary depending on your specific ingredients – like if you use homemade bone broth or extra-lean beef. Here’s the general breakdown per 1-cup serving based on my standard recipe:
Approximately: 320 calories, 28g protein, 22g carbs (3g fiber), and 12g fat. Not too shabby for such a hearty, satisfying meal starter!
What I love is that you’re getting serious protein punch from the beef – perfect for post-workout recovery or keeping the kids full through homework time. The veggies add vitamins A and C, plus that all-important fiber. And unlike store-bought versions, you control the sodium – mine usually clocks in around 580mg per serving.
Pro tip: If you’re watching carbs, serve this over mashed cauliflower instead of pastry. My keto-loving sister swears by this hack! Just remember – nutrition labels are guidelines, not gospel. Your mileage may vary based on your exact ingredients and portion sizes.
FAQs About Canning Beef Pot Pie Filling
I get questions about this recipe all the time from friends and neighbors – seems like everyone wants in on my beef pot pie filling secrets! Here are the most common ones that pop up, along with my tried-and-true answers:
Can I use chicken instead of beef?
Oh honey, I tried this once – big mistake! The processing times are completely different for poultry. If you want chicken pot pie filling, you’ll need a separate recipe with adjusted processing times (90 minutes for pints). Beef is denser and handles the longer processing time better. Stick with beef for this one!
Can I use frozen vegetables?
Absolutely! I always keep a bag of mixed veggies in the freezer for last-minute canning sessions. Just toss them in frozen during the last 5 minutes of simmering – no need to thaw first. The texture holds up beautifully during canning. My only rule? Skip the frozen onions – they turn weirdly mushy.
The filling looks thin when I open the jar – can I thicken it?
You bet! This happens sometimes – just pour it into a saucepan and simmer uncovered for 5-10 minutes. The liquid will reduce and thicken naturally. If you’re really in a hurry, mix 1 tsp cornstarch with 1 tbsp cold water and stir it in while heating. But honestly? I love the extra gravy for soaking into biscuits!
How long does canned beef pot pie filling last?
Properly processed jars are shelf-stable for 1 year – but good luck keeping them that long! I date all my jars with a grease pencil. After opening, refrigerate and use within 4 days. Pro tip: The flavors actually improve over the first month as everything melds together. Just don’t tell my family – they’d eat it all the first week!
Got more questions? Slide into my DMs – I could talk canning all day! Just don’t ask me about water bath canning meat… we’ve been over that.
PrintCanning Beef Pot Pie Filling: 75-Minute Comfort Food Magic
A hearty beef pot pie filling that’s perfect for canning and enjoying later. Packed with tender beef, vegetables, and savory gravy.
- Prep Time: 20 mins
- Cook Time: 25 mins
- Total Time: 45 mins
- Yield: 4 pints 1x
- Category: Main Dish
- Method: Canning
- Cuisine: American
- Diet: Low Lactose
Ingredients
- 2 lbs beef stew meat, cubed
- 1 cup diced carrots
- 1 cup diced potatoes
- 1 cup frozen peas
- 1/2 cup diced onions
- 1/4 cup all-purpose flour
- 3 cups beef broth
- 1 tsp salt
- 1/2 tsp black pepper
- 1 tsp thyme
Instructions
- Brown the beef in a large pot over medium heat.
- Add onions, carrots, and potatoes. Cook for 5 minutes.
- Sprinkle flour over the mixture and stir well.
- Slowly add beef broth while stirring to avoid lumps.
- Bring to a boil, then reduce heat and simmer for 15 minutes.
- Add peas, salt, pepper, and thyme. Simmer for another 5 minutes.
- Ladle the filling into sterilized canning jars, leaving 1-inch headspace.
- Process in a pressure canner at 10 psi for 75 minutes (pints) or 90 minutes (quarts).
Notes
- Use lean beef for best results.
- Adjust seasoning to taste before canning.
- Cool jars completely before storing.
Nutrition
- Serving Size: 1 cup
- Calories: 320
- Sugar: 4g
- Sodium: 580mg
- Fat: 12g
- Saturated Fat: 4g
- Unsaturated Fat: 6g
- Trans Fat: 0g
- Carbohydrates: 22g
- Fiber: 3g
- Protein: 28g
- Cholesterol: 70mg