
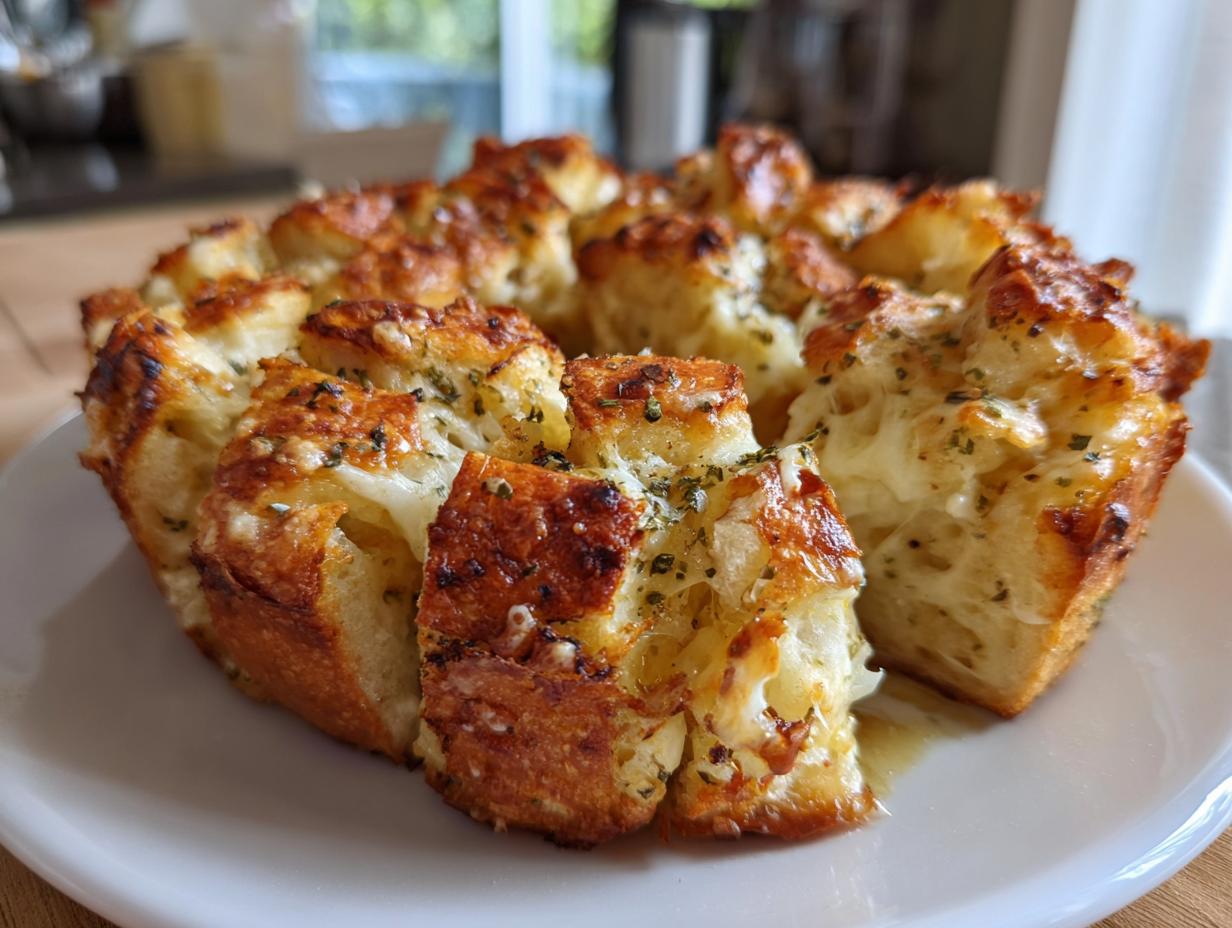
There’s something magical about the smell of garlic and melted cheese wafting through the house on a chilly winter night—especially when it’s coming from my air fryer. These cheesy pull-apart garlic bread bombs are my go-to comfort food when the temperature drops, and they’ve become a staple at our family game nights. My kids practically cheer when they see me pulling out that can of biscuit dough! Crispy on the outside, gooey on the inside, and ready in just 20 minutes, these little bombs are pure cozy happiness in every bite.

Why You’ll Love These Air Fryer Cheesy Pull-Apart Garlic Bread Bombs
Listen, I know we all have those days when we need something warm, cheesy, and ridiculously easy—and these little garlic bread bombs deliver every single time. Here’s why they’re my winter MVP:
- Quick fix magic: From fridge to table in 20 minutes flat. (Yes, even when you’re in your pajamas.)
- Minimal effort, maximum wow: That can of biscuit dough does half the work for you.
- Cheese pull dreams: Every bite has that ooey-gooey mozzarella surprise inside.
- Air fryer crispiness: No soggy bottoms here—just golden, buttery perfection.
- Winter night vibes: The garlic smell alone will make your house feel like a cozy cabin.
Trust me, once you make these, you’ll start finding excuses to have “bomb nights” all season long.
Ingredients for Air Fryer Cheesy Pull-Apart Garlic Bread Bombs
Grab these simple ingredients—you probably have most in your kitchen already! The magic happens when humble basics come together just right. (I’ve learned the hard way: measure carefully, especially with garlic—my 2018 “double garlic incident” still haunts me.)
- Refrigerated biscuit dough: One 16.3 oz can (the classic flaky kind works best—not the layered buttermilk ones)
- Shredded mozzarella: ½ cup (pack it lightly in the measuring cup—no need to press down hard)
- Butter: ¼ cup melted (real butter only, please—it makes that golden crust sing)
- Garlic: 2 cloves, minced (or 1 teaspoon from a jar in a pinch, but fresh is dreamier)
- Dried parsley: 1 teaspoon (it’s mostly for color, so don’t stress if you only have fresh)
- Salt: ¼ teaspoon (I use kosher—if you’re using table salt, maybe go a shade lighter)
Pro tip: Keep the biscuit dough chilled until the last second. Warm dough turns sticky, and we want those perfect little bombs to hold their shape!
How to Make Air Fryer Cheesy Pull-Apart Garlic Bread Bombs
Okay, let’s get these golden beauties going! The process is so simple you’ll laugh—but I’ve got some sneaky tricks to make sure every bite is perfect. (Learned these the hard way after my first batch turned into “cheese escape artists.”)
Step 1: Prepare the Dough and Cheese Filling
First, pop open that biscuit can—that satisfying whoosh never gets old! Lay the biscuits on a clean surface and grab a sharp knife. Cut each biscuit into quarters—just like you’re dividing a tiny pizza. Now, take each little piece and roll it between your palms to form a ball (don’t overwork it—we want tender bombs, not hockey pucks).
Here’s the fun part: pinch a ball flat, tuck in about ½ teaspoon of mozzarella (more is tempting, but trust me, overstuffing leads to cheese explosions), then seal it up tight like you’re hiding treasure. Repeat until you’ve got a whole army of cheesy dough balls ready for their garlic bath!
Step 2: Mix the Garlic Butter Coating
While your air fryer preheats to 350°F (yes, this step matters—cold air fryers make sad, pale bread bombs), melt that butter in a microwave-safe bowl. Stir in the minced garlic—smell that heavenly aroma already?—then add parsley and salt. Give it a good whisk until it’s all friends in there.
Now, dunk each stuffed dough ball into the garlic butter, rolling it around until fully coated. Let any excess drip off—you want them glistening, not swimming. Pro tip: I use one hand for dipping and keep one clean for arranging—otherwise, you’ll end up with garlic fingers for days!
Step 3: Air Fry to Golden Perfection
Arrange your buttered bombs in the air fryer basket with about ½ inch space between them—they’ll puff up like little pillows! Slide the basket in and set your timer for 8 minutes. At the halfway mark, give the basket a gentle shake (no flipping needed—the air flow does the work).
At 8 minutes, peek inside—they should be golden with maybe a few darker spots (that’s flavor!). If they need another minute or two, go for it, but watch closely—from perfect to overdone happens fast! When they’re gorgeously browned and the cheese inside is molten magic, transfer them to a plate immediately (they’ll keep cooking if left in the basket).
Warning: The smell will have everyone hovering around the kitchen like hungry seagulls. Try to let them cool for 60 seconds—that cheese is lava-hot!—then dig into the most comforting winter snack you’ll ever make.
Tips for the Best Air Fryer Cheesy Pull-Apart Garlic Bread Bombs
After making these dozens of times (okay, maybe hundreds—my family’s obsessed), I’ve picked up some game-changing tricks:
- Garlic matters: Fresh minced garlic gives that punchy flavor jarred stuff just can’t match. (But if you’re in a pinch, ½ teaspoon garlic powder works too.)
- Air fryer quirks: All models run differently—start checking at 7 minutes! Mine’s perfect at 8, but my sister’s needs 9.
- Dip duo: Warm marinara sauce is classic, but ranch dressing? Unexpectedly amazing.
- Cheese insurance: Seal those dough balls tight—any cracks mean cheesy lava leaks!
Bonus: Double the garlic butter for extra dipping—you’ll thank me later.
Variations for Your Air Fryer Cheesy Pull-Apart Garlic Bread Bombs
Once you’ve mastered the basic recipe (and trust me, you’ll want to make these weekly), it’s time to get creative! My family loves testing new twists—here are our favorite ways to shake things up:
Meat Lover’s Dream
For my husband’s poker nights, I add tiny pepperoni cubes to the cheese filling—they crisp up slightly and give that pizza-pocket vibe. (Pro tip: Pat the pepperoni dry first so they don’t make the dough soggy.) Cooked crumbled sausage or diced ham work great too—just use about 1 teaspoon per bomb.
Cheese Swap Magic
While mozzarella is classic, sharp cheddar gives a punchier flavor. My kids go nuts when I mix both cheeses! For fancy nights, try smoked gouda or crumbled feta. And never underestimate the power of a parmesan sprinkle right before air frying—it creates this crispy, savory crust that’ll make you swoon.
Herb Garden Upgrade
In summer, I raid my herb pots—fresh basil or chives mixed into the garlic butter is *chef’s kiss*. Rosemary lovers (like me!) can add a tiny pinch to each dough ball—just enough to whisper through the garlic. Don’t forget to brush any leftover herbed butter on top after cooking for extra shine!
The beauty of these bombs? They’re like blank canvases. Last Christmas, I even did a sweet version with cinnamon sugar and Nutella centers—because why should savory have all the fun? Whatever twist you try, snap a pic and tag me—I’m always hunting for new ideas!
Serving Suggestions for Air Fryer Cheesy Pull-Apart Garlic Bread Bombs
Oh, the places these little garlicky wonders can go! I’ve served them everywhere from fancy dinner parties to my daughter’s sleepovers (where they disappeared in 2.3 seconds). Here’s how to make them shine in any setting:
Soup’s Best Friend
On frosty nights, nothing beats dunking these bombs into a steaming bowl of tomato soup—it’s like grilled cheese’s fun cousin came to visit. They’re also magical with creamy broccoli cheddar or chicken noodle soup (the cheese pulls mix with the broth in the most glorious way). My grandma-style tip? Serve them on the side of French onion soup and let people drop bombs right into their bowls for cheesy crouton heaven!
Salad Sidekick
Sounds weird, but trust me—these balance out a big Caesar or kale salad perfectly. The crisp garlic bombs cut through rich dressings, and their warmth makes even “healthy nights” feel indulgent. For parties, I arrange them around a giant antipasto platter—guests love grabbing bombs between bites of olives and cured meats.
Party MVP
When hosting, I triple the recipe and keep batches coming from the air fryer all night. Set them out with small bowls of marinara, pesto, and garlic aioli for dipping—watch them vanish faster than you can say “more cheese please!” Pro tip: Skewer 2-3 bombs on toothpicks for easy grabbing (and to prevent double-dipping drama). They’re always the first appetizer gone at my book club—even faster than the wine!
Last week, my teenager even packed cooled leftovers in her lunchbox with a tiny cup of pizza sauce—apparently her whole cafeteria table smelled like garlic, and she came home a legend. However you serve them, just be ready for recipe requests—these bombs turn eaters into fanatics every time!
Storing and Reheating Air Fryer Cheesy Pull-Apart Garlic Bread Bombs
Okay, let’s be real—these garlic bread bombs rarely last long enough to store (my family inhales them like they’re going out of style). But on the off chance you have leftovers—or you’re smart enough to make extra—here’s how to keep them tasting fresh and fabulous:
Storing Your Garlicky Treasures
First rule: let them cool completely before storing! I learned this the hard way when I once packed them warm—hello, soggy mess. Spread them in a single layer on a plate for about 20 minutes, then transfer to an airtight container with a paper towel underneath (it absorbs any excess moisture). They’ll keep beautifully for 2 days in the fridge—any longer and the dough starts getting sad.
The Magic of Air Fryer Reheating
Microwaving turns these into rubbery disappointments—but your air fryer brings them back to life! Pop them in at 350°F for just 2-3 minutes until they’re heated through and regaining their crispiness. No need to thaw if they’re fridge-cold—just add an extra 30 seconds. Watch closely—they go from “still cold” to “perfectly warm” in seconds!
Pro tip: If you’re reheating a whole batch, give the basket a gentle shake halfway through. And for extra credit? Brush them lightly with fresh garlic butter after reheating—it’s like they were never stored at all!
Nutrition Information for Air Fryer Cheesy Pull-Apart Garlic Bread Bombs
Let’s be honest—we’re not eating these garlicky cheese bombs for their health benefits (though garlic is good for you…right?). But for those curious minds—or anyone tracking their macros between cozy snack sessions—here’s the scoop on what’s inside these little flavor explosions. Remember: These are estimates based on standard ingredients—your exact numbers might dance around a bit depending on cheese brands or how generously you dunk in that garlic butter!
- Serving Size: 2 bread bombs (because who stops at one?)
- Calories: 180 (worth every single one)
- Fat: 10g (that’s the butter and cheese doing their magic dance)
- Saturated Fat: 4g (the delicious kind, obviously)
- Carbs: 18g (blame the biscuit dough—no regrets)
- Protein: 4g (cheese power!)
- Sodium: 380mg (garlic bread’s not exactly a spa food, folks)
My nutritionist friend always reminds me: “It’s about balance!” So maybe pair these with a big salad…or just enjoy them shamelessly with extra marinara. Life’s too short not to savor every garlicky, cheesy bite.
Frequently Asked Questions About Air Fryer Cheesy Pull-Apart Garlic Bread Bombs
After sharing this recipe with friends (and their friends, and probably their neighbors too), I’ve gotten the same excited questions popping up. Here’s everything you need to know before you start stuffing and air frying!
Can I use homemade dough instead of canned biscuits?
Absolutely! My go-to is a simple drop biscuit dough—just mix 2 cups flour, 1 tbsp baking powder, ½ tsp salt, and ½ cup cold butter (cut in), then stir in ¾ cup milk. Roll and cut like the canned version. Homemade gives you more control over thickness, but let’s be real—sometimes that pop-can convenience is what gets these bombs on the table!
Help! My cheese keeps leaking out—what am I doing wrong?
Ah, the Great Cheese Escape—we’ve all been there! Three tricks: 1) Make sure your dough balls are completely sealed—pinch the edges like you’re closing a tiny purse. 2) Don’t overstuff—½ tsp cheese max per bomb. 3) Chill stuffed balls for 10 minutes before air frying—cold dough holds its shape better. If some cheese still leaks? Call it “crispy cheese lace” and pretend you meant to do it!
Can I prep these ahead and refrigerate before cooking?
Yes! Assemble the stuffed bombs, coat in garlic butter, then arrange on a parchment-lined tray. Cover tightly and refrigerate up to 12 hours. When ready, let them sit at room temp for 10 minutes while your air fryer preheats—they’ll cook perfectly! This makes them genius for last-minute holiday appetizers.
Why do mine sometimes come out doughy inside?
Usually means your air fryer runs cooler than mine—try cooking at 375°F instead of 350°F. Also, don’t overcrowd the basket! If bombs are touching, steam gets trapped and they won’t crisp up properly. Give them their personal space—about ½ inch apart—for even cooking.
Can I freeze leftovers?
You can, but they’re best fresh! If you must freeze, cool completely, then store in a single layer in an airtight bag for up to 1 month. Reheat frozen bombs directly in the air fryer at 350°F for 4-5 minutes—no thawing needed. They’ll lose a bit of crispness but still satisfy those cheesy cravings!
Got more questions? Slide into my DMs with your garlic bomb adventures—I love troubleshooting kitchen experiments! Now go forth and air fry with confidence, my cheesy friends.
For more inspiration, check out Canned Kitchen’s Pinterest page.
Print20-Minute Air Fryer Cheesy Pull-Apart Garlic Bread Bombs
Enjoy these warm and cheesy pull-apart garlic bread bombs made in your air fryer. Perfect for cozy winter nights.
- Prep Time: 10 mins
- Cook Time: 10 mins
- Total Time: 20 mins
- Yield: 16 bread bombs 1x
- Category: Appetizer
- Method: Air Fryer
- Cuisine: American
- Diet: Vegetarian
Ingredients
- 1 can refrigerated biscuit dough (16.3 oz)
- 1/2 cup shredded mozzarella cheese
- 1/4 cup melted butter
- 2 cloves garlic, minced
- 1 tsp dried parsley
- 1/4 tsp salt
Instructions
- Preheat air fryer to 350°F (175°C).
- Cut each biscuit into 4 pieces.
- Roll each piece into a ball and stuff with a pinch of mozzarella cheese.
- In a bowl, mix melted butter, garlic, parsley, and salt.
- Dip each stuffed dough ball into the butter mixture.
- Place balls in the air fryer basket, leaving space between them.
- Cook for 8-10 minutes until golden brown.
- Serve warm.
Notes
- Use fresh garlic for best flavor.
- Adjust cooking time based on your air fryer model.
- Serve with marinara sauce for dipping.
Nutrition
- Serving Size: 2 bread bombs
- Calories: 180
- Sugar: 2g
- Sodium: 380mg
- Fat: 10g
- Saturated Fat: 4g
- Unsaturated Fat: 5g
- Trans Fat: 0g
- Carbohydrates: 18g
- Fiber: 1g
- Protein: 4g
- Cholesterol: 15mg