
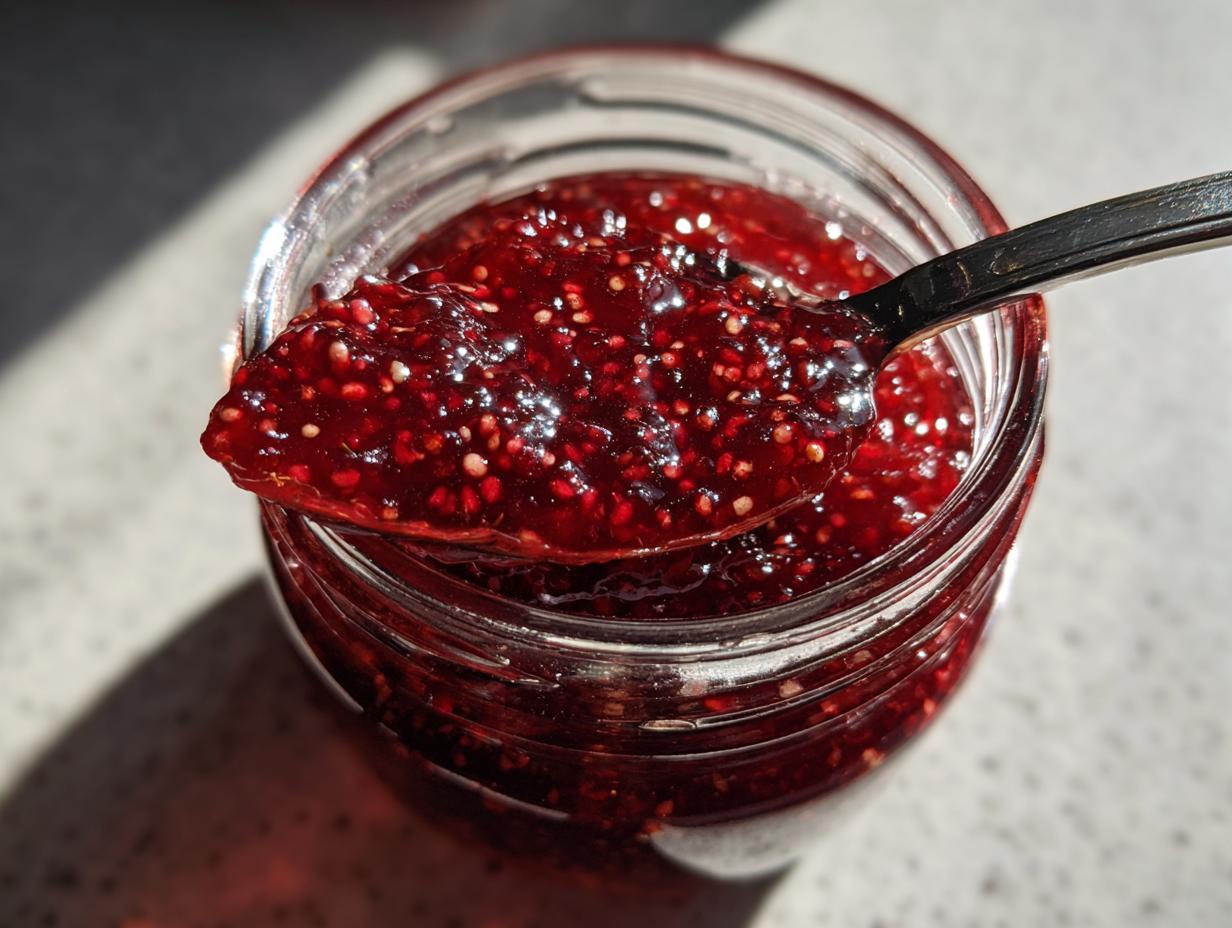
There’s something magical about homemade raspberry jam that store-bought jars just can’t match. The first time I made it, I was amazed at how three simple ingredients – fresh raspberries, sugar, and lemon juice – could transform into this glossy, jewel-toned spread bursting with flavor. Now, I keep a stash in my pantry year-round because once you taste this ruby-red delight on your morning toast or swirled into yogurt, you’ll never go back to the supermarket stuff.
What I love most about this raspberry jam recipe is how versatile it is. Sure, it’s perfect on scones or biscuits (trust me, it’ll make your breakfast feel fancy), but it’s also incredible as a cake filling, mixed into oatmeal, or even as a sweet-tart glaze for meats. My neighbor still talks about the jar I gave her last Christmas – turns out it was the star of her holiday cheese board!
The best part? You don’t need any special equipment or skills. In about 35 minutes, you’ll have jars of pure raspberry goodness ready to enjoy or share. Just wait until you see how the berries break down into that perfect jammy consistency – it’s like alchemy in your saucepan!
Why You’ll Love This Raspberry Jam
This isn’t just any jam – it’s the kind of recipe that’ll make you wonder why you ever settled for store-bought. Here’s why it’s become my absolute favorite:
- Seriously simple – With just three ingredients and about half an hour, you’ll have jam that tastes like you spent all day making it. I’ve whipped up a batch while my morning coffee brewed!
- Pure, real flavor – No weird additives or preservatives here. Just vibrant raspberries shining through with that perfect balance of sweet and tart. The first taste takes me straight back to picking berries at my aunt’s farm.
- That dreamy texture – Unlike the gelatinous gloop in some commercial jams, this spreads like velvet and holds its shape beautifully. It’s thick enough for PB&Js but still glossy enough to drizzle over cheesecake.
- Gift-worthy results – Pretty jars of homemade jam make the most thoughtful presents. My friends now request these for birthdays – and I don’t blame them!
Ingredients for Raspberry Jam
Here’s the beautiful part – you only need three simple ingredients to make magic happen. But let me tell you, each one plays a crucial role in creating that perfect jammy goodness:
- 500g fresh raspberries – Look for plump, ripe berries with that gorgeous deep red color. Trust me, the quality of your raspberries makes all the difference. Give them a gentle rinse and let them drain well – we don’t want extra water diluting our jam!
- 400g granulated sugar – Yes, it seems like a lot, but sugar isn’t just for sweetness here. It helps preserve our jam and gives it that glossy, spreadable texture we love. Regular white sugar works perfectly – no fancy substitutes needed.
- 1 tablespoon lemon juice – This little powerhouse does two important jobs: it balances the sweetness with a bright tartness, and its natural pectin helps our jam set beautifully. Freshly squeezed is best, but bottled works in a pinch.
See? I told you it was simple! Just these three ingredients transform into something extraordinary. Now let’s get cooking – I can already smell that sweet raspberry aroma filling the kitchen!
Equipment You’ll Need
Don’t worry – you won’t need any fancy gadgets to make this raspberry jam. Just gather these basic kitchen tools (chances are, you already have most of them!):
- Medium saucepan – About 2-3 quarts is perfect. I use my trusty stainless steel one because it heats evenly and lets me see the jam’s color change as it cooks. No non-stick needed!
- Wooden spoon – My absolute must-have for jam-making. It won’t react with the fruit acids, and I love how it feels stirring that bubbling berry mixture. Plus, it’s perfect for testing the jam’s consistency later.
- Sterilized jars with lids – I save small (8 oz) glass jars throughout the year just for jam. Run them through the dishwasher or boil for 10 minutes to sterilize. That “ping” sound as they seal is so satisfying!
- Ladle or funnel – Makes transferring hot jam into jars so much easier (and cleaner!). I’ve learned the hard way – pouring straight from the pan creates sticky messes.
- Fine mesh strainer (optional) – Some people like seedless jam. I personally love the texture with seeds, but if you prefer smooth, this is handy for straining.
That’s it! No special canning equipment required for this small-batch recipe. Now let’s move on to the fun part – making that gorgeous ruby-red jam!
How to Make Raspberry Jam
Okay, here’s where the magic happens! Making raspberry jam is easier than you think, but there are a few key steps that’ll ensure perfect results every time. I’ve made this recipe dozens of times (my family can’t get enough!), and I’ll walk you through exactly how I do it.
Preparing the Raspberries
First things first – let’s get those raspberries ready. I like to pour them into a colander and give them a gentle rinse under cool water. No need to scrub – just a quick shower to remove any dust or little critters (trust me, you’d rather find them now than in your jam!).
Here’s my pro tip: let them drain really well. I spread mine on a clean kitchen towel for about 10 minutes after rinsing. Excess water can make your jam too runny, and we want that perfect thick consistency. While they’re drying, I prep my other ingredients – it’s like a little kitchen ballet!
Cooking the Jam
Now for the fun part! Combine your raspberries, sugar, and lemon juice in your saucepan. At first, it’ll look like way too much sugar – don’t panic! As you stir over medium heat, you’ll see the berries start releasing their juices and the sugar begins to dissolve. This takes about 5 minutes of patient stirring.
Once the mixture comes to a rolling boil (those big bubbles that don’t disappear when you stir), reduce the heat to a lively simmer. This is when the magic really happens! Set your timer for 20 minutes and stir occasionally – you’ll watch the mixture transform from loose berries to thick, glossy jam. The aroma is absolutely heavenly!
Keep an eye out for foam forming on top – I skim this off with a spoon as it appears. It’s mostly just air bubbles and makes for prettier jam. The color will deepen to a gorgeous ruby red as it cooks.
Testing Jam Doneness
Here’s how I test if my jam is perfectly set: chill a small plate in the freezer for 5 minutes. Drop a teaspoon of jam onto the cold plate, wait 30 seconds, then push it with your finger. If it wrinkles and holds its shape rather than running everywhere, it’s ready!
Another trick I use is the “sheet test” – dip your wooden spoon in, then hold it horizontally. When the jam drips off in a sheet rather than individual drops, you’re golden. If it’s not quite there, give it another 2-3 minutes of cooking and test again.
Remember, the jam will thicken more as it cools, so don’t overcook it looking for that super-thick consistency in the pan. I learned this the hard way with my first batch that turned into raspberry candy!
Tips for Perfect Raspberry Jam
After making countless batches of this raspberry jam (and yes, learning from a few mistakes along the way!), I’ve gathered my best tips to help you nail it every time. These little tricks make all the difference between good jam and knock-your-socks-off jam:
Use the ripest berries you can find – I know it’s tempting to use up those slightly underripe ones, but trust me, fully ripe raspberries have more natural pectin and sweetness. Look for berries that are deep red all over and practically fall apart when you touch them. That intense flavor shines through in the finished jam!
Watch the clock (but trust your instincts) – That 20-minute simmer time is a great guideline, but every stove and batch behaves differently. The first time I made this, I got distracted and overcooked it – lesson learned! Set a timer, but keep checking the consistency as it cooks. When it starts coating the back of your spoon thickly, it’s probably done.
Sterilize those jars properly – Nothing worse than spoiled jam! I wash my jars in hot soapy water, then pop them in a 300°F oven for 10 minutes while the jam cooks. The lids get a quick boil in water. This extra step means your jam stays fresh for months. That satisfying “pop” when the lids seal is music to my ears!
Skim off the foam – It might seem insignificant, but taking a minute to skim that white foam off the top makes for clearer, prettier jam. I use a metal spoon and just gently scoop it off as it forms. Bonus: the skimmed foam tastes amazing on yogurt – waste not, want not!
One last piece of advice? Let the jam cool slightly before jarring – About 5 minutes off the heat helps it thicken just enough to prevent all the fruit from settling at the bottom of your jars. Learned this trick after my first batch had all the berries at the top and clear liquid below – not the look we’re going for!
Raspberry Jam Variations
While I adore the classic version of this raspberry jam, sometimes I love playing around with fun twists! Here are my favorite simple variations that still keep that amazing raspberry flavor front and center:
Vanilla Raspberry Jam – Just split a vanilla bean and scrape the seeds into the pot with your berries (or use 1 teaspoon of good vanilla extract). The vanilla adds this incredible floral note that makes the raspberries taste even brighter. My niece calls this the “fancy jam” and insists on it for her birthday pancakes!
Chia Seed Raspberry Jam – For a quicker, lower-sugar option, I sometimes mash the berries with just 2 tablespoons of chia seeds and a tablespoon of honey or maple syrup. Let it sit for 30 minutes – the chia seeds work magic to thicken it naturally. It’s more of a quick fridge jam, but so delicious stirred into oatmeal.
Spiced Raspberry Jam – A pinch of cinnamon or cardamom (about 1/4 teaspoon) adds warmth that’s perfect for holiday gifts. I once added a tiny bit of black pepper – sounds weird, but it made the raspberry flavor pop in the most surprising way!
Reduced Sugar Version – If you prefer less sweet, you can cut the sugar down to 300g (about 1 1/2 cups). The jam won’t keep as long, but it lets the tart berry flavor shine. Just be sure to refrigerate it and use within a couple weeks.
The beauty of homemade jam is how easily you can customize it! I’ve even stirred in a tablespoon of balsamic vinegar at the end for a grown-up twist – perfect for cheese pairings. Whatever variation you try, start with small batches until you find your perfect flavor combo!
Serving and Storing Raspberry Jam
Oh, the possibilities with this ruby-red beauty! Once you’ve made your batch of raspberry jam, the real fun begins. I keep a jar on my kitchen counter at all times because I swear it makes breakfast taste like a special occasion. My favorite way? Slathered thick on warm, buttered sourdough toast – the way the jam melts slightly into the bread is pure magic. But that’s just the beginning!
Here are my go-to ways to enjoy this jam:
- Breakfast superstar: Swirl into yogurt, dollop on pancakes, or sandwich between buttery biscuits. My husband loves it on his morning oatmeal with a sprinkle of almonds.
- Dessert enhancer: Layer it in parfaits, use as a cake filling, or warm slightly to drizzle over ice cream. I once made mini cheesecakes with a raspberry jam swirl that disappeared in minutes at a potluck!
- Savory pairings: Brush it on roasted meats during the last few minutes of cooking – pork tenderloin with this jam glaze will change your life. It’s also incredible with brie on crackers.
Now, let’s talk storage because we want to keep this goodness fresh! Properly sealed jars will last up to a year in a cool, dark pantry (mine never last that long though!). Once opened, refrigerate and enjoy within 3-4 weeks. You’ll know it’s gone bad if you see mold or smell anything funky – but honestly, in my house, it gets eaten long before that’s a concern!
Pro tip: If you notice condensation inside the jar after sealing, don’t panic! Just wipe the lid dry and store upside down for the first day – this creates an even better seal. And if by some miracle you have leftovers getting old in the fridge, stir a spoonful into salad dressings or barbecue sauce for an instant flavor boost!
Raspberry Jam FAQs
I’ve gotten so many great questions about this raspberry jam recipe over the years – here are the ones that pop up most often with my tried-and-true answers:
Can I use frozen raspberries instead of fresh?
Absolutely! I actually keep a bag in my freezer for emergency jam cravings. No need to thaw – just toss them straight into the pan (they’ll break down as they cook). You might need to simmer a few extra minutes to account for the extra liquid. The flavor is nearly identical to fresh!
How do I know if my jam is safe to eat if it’s been stored awhile?
First, check the seal – the lid should be slightly concave and not move when pressed. When you open it, look for any mold (unlikely if properly sealed) and give it a sniff. Good jam smells fruity and sweet; if it’s off or fermented smelling, toss it. When in doubt? Better safe than sorry!
My jam turned out too runny – can I fix it?
Don’t worry – this happened to me my first time too! Just pour it back into the pan, add 1 teaspoon of lemon juice, and simmer another 5-10 minutes. The extra pectin in the lemon helps it set. If it’s still too thin after cooling, no shame – call it raspberry sauce and enjoy it on ice cream!
Why does the sugar measurement seem so high?
I know 400g looks like a lot, but sugar isn’t just for sweetness – it’s crucial for texture and preservation. The sugar binds with the fruit’s natural pectin to create that perfect jammy consistency. You can reduce it slightly (down to 300g), but your jam won’t keep as long and might be more like a thick compote.
Can I double this recipe?
You can, but I recommend making separate batches instead. Jam needs careful temperature control, and doubling can lead to uneven cooking. I learned this the hard way when a double batch took forever to reach setting point! Stick to single batches for consistent results every time.
Nutritional Information
Now, I’m no nutritionist (just a jam enthusiast!), but here’s the general breakdown per tablespoon of this raspberry jam. Keep in mind these are estimates – your exact numbers might vary slightly depending on your berries and how long you cook it:
Per serving (1 tbsp):
- 50 calories – Perfect little burst of energy for your morning toast!
- 12g sugar – Mostly from the natural fruit sugars and that bit of added sugar we need for preservation.
- 1g fiber – Thanks to all those lovely raspberry seeds – they’re good for you!
- 0g fat – Completely guilt-free in that department.
- 0mg sodium – Naturally low, which makes it great for those watching salt intake.
A little disclaimer from my kitchen to yours: these numbers can change based on how ripe your berries are, exactly how much sugar you use, and how thick you cook your jam. My friend’s batch came out slightly different because she used organic cane sugar – that’s the beauty of homemade!
What I love is that even with the sugar, you’re still getting all the goodness of real raspberries – their natural antioxidants and vitamin C. Compared to store-bought jams with additives and high fructose corn syrup, this homemade version feels like a healthier choice. But let’s be real – we’re here for the incredible taste first and foremost!
Print3-Ingredient Raspberry Jam: Sweet Perfection in 35 Minutes
A simple homemade raspberry jam recipe. Sweet, tangy, and perfect for toast, desserts, or gifting.
- Prep Time: 10 mins
- Cook Time: 25 mins
- Total Time: 35 mins
- Yield: 2 small jars 1x
- Category: Condiment
- Method: Stovetop
- Cuisine: International
- Diet: Vegetarian
Ingredients
- 500g fresh raspberries
- 400g granulated sugar
- 1 tbsp lemon juice
Instructions
- Wash raspberries and drain excess water.
- Combine raspberries, sugar, and lemon juice in a saucepan.
- Cook over medium heat, stirring until sugar dissolves.
- Bring to a boil, then reduce heat and simmer for 20 minutes.
- Skim off any foam and test jam consistency.
- Pour into sterilized jars and seal.
Notes
- Use ripe raspberries for best flavor.
- Store sealed jars in a cool, dark place.
- Refrigerate after opening.
Nutrition
- Serving Size: 1 tbsp
- Calories: 50
- Sugar: 12g
- Sodium: 0mg
- Fat: 0g
- Saturated Fat: 0g
- Unsaturated Fat: 0g
- Trans Fat: 0g
- Carbohydrates: 13g
- Fiber: 1g
- Protein: 0g
- Cholesterol: 0mg