
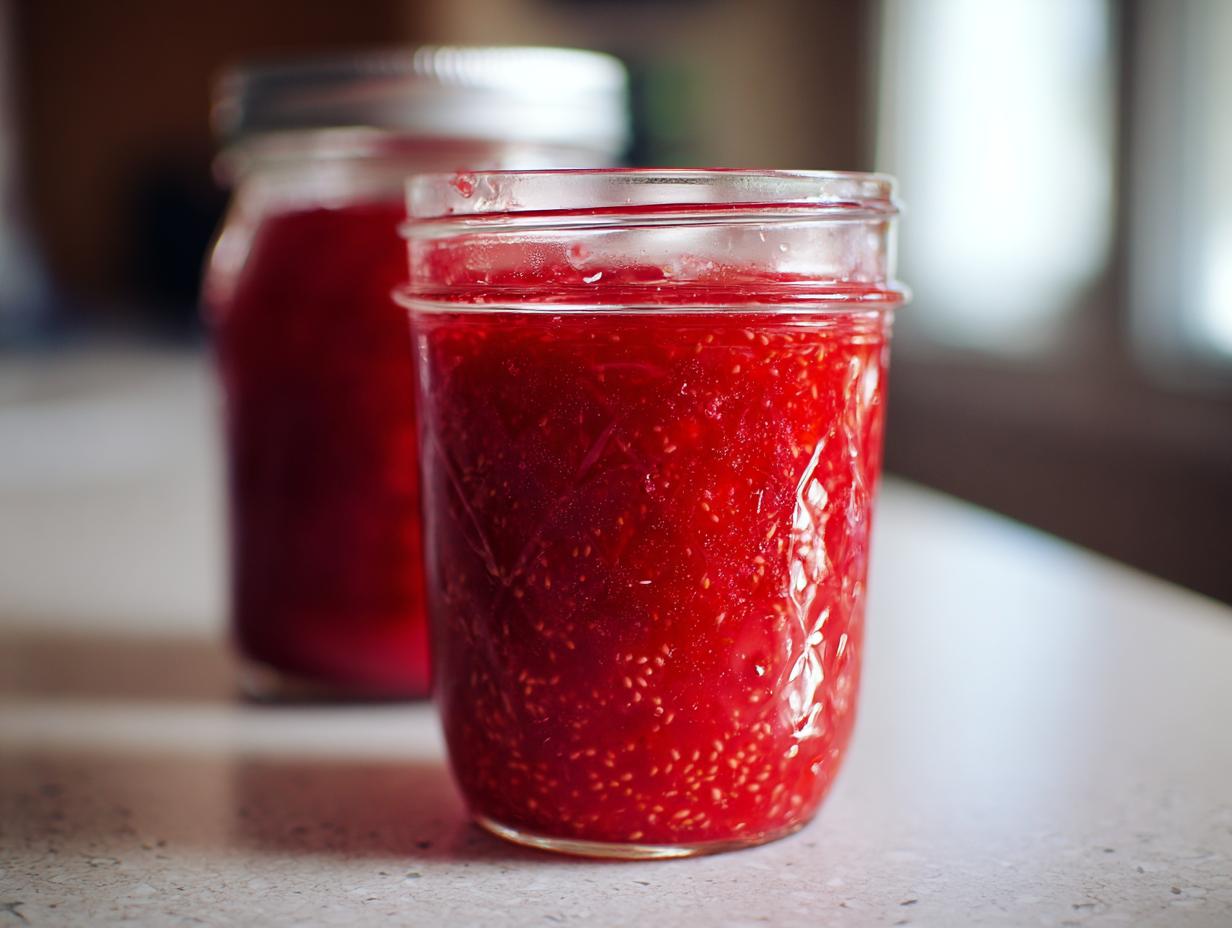
Nothing beats cracking open a jar of homemade strawberry juice in the dead of winter—it’s like bottling sunshine! I’ve been canning strawberry juice every June since my grandma taught me her foolproof method years ago. Those ruby-red berries transform into the most vibrant, sweet-tart juice you’ll ever taste. Canning strawberry juice lets you preserve that fresh-picked flavor for months, and trust me, once you’ve tried your own, store-bought will never compare. It’s simpler than you think—just ripe strawberries, a bit of sugar, and some patience while the jars seal. Your future self will thank you when you’re sipping summer in January!
Why You’ll Love Canning Strawberry Juice
This recipe is my go-to summer ritual for so many reasons:
- Easiest way to preserve berries – No fancy equipment needed, just simple ingredients and basic canning tools
- Locks in that just-picked flavor – Unlike freezer jam, canned juice stays vibrant for a whole year in your pantry
- Make it your own – Add more sugar for sweetness or extra lemon for tartness based on your taste
- Budget-friendly – One batch costs less than store-bought juice and tastes infinitely better
Seriously, once you taste that first sip of ruby-red goodness mid-winter, you’ll understand why I’m obsessed!
Ingredients for Canning Strawberry Juice
Gather these simple ingredients – quality matters here, friends! My grandma always said, “Good berries make great juice,” and she wasn’t wrong. Here’s exactly what you’ll need for about 4 cups of liquid sunshine:
- 4 cups fresh strawberries (hulled – those green tops gotta go!)
- 1 cup granulated sugar (adjust up or down depending on your berry sweetness)
- 4 cups water (filtered if you’ve got it)
- 1 tablespoon fresh lemon juice (that bright acidity is KEY)
See? Nothing crazy – just pure, simple ingredients that let those strawberries shine. Pro tip: sniff your berries at the store – if they don’t smell like candy, keep looking!
Equipment Needed for Canning Strawberry Juice
Here’s the short list of tools that’ll get you from fresh berries to shelf-stable juice in no time:
- Blender (I use my trusty old Oster)
- Fine-mesh strainer (those tiny seeds will drive you nuts otherwise!)
- Large pot for simmering and water bath canning
- Canning jars with new lids (pints or half-pints work best)
- Canning funnel (saves so many spills!)
Nice-to-have extras: a jar lifter (safety first!) and a thermometer to check your water bath temp. That’s it – you probably have most of this in your kitchen already!
How to Make Canned Strawberry Juice
Alright, let’s get down to the fun part – turning those gorgeous berries into shelf-stable sunshine! I’ve made this recipe dozens of times, and these steps never fail me. Just follow along, and you’ll have perfect strawberry juice ready for canning in no time.
Preparing the Strawberries
First things first – give those berries some love! I always wash them gently in cold water (no soap!) and let them drain in a colander. Now, the most important step: hulling. Those little green tops don’t belong in our juice! Use a paring knife or strawberry huller to remove just the stem and white core – don’t take too much flesh.
Once they’re prepped, toss them in your blender with the water. Pulse until smooth as silk – about 30 seconds should do it. The kitchen will smell amazing already! Pro tip: don’t over-blend or you’ll incorporate too much air.
Straining and Cooking the Juice
Here’s where we separate the good stuff from those pesky seeds. Pour your strawberry puree through a fine-mesh strainer into a large pot, pressing with a wooden spoon to extract every last drop of juice. Those tiny seeds might seem harmless, but trust me, you don’t want them floating in your finished product!
Now, stir in the sugar and lemon juice over medium heat until the sugar dissolves completely – about 3 minutes. Don’t let it boil yet! Once the sugar’s melted in, bring it just to a simmer (tiny bubbles around the edges) for 5 minutes to marry the flavors. That lemon juice? It’s not just for taste – it helps preserve that beautiful red color!
Canning the Strawberry Juice
While your juice simmers, get your jars ready. I always sterilize mine in boiling water for 10 minutes – clean jars mean safe canning! Keep them hot until filling. When your juice is ready, use that handy funnel to pour it into jars, leaving ½ inch headspace (that air gap is crucial for proper sealing).
Wipe the rims spotless with a damp cloth (any stickiness can prevent sealing), then screw on the lids fingertip-tight. Process in a boiling water bath for 10 minutes (adjust for altitude if needed). When time’s up, turn off the heat and let the jars sit in the water for 5 minutes before removing – this prevents siphoning. Listen for those satisfying “pops” as they cool – that’s the sound of success!

Tips for Perfect Canned Strawberry Juice
After years of trial and error (and a few sticky messes), here are my can’t-live-without tips:
- Pick berries at peak ripeness – They should smell sweet and give slightly when pressed. Underripe berries = bland juice!
- Check seals religiously – Press the center of cooled lids; if it pops, refrigerate that jar immediately.
- Taste before canning – Adjust sugar while the juice is still in the pot – I often add an extra squeeze of lemon.
- Work fast when filling jars – Keep everything hot to prevent broken glass and ensure a good vacuum seal.
Remember: good canning is equal parts patience and precision – but oh, the rewards!
Strawberry Juice Variations
Oh, the fun you can have with this basic recipe! Here are my favorite spins:
- Herb-infused – Toss in fresh mint or basil leaves while simmering for a refreshing twist
- Spiced – A cinnamon stick or pinch of ginger adds cozy warmth
- Sweetener swaps – Try honey instead of sugar (use 3/4 cup honey per 1 cup sugar)
Just remember: if you’re canning, stick to tested ratios for safety. For fresh juice? Go wild with flavors!
Storing and Using Canned Strawberry Juice
Properly sealed jars will keep their summer magic for a whole year in your cool, dark pantry – but let’s be real, mine never last that long! Always check seals before storing – lids should be slightly concave and not move when pressed. Once opened, refrigerate and use within a week. My favorite ways to enjoy it? Chilled over ice, warmed as a cozy drink, or mixed into cocktails (hello, strawberry mojitos!). The juice also makes killer popsicles or pancake syrup – just simmer to thicken slightly. Pro tip: shake jars gently before opening to redistribute any settled pulp!
Nutritional Information for Canned Strawberry Juice
Here’s the scoop on what’s in that ruby-red goodness (per 1 cup serving): about 120 calories, 30g carbs with 2g fiber, and a vitamin C boost from those fresh berries. The sugar content (28g) comes mostly from natural fruit sugars plus our added sweetener. Now, full disclosure – these numbers can vary based on your berries’ ripeness and exact sugar adjustments. My grandma always said, “It’s juice, not medicine – enjoy every sip!” But it’s nice to know you’re getting some nutrients with all that deliciousness.
Common Questions About Canning Strawberry Juice
I’ve gotten so many questions from friends trying this recipe – here are the ones that pop up most often with my tried-and-true answers!
Can I use frozen strawberries instead of fresh?
Absolutely! Thaw them completely first, but know the juice might be slightly less vibrant. Frozen berries work great when fresh aren’t in season – just skip the ice in your blender.
Why didn’t my jars seal properly?
Heartbreaking, but fixable! Common culprits: food residue on rims (wipe meticulously!), old or dented lids (always use new ones), or not enough headspace. If a jar doesn’t pop within 24 hours, just refrigerate and enjoy it first.
How long does canned strawberry juice last?
Properly sealed jars keep 12-18 months in a cool, dark place. Once opened? Finish within a week – if it lasts that long in your fridge!
Can I reduce the sugar for a healthier version?
For fresh juice, sure! But when canning, sugar helps preserve color and texture. If reducing, consider freezing instead or adding lemon juice to compensate.
Help! My juice separated in the jar – is it safe?
Totally normal! The pulp settles – just give it a good shake before opening. As long as the seal held and there’s no mold, you’re golden.
Canning Strawberry Juice: 4 Cups Sunshine In A Jar
Learn how to make homemade strawberry juice and preserve it by canning for long-term storage.
- Prep Time: 15 mins
- Cook Time: 10 mins
- Total Time: 25 mins
- Yield: 4 cups 1x
- Category: Beverage
- Method: Canning
- Cuisine: American
- Diet: Vegetarian
Ingredients
- 4 cups fresh strawberries, hulled
- 1 cup granulated sugar
- 4 cups water
- 1 tablespoon lemon juice
Instructions
- Wash and hull the strawberries.
- Blend strawberries with water until smooth.
- Strain the mixture to remove seeds.
- Add sugar and lemon juice, then simmer for 5 minutes.
- Sterilize jars and lids in boiling water.
- Pour hot juice into jars, leaving 1/2 inch headspace.
- Wipe rims, seal with lids, and process in a water bath for 10 minutes.
- Remove jars and cool for 24 hours before storing.
Notes
- Use ripe strawberries for best flavor.
- Adjust sugar based on sweetness preference.
- Check seals before storing.
Nutrition
- Serving Size: 1 cup
- Calories: 120
- Sugar: 28g
- Sodium: 5mg
- Fat: 0.5g
- Saturated Fat: 0g
- Unsaturated Fat: 0g
- Trans Fat: 0g
- Carbohydrates: 30g
- Fiber: 2g
- Protein: 1g
- Cholesterol: 0mg