
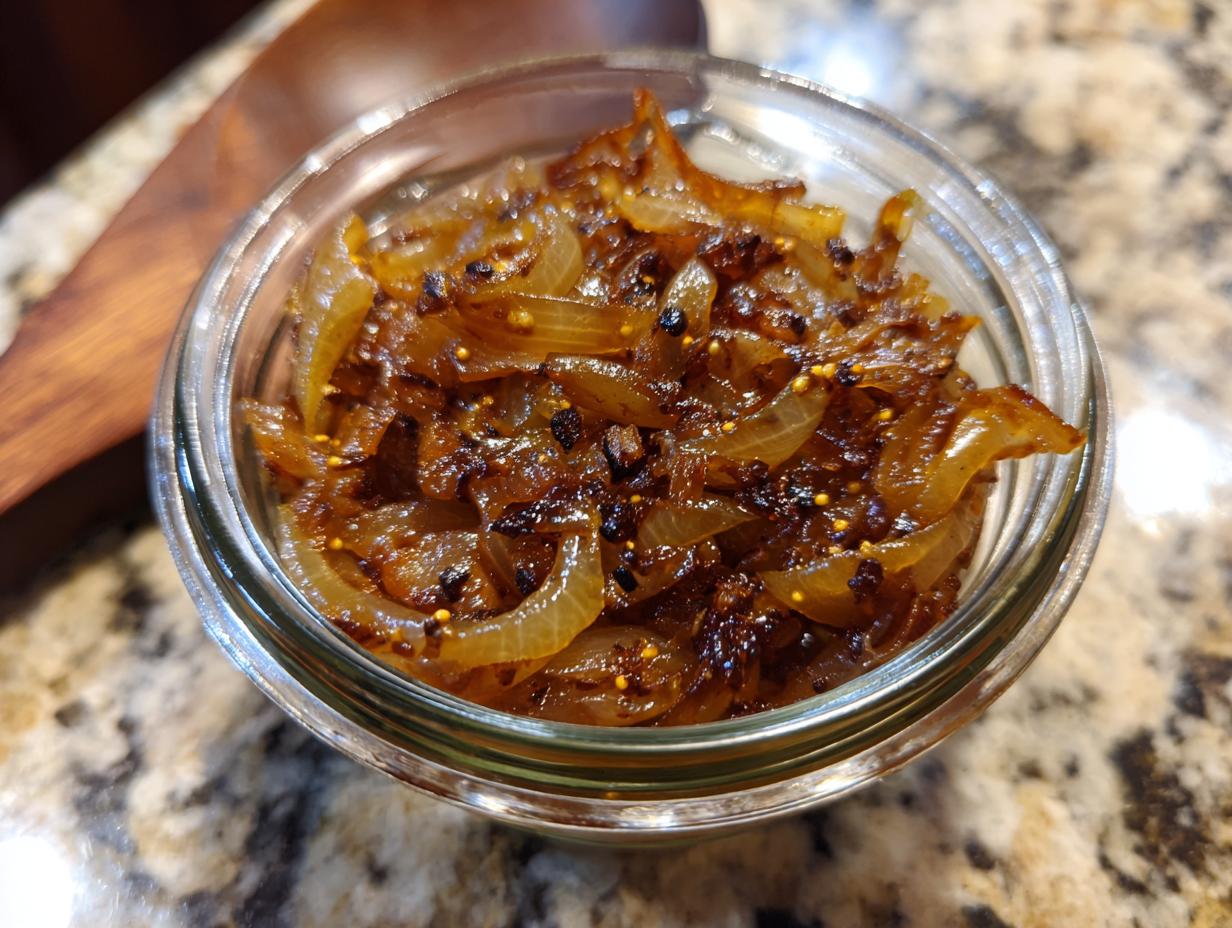
I’ll never forget the first time I slathered a spoonful of homemade onion relish on a burger—it was a total game-changer. That sweet-tangy punch transformed an ordinary patty into something extraordinary. Since then, I’ve been hooked, and this onion relish has become my secret weapon in the kitchen. It’s crazy how something so simple—just onions, a bit of sugar, and vinegar—can elevate everything from hot dogs to cheese boards. Trust me, once you taste it, you’ll want to put it on everything. It’s the kind of condiment that makes people ask, “Wait, what is that?!”—and lucky for you, it takes under 30 minutes to whip up.
Why You’ll Love This Onion Relish
This isn’t just any condiment—it’s the kind of magic that’ll make you rethink every sandwich, burger, or cheese plate. Here’s why it’s a must-make:
- Effortless prep: Just chop, sauté, and simmer—done in 25 minutes flat.
- Bold flavor: Sweet caramelized onions meet tangy vinegar and a hint of spice from mustard seeds.
- Wildly versatile: Glorious on grilled meats, swirled into mayo, or even spooned over baked brie.
- No weird ingredients: Pantry staples only, promise.
Seriously, one batch and you’ll wonder how you ever lived without it.
The Simple, Flavor-Packed Ingredients You’ll Need
Here’s the beautiful part—you probably have most of this already in your kitchen. But the way you prep them makes all the difference. No fancy ingredients, just a handful of staples that work magic together:
- 2 large onions – finely chopped (yellow onions work best—they caramelize like a dream!)
- 2 tablespoons olive oil – for that perfect, silky sauté
- 2 tablespoons brown sugar – packed (it’s what gives that deep, caramel sweetness)
- ¼ cup apple cider vinegar – tangy, bright, and just acidic enough to balance the sugar
- 1 teaspoon mustard seeds – for a subtle earthy pop (trust me, you’ll notice if they’re missing)
- ½ teaspoon salt – to coax out the onions’ natural sweetness
- ¼ teaspoon black pepper – freshly ground, if you can swing it
See? Nothing crazy. But when these hit the pan together? Wow. Pro tip: Measure your brown sugar after packing it into the spoon—none of that fluffy, barely-there stuff. We want flavor that means business.
The Bare-Bones Equipment You’ll Need
No fancy gadgets here—just a few trusty tools you definitely already own. (I mean, if you’ve got a stove and a pan, you’re 90% there.) Here’s the short-and-sweet lineup:
- A good skillet – My go-to is a 10-inch stainless steel pan, but nonstick works too. Just avoid cast-iron unless you want your relish to taste like last night’s steak.
- Wooden spoon – For stirring without scratching your pan to bits. Also, it makes you feel like a legit chef when you’re caramelizing those onions.
- Airtight container – A mason jar or old jam jar is perfect. (Bonus: It’ll make your fridge look Instagram-ready.)
That’s it—no food processors, no special gizmos. Though if you really want to treat yourself, a microplane for grating garlic (for future relish experiments!) never hurt anybody.
How to Make Onion Relish
Okay, here’s where the magic happens—and I promise, it’s easier than you think. Just follow these steps, and you’ll have a jar of golden, tangy-sweet goodness in no time. The key? Patience with the onions and keeping an eye on that simmer. Ready? Let’s do this.
Sautéing the Onions
First, grab your skillet and heat the olive oil over medium heat. Toss in those finely chopped onions—yes, all of them! Now, here’s the important part: don’t rush this. Stir them occasionally, letting them soften and turn translucent, about 5–7 minutes. You’ll know they’re ready when they smell sweet and look kinda shiny, like they’re sweating (but in a delicious way). If they start browning too fast, just nudge the heat down a smidge. We’re going for tender, not crispy!
Adding the Flavors
Time to wake up those taste buds! Sprinkle in the brown sugar, mustard seeds, salt, and pepper. Stir like your life depends on it for 30 seconds—this helps the sugar dissolve and coats every onion piece evenly. Now, pour in the apple cider vinegar (stand back—it’ll sizzle and smell sharp at first). Keep stirring! The sugar loves to stick to the pan, so scrape the bottom constantly. After a minute, everything will mellow into a glossy, bubbly syrup. Ahhh, that’s the sound of flavor coming together.
Simmering to Perfection
Reduce the heat to low and let it all bubble gently for 10–15 minutes. You’re waiting for the liquid to thicken just enough to coat the back of a spoon but still look saucy—not jammy, not soup. Stir every few minutes to prevent sticking. Pro tip: If it looks too dry, add a splash of water. Too thin? Give it 2 more minutes. When it’s done, take it off the heat and let it cool completely (about 20 minutes). It’ll thicken a tad more as it sits. Taste it—go on!—and adjust the salt or vinegar if needed. Now, try not to eat it all straight from the pan.

Tips for the Best Onion Relish
Want pro-level results? Here’s how to nail it every time:
- Low and slow wins: Keep the heat medium-low for caramelization without burning. Rushed onions = bitter relish.
- Vinegar to taste: Like it tangier? Add an extra splash at the end—just stir well.
- Watch the sugar: If your onions are very sweet, reduce sugar by half a tablespoon.
- Seed swap: No mustard seeds? A pinch of dry mustard powder works in a pinch.
Easy tweaks for your perfect batch!
Onion Relish Variations
The beauty of this relish? It’s like a blank canvas begging for your personal touch. Play around—I do it all the time! Here are my favorite twists:
- Spice it up: Toss in a pinch of red pepper flakes with the mustard seeds for a gentle kick. (My husband adds a whole teaspoon—yowza!)
- Sweet swaps: Out of brown sugar? Honey or maple syrup work beautifully—just reduce by half since they’re sweeter.
- Garlic lovers: Throw in 2 minced cloves when sautéing onions. The aroma? Heavenly.
- Herb vibes: Stir in 1 tablespoon chopped fresh thyme or rosemary at the end for a fragrant twist.
- Bacon bonus: Because everything’s better with bacon. Cook 2 strips crispy, crumble, and fold into the cooled relish.
See? Endless possibilities. My advice? Make a classic batch first, then go wild experimenting!
Serving Suggestions for Onion Relish
Oh, where don’t I put this stuff? It’s like the superhero of condiments—ready to swoop in and save any meal from blandness. Here’s how I use it (and trust me, once you start, you’ll find excuses to add it to everything):
- Burgers & hot dogs: A heaping spoonful on top melts into the meat, adding sweet-tangy magic. Bonus: Mix a tablespoon into your mayo first for next-level sauce.
- Grilled cheese: Spread it inside before assembling—the heat softens the onions into gooey perfection. (Try it with sharp cheddar and sourdough. You’re welcome.)
- Roast meats: Dollop over pork chops, chicken thighs, or even meatloaf. The acidity cuts through richness like a dream.
- Cheese boards: Pair with aged gouda, brie, or blue cheese. The contrast? *Chef’s kiss*.
- Eggs: Fold into scrambled eggs or top avocado toast. Morning game = changed.
My latest obsession? Stirring a spoonful into tuna salad instead of pickles. Zero regrets. Basically, if it’s edible, this relish will probably make it better.
Storing and Reheating Onion Relish
Here’s the best part—this relish actually gets *better* after a day in the fridge as the flavors cozy up together. But let’s talk storage because nobody wants a sad, spoiled batch. First things first: always let it cool completely before packing it up. Hot relish in a jar? That’s just asking for condensation (and sogginess). I use a clean mason jar with a tight lid, but any airtight container works. Pop it in the fridge, and it’ll stay fresh for up to a week—though in my house, it’s lucky to last three days!
Now, reheating? Don’t bother! This relish shines when served chilled or at room temp. The onions stay perfectly tender, and that glossy texture holds up beautifully straight from the jar. If it thickens too much in the fridge, just stir in a teaspoon of warm water to loosen it. Pro tip: Label your jar with the date—because between you and me, you *will* forget when you made it once the deliciousness distraction kicks in.
Onion Relish FAQs
Got questions? I’ve got answers—because I’ve made every mistake so you don’t have to! Here’s the scoop on the things people ask me most about this relish:
Can I freeze onion relish?
Nope, and here’s why: The texture turns weirdly mushy when thawed (onions are mostly water, after all). Plus, the vinegar’s acidity can make your freezer smell like a pickle factory. Stick to fridge storage—it keeps beautifully for a week anyway!
What can I use instead of brown sugar?
Maple syrup’s my top swap—use just 1 tablespoon since it’s sweeter. Honey works too, but go light-handed. White sugar in a pinch? Sure, but you’ll miss those caramel notes. (P.S.: If you’re sugar-free, a dash of balsamic glaze adds sweetness without refined sugar.)
How do I adjust the spice level?
Too mild? Add a pinch of red pepper flakes with the mustard seeds. Too bold? Skip the seeds entirely—the relish will still taste amazing. For kids, I often use just ¼ teaspoon mustard powder instead of seeds for subtle flavor.
Why is my relish too watery?
Two fixes: Either simmer it longer (5 more minutes) to evaporate liquid, or drain excess juice with a spoon before storing. Next time, chop onions finer—big pieces release more water!
Can I use red onions instead?
Absolutely! They’re prettier but slightly sharper. I like to add an extra teaspoon of sugar to balance their bite. Pro tip: They’ll dye the relish pinkish—great for holiday cheese boards!
Nutritional Information
Okay, let’s be real—this relish is so delicious, you’re probably not thinking about nutrition! But just in case you’re curious (or counting), here’s the lowdown on what’s in that golden spoonful. Keep in mind, these are estimates—your exact numbers might dance around a bit depending on your onion size or vinegar brand. But hey, at least we’re being honest!
- Serving size: 1 tablespoon (the perfect burger-topping amount)
- Calories: ~25
- Sugar: 3g (mostly from those caramelized onions and brown sugar)
- Sodium: 50mg (a light sprinkle from our salt)
- Fat: 1g (thank you, heart-healthy olive oil)
- Carbs: 4g
Now, before anyone panics about the sugar—remember, we’re talking tablespoons here, not cups! And honestly? Compared to store-bought relishes packed with corn syrup, this homemade version is practically a health food. (Okay, maybe not, but at least you can pronounce every ingredient!) The onions bring fiber, the apple cider vinegar has gut-friendly properties, and there’s zero weird preservatives. So go ahead—lick that spoon guilt-free! You can find more recipes like this on Pinterest.
Print25-Minute Onion Relish Recipe – Bold Flavor in Every Bite
A tangy and sweet onion relish perfect for burgers, hot dogs, or sandwiches.
- Prep Time: 10 mins
- Cook Time: 15 mins
- Total Time: 25 mins
- Yield: 1 cup 1x
- Category: Condiment
- Method: Stovetop
- Cuisine: American
- Diet: Vegetarian
Ingredients
- 2 large onions, finely chopped
- 2 tablespoons olive oil
- 2 tablespoons brown sugar
- 1/4 cup apple cider vinegar
- 1 teaspoon mustard seeds
- 1/2 teaspoon salt
- 1/4 teaspoon black pepper
Instructions
- Heat olive oil in a pan over medium heat.
- Add onions and sauté until soft and translucent.
- Stir in brown sugar, apple cider vinegar, mustard seeds, salt, and black pepper.
- Cook for 10-15 minutes until the mixture thickens.
- Let cool before serving.
Notes
- Store in an airtight container in the fridge for up to a week.
- Use as a topping for grilled meats or cheese platters.
Nutrition
- Serving Size: 1 tablespoon
- Calories: 25
- Sugar: 3g
- Sodium: 50mg
- Fat: 1g
- Saturated Fat: 0g
- Unsaturated Fat: 1g
- Trans Fat: 0g
- Carbohydrates: 4g
- Fiber: 0g
- Protein: 0g
- Cholesterol: 0mg