
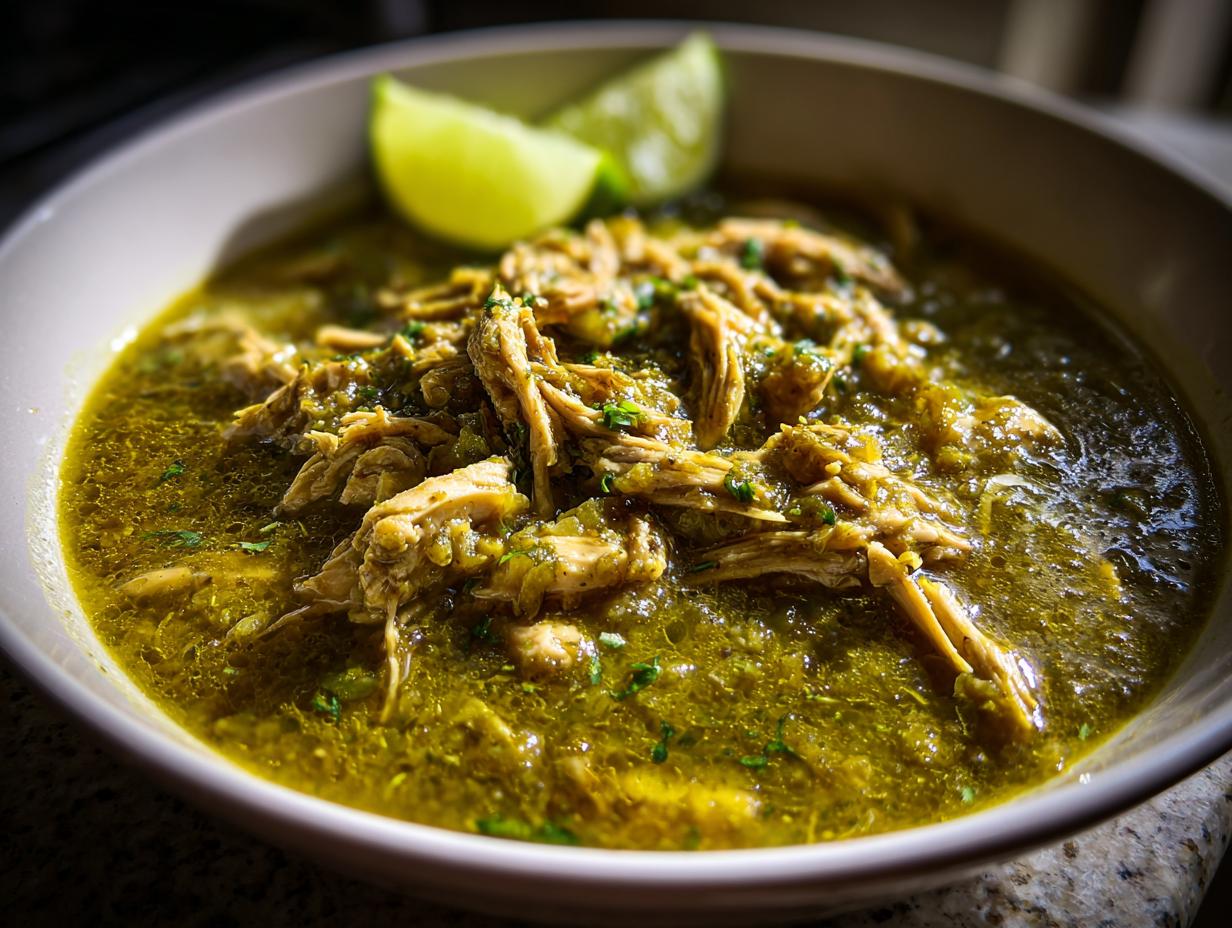
There’s something magical about opening a jar of homemade chicken chili verde months after you’ve made it—the bright tang of tomatillos, the smoky depth of roasted poblanos, and tender shreds of chicken all ready to warm you up on a chilly night. I’ve been canning this recipe for years, ever since my abuela taught me her secrets for preserving the vibrant flavors of Mexican cuisine. Canning chicken chili verde became my go-to solution for quick, flavorful meals during busy weeks.
What makes this recipe perfect for preserving? That verde sauce—packed with roasted tomatillos and peppers—holds up beautifully in jars, keeping its fresh, zesty character even after months in the pantry. The chicken stays moist and absorbs all those wonderful spices. Trust me, once you taste this straight from the jar over steaming rice or tucked into warm tortillas, you’ll understand why I always keep a few pints stocked!
Why You’ll Love Canning Chicken Chili Verde
This isn’t just another canned meal—it’s a flavor explosion waiting in your pantry! Here’s why you’ll be obsessed:
- Bold, fresh taste year-round: Roasted tomatillos and charred peppers keep their zing even after months in jars—no sad, soggy flavors here!
- Meal prep magic: When you’re too tired to cook, pop open a jar—dinner’s ready in minutes (just add tortillas or rice).
- Spice it your way: Love heat? Keep the jalapeño seeds. Prefer mild? Swap poblanos for bell peppers. The recipe bends to your taste.
- Pantry superhero: No freezer space needed—these shelf-stable jars mean emergency meals are always on hand.
Seriously, it’s like having a Mexican abuela’s cooking on standby 24/7!
Ingredients for Canning Chicken Chili Verde
Gathering the right ingredients is half the battle with canning—but trust me, these fresh flavors are worth the trip to the mercado! Here’s what you’ll need:
- 2 lbs boneless, skinless chicken thighs (trimmed and cut into 2-inch chunks—thighs stay juicier than breasts when canned)
- 1 lb tomatillos (husked, rinsed, and quartered—look for firm, bright green ones)
- 2 poblano peppers (these mild chiles add smoky depth)
- 1 jalapeño pepper (seeds in for heat, seeds out for milder flavor)
- 1 large yellow onion (chopped—about 2 cups)
- 4 garlic cloves (minced—or 1 tbsp pre-minced)
- 1 tsp ground cumin
- 1 tsp dried oregano (Mexican variety if you can find it)
- 1 tsp kosher salt
- ½ tsp black pepper
- 2 cups chicken broth (low-sodium works best for canning)
- ¼ cup fresh cilantro (chopped—stems and all for maximum flavor)
- 1 tbsp lime juice (fresh squeezed—about half a lime)
Ingredient Notes & Substitutions
No poblanos at your market? No sweat! Bell peppers work in a pinch, though they’ll be sweeter. Chicken breasts can sub for thighs, but they’ll dry out faster in the jars—if you go this route, add an extra ½ cup broth. For spice wimps (no judgment!), ditch the jalapeño entirely. And fair warning: always wear gloves when handling hot peppers—I learned that lesson the hard way after rubbing my eyes mid-recipe (ouch!).
Equipment Needed for Canning Chicken Chili Verde
Before we dive into roasting those tomatillos, let’s talk gear! Canning chicken chili verde requires a few key tools—some you might already have, others worth investing in if you plan to preserve often. Here’s my must-have list:
- Pressure canner (mandatory for safe canning—a water bath won’t cut it with chicken!)
- Pint or quart glass jars with new lids and rings
- Jar lifter (those jars get HOT)
- Blender or food processor for that smooth verde sauce
- Rubber gloves (trust me, you’ll thank me when handling jalapeños)
- Non-reactive pot (stainless steel works best with acidic tomatillos)
That’s it! With these basics, you’re ready to can like a pro. Just promise me you’ll double-check your canner’s manual before starting—safety first, amigos!
How to Make Chicken Chili Verde for Canning
Alright, let’s get cooking! This process is easier than you think—just follow these steps, and you’ll have jars of golden-green goodness ready for your pantry in no time. I’ll walk you through each phase, from roasting those veggies to sealing your jars with that satisfying “pop!”
Roasting the Vegetables
First, fire up your broiler to high—we’re going for serious char here! Line a baking sheet with foil (trust me, cleanup’s a breeze this way). Spread out your tomatillos, poblanos, and jalapeño in a single layer. Broil for 5-7 minutes until blackened spots appear, then flip everything and broil another 5 minutes. You want that smoky, blistered look—it means maximum flavor!
Now, the tricky part: wear those gloves and peel the peppers. The skins should slip right off after they’ve cooled in a covered bowl for 10 minutes. Don’t stress about getting every last bit—a few charred flecks add character. Just remove the big pieces and the jalapeño seeds if you’re heat-shy.
Blending the Sauce
Time to make magic! Toss the roasted veggies (including any juices from the bowl) into your blender. Pulse until you get a texture you love—I go for mostly smooth with tiny flecks of pepper for texture. Scrape down the sides halfway through to catch any stubborn chunks. This vibrant green puree is the heart of your chili verde, so taste it and do a little happy dance—it’s that good!
Cooking the Chicken Chili Verde
Grab your biggest pot and heat a glug of oil over medium. Sauté the onions until they’re soft and golden, about 5 minutes, then add the garlic (just 30 seconds—don’t let it burn!). Now, in goes the chicken, cumin, oregano, salt, and pepper. Stir to coat everything in spices, then pour in that gorgeous green sauce and chicken broth.
Bring it to a gentle simmer, cover, and let it bubble away for 25-30 minutes until the chicken shreds easily with a fork. Fish out the chicken pieces, shred them (two forks work great), then stir them back in with the cilantro and lime juice. That citrusy zing at the end? Chef’s kiss!
Canning the Chili Verde
Here’s where we make this meal last! While the chili simmers, sterilize your jars in boiling water or the dishwasher. Ladle the hot chili into hot jars, leaving 1-inch headspace (critical for safe canning!). Wipe the rims with a clean damp cloth, seat the lids, and screw on the rings fingertip-tight.
Process pints for 75 minutes or quarts for 90 minutes in your pressure canner at 10 psi (adjust for altitude if needed). Let the canner depressurize naturally—no peeking! When you hear those lids pop, you’ve just bottled up homemade deliciousness that’ll keep for a year. Not bad for an afternoon’s work, eh?
Tips for Perfect Canning Chicken Chili Verde
After years of tweaking this recipe, I’ve picked up some game-changing tricks! Always deglaze your pot after sautéing the onions—a splash of broth scrapes up those flavorful browned bits. Taste your chili before canning (adjust salt or lime if needed), but remember—spices intensify over time, so go slightly milder than you think. And here’s my golden rule: wipe those jar rims religiously with a vinegar-dampened cloth—one stray cilantro leaf can ruin your seal. Oh, and toss in an extra lime wedge to each jar if you love bright flavors—it’s my secret touch!
Storing and Reheating Canned Chicken Chili Verde
Here’s the beautiful part—all that work means you’ve got ready-to-eat meals waiting whenever you need them! Your canned chicken chili verde will stay perfect in a cool, dark pantry for up to a full year. Once opened, treat it like any cooked food—refrigerate and use within 4 days. When hunger strikes, just dump a jar into a pot with a splash of broth (or water) and warm it gently on the stove, stirring occasionally. Microwave works too—just cover and zap in 1-minute bursts. The verde sauce thickens as it sits, so don’t panic if it looks a little gel-like at first—that’s normal! A quick stir over heat brings back that saucy goodness.
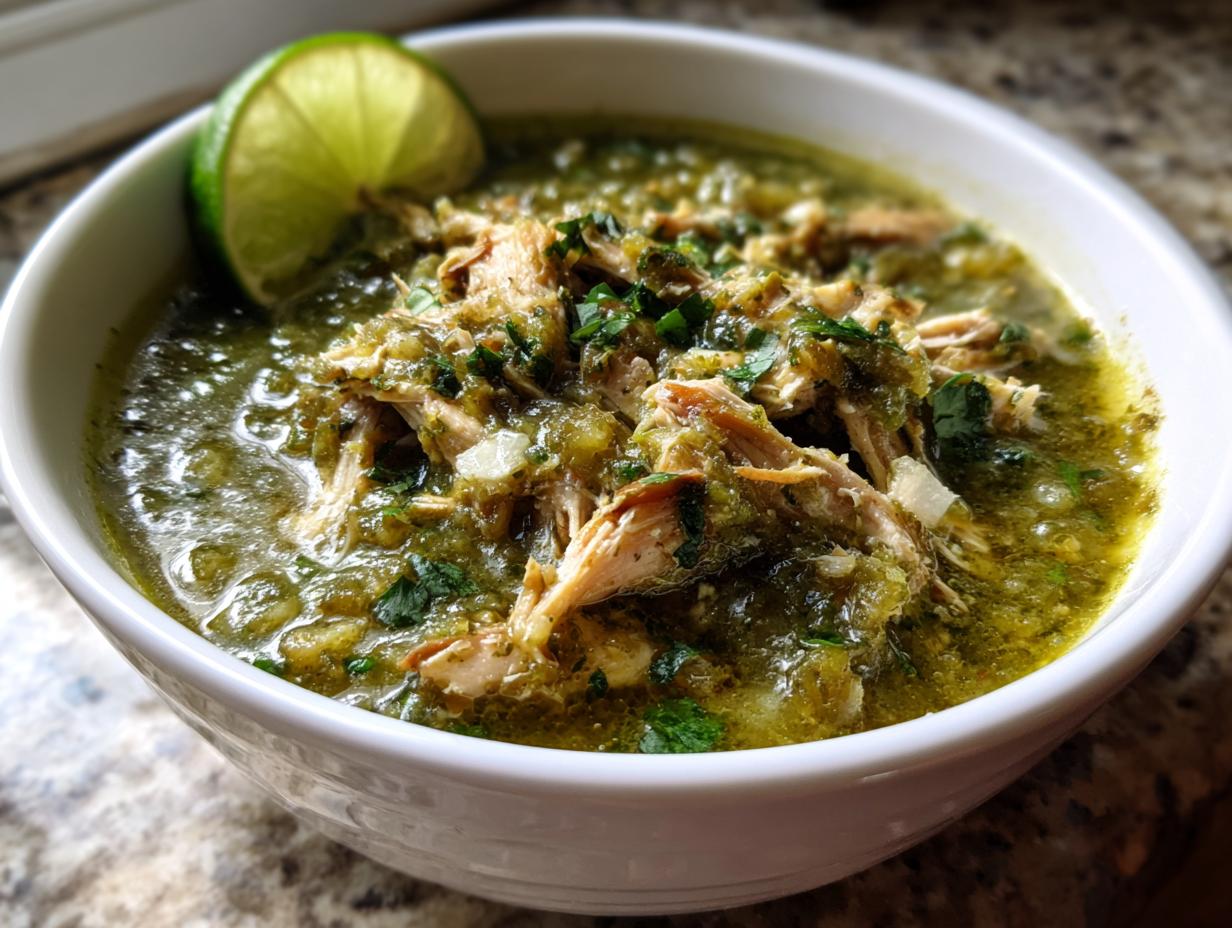
Serving Suggestions for Chicken Chili Verde
Oh, the possibilities! This chili verde shines brightest when you dress it up a little. My absolute favorite? Piled into warm corn tortillas with diced avocado and a dollop of crema. For heartier meals, serve over fluffy cilantro-lime rice—the grains soak up that tangy verde sauce beautifully. Feeling fancy? Top with crumbled queso fresco, extra cilantro, and a squeeze of fresh lime. And don’t forget the warm flour tortillas on the side for scooping up every last bit of that delicious sauce!
Nutrition Information
Here’s the scoop on what’s in each delicious serving—but remember, these are just estimates! One cup of this chicken chili verde packs about 220 calories, with 24g protein from that juicy chicken and 8g fat (mostly the good kind!). You’re also getting 3g fiber from all those veggies—so it’s tasty AND wholesome. Exact numbers might vary based on your ingredient sizes, but hey, that’s the beauty of homemade!
Frequently Asked Questions About Canning Chicken Chili Verde
I get it—canning can feel intimidating at first! Here are answers to the questions I hear most often from fellow home cooks diving into this recipe:
Can I freeze instead of canning? Absolutely! Just skip the pressure canner and freeze cooled chili in airtight containers for up to 3 months. Thaw overnight in the fridge before reheating. (P.S. The texture changes slightly, but it’s still delicious!)
How do I tone down the heat? Easy fixes: omit the jalapeño entirely, use bell peppers instead of poblanos, or remove ALL seeds/membranes from hot peppers before roasting. Taste your sauce before adding chicken—you can always stir in a spoonful of honey to balance spiciness.
Can I use store-bought verde sauce? While homemade tastes fresher, a 16oz jar of quality salsa verde works in a pinch! Reduce broth by ½ cup since pre-made sauce is thicker. Just know the flavor won’t have that same roasted depth.
Why pressure canning? Isn’t water bath safe? Chicken requires the high heat of pressure canning to destroy bacteria—water baths can’t reach the needed temperature. Never gamble with meat safety!
Share Your Canning Chicken Chili Verde Experience
Did you make this recipe? I’d love to hear how it turned out! Snap a pic of those gorgeous green jars and tag me—I live for your kitchen wins. And if you’ve got your own twist (extra garlic? smoked peppers?), spill the beans in the comments below! Share your creations.
Print5-Star Canning Chicken Chili Verde for Bold Flavor All Year
Make flavorful chicken chili verde at home with this simple recipe. Perfect for canning and storing.
- Prep Time: 20 mins
- Cook Time: 40 mins
- Total Time: 1 hr
- Yield: 4 pints 1x
- Category: Main Dish
- Method: Pressure Canning
- Cuisine: Mexican
- Diet: Low Fat
Ingredients
- 2 lbs boneless, skinless chicken thighs
- 1 lb tomatillos, husked and rinsed
- 2 poblano peppers
- 1 jalapeño pepper
- 1 onion, chopped
- 4 cloves garlic, minced
- 1 tsp cumin
- 1 tsp oregano
- 1 tsp salt
- 1/2 tsp black pepper
- 2 cups chicken broth
- 1/4 cup fresh cilantro, chopped
- 1 tbsp lime juice
Instructions
- Roast tomatillos, poblano, and jalapeño peppers under broiler until charred.
- Remove skins from peppers and blend with tomatillos.
- Sauté onion and garlic until soft.
- Add chicken, spices, and blended sauce to the pot.
- Pour in chicken broth and simmer until chicken is cooked.
- Shred chicken and return to pot.
- Stir in cilantro and lime juice.
- Ladle into sterilized jars and process in a pressure canner.
Notes
- Use gloves when handling hot peppers.
- Adjust spice level by reducing jalapeño.
- Store canned jars in a cool, dark place.
Nutrition
- Serving Size: 1 cup
- Calories: 220
- Sugar: 4g
- Sodium: 480mg
- Fat: 8g
- Saturated Fat: 2g
- Unsaturated Fat: 5g
- Trans Fat: 0g
- Carbohydrates: 12g
- Fiber: 3g
- Protein: 24g
- Cholesterol: 80mg