

Oh my gosh, let me tell you about the first time I made garlic dill pickles at home – I was hooked after one bite! That crisp crunch, the tangy garlic punch, and that fresh dill aroma… way better than anything from a store. And here’s the best part: they’re ridiculously easy to make. No fancy equipment, no weeks of fermenting – just a quick brine and some patience while they chill in the fridge. I love tossing these on burgers, chopping them into tuna salad, or just snacking straight from the jar (don’t judge me!). Once you taste homemade, you’ll never go back to those sad, soggy store-bought pickles again.

Why You’ll Love These Garlic Dill Pickles
Trust me, these pickles are about to become your new obsession. Here’s why:
- No waiting around – skip the weeks-long fermenting process! These fridge pickles are ready in just 24 hours.
- Crunch that lasts – the quick-brine method keeps cucumbers crispier than store-bought versions.
- Your pickle, your rules – add extra garlic, throw in some chili flakes, or swap dill seeds for fresh sprigs.
- Secret flavor booster – that garlicky brine makes an amazing marinade or salad dressing base.
Garlic Dill Pickles Ingredients
Gather these simple ingredients – I promise you probably have most already! Just be picky (pun intended) about a few key items:
- 4 cups water (filtered is best if your tap water has strong flavors)
- 2 cups white vinegar (5% acidity) – don’t use fancy vinegars, plain white does the job perfectly
- 2 tbsp kosher salt – not table salt (it makes the brine too salty!)
- 1 tbsp sugar – just enough to balance without tasting sweet
- 4 cloves garlic, thinly sliced – fresh is non-negotiable here
- 1 tbsp dill seeds – or 2 fresh dill sprigs if you prefer
- 1 tsp black peppercorns – whole, not ground
- 1 lb small cucumbers (about 4-5), washed and sliced ¼-inch thick – look for firm pickling cukes like Kirby
How to Make Garlic Dill Pickles
Ready to turn those crisp cucumbers into garlic dill pickle magic? Here’s my foolproof method – I’ve made this recipe dozens of times, and these little tricks guarantee perfect results every batch!
Step 1: Prepare the Brine
Grab a medium saucepan and combine water, vinegar, salt, and sugar. Medium heat works best here – you want it bubbling gently, not boiling like crazy. Stir until every grain of salt and sugar completely dissolves (about 2-3 minutes). This is crucial – undissolved salt means uneven flavor!
Step 2: Pack the Jars
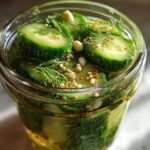
While the brine heats, layer your clean jar with the good stuff: garlic slices first (they’ll flavor from the bottom up), then dill seeds and peppercorns. Next, tightly pack in those cucumber slices – really wedge them in there! Tuck fresh dill sprigs around the edges like little green flavor bombs.
Step 3: Pour and Seal
Careful now – that brine is hot! Slowly pour it over the cucumbers, leaving about ½ inch of space at the top (trust me, they need room to “breathe”). Immediately screw on the lid, then let the jar sit on your counter until completely cool before refrigerating. The hardest part? Waiting 24 hours before digging in!
Garlic Dill Pickles Tips for Success
After making countless batches, here are my hard-earned secrets for perfect garlic dill pickles every time:
- Pickle-perfect cucumbers – Kirby or Persian cukes stay crisper than regular salad varieties (and yes, size matters – smaller is better!).
- Jar hygiene 101 – run your jars through the dishwasher or boil them for 10 minutes to prevent funky bacteria.
- Taste as you go – start with 4 garlic cloves, then add more next batch if you’re a garlic fiend like me!
- Patience pays off – resist sneaking tastes before 24 hours – that’s when the magic really happens.
Garlic Dill Pickles Variations
Once you’ve mastered the basic recipe, try these fun twists to make these pickles your own:
- Spicy kick – add ½ tsp red pepper flakes or a sliced jalapeño for heat that builds with each bite
- Herb garden special – swap dill seeds for 3-4 fresh dill sprigs plus a bay leaf for extra aroma
- Sweet & savory – mix in 1 tsp mustard seeds and increase sugar to 2 tbsp for a bread-and-butter pickle vibe
Serving Suggestions for Garlic Dill Pickles
Oh, the possibilities! These garlic dill pickles shine everywhere – I love them piled high on juicy burgers, chopped into potato salad, or alongside a fancy charcuterie board. But let’s be real – my favorite way is straight from the jar while standing at the fridge!
Garlic Dill Pickles Storage & Reheating
These pickles keep their crunch for up to a month in the fridge – if they last that long! No reheating needed (who warms pickles anyway?), just grab ’em cold for maximum crispness.
Garlic Dill Pickles Nutrition Information
One crisp pickle clocks in at just 15 calories! Keep in mind these are estimates – your exact amounts may vary slightly based on cucumber size and how much brine you consume (I won’t tell if you drink it!).
Garlic Dill Pickles FAQs
Can I use dried dill instead of seeds?
Absolutely! Use 1 tablespoon dried dill weed in place of dill seeds – the flavor will be slightly milder but still delicious. For maximum flavor, though, fresh dill sprigs are my top choice.
How long until the pickles are ready to eat?
Technically you could sneak a taste after 12 hours, but wait the full 24 hours for that perfect garlic-dill balance. The flavor actually gets better over time – if you can resist eating them all immediately!
Can I double this recipe?
You bet! I often make a double batch in two separate jars (don’t overfill one jar). The brine ratios stay the same – just multiply everything by two. More pickles equals more happiness in my book!
Did you make these garlic dill pickles? I’d love to hear how they turned out – tag me or leave a comment below! Check out more recipes on Pinterest.
PrintGarlic Dill Pickles Recipe: 24 Hours to Crunchy Perfection
Crisp and tangy garlic dill pickles with a fresh herb kick. Perfect for snacking, sandwiches, or burgers.
- Prep Time: 10 minutes
- Cook Time: 5 minutes
- Total Time: 15 minutes + 24 hours chilling
- Yield: 1 quart 1x
- Category: Condiment
- Method: Pickling
- Cuisine: American
- Diet: Vegetarian
Ingredients
- 4 cups water
- 2 cups white vinegar
- 2 tbsp salt
- 1 tbsp sugar
- 4 cloves garlic, sliced
- 1 tbsp dill seeds
- 1 tsp black peppercorns
- 1 lb small cucumbers, sliced or whole
- 2 sprigs fresh dill
Instructions
- Combine water, vinegar, salt, and sugar in a pot. Bring to a boil.
- Place garlic, dill seeds, and peppercorns in a clean jar.
- Pack cucumbers and fresh dill into the jar.
- Pour hot brine over the cucumbers, leaving ½ inch headspace.
- Seal the jar and let cool to room temperature.
- Refrigerate for at least 24 hours before serving.
Notes
- Use fresh, firm cucumbers for best texture.
- Adjust garlic and dill to taste.
- Pickles keep for up to 1 month in the fridge.
Nutrition
- Serving Size: 1 pickle
- Calories: 15
- Sugar: 1g
- Sodium: 290mg
- Fat: 0g
- Saturated Fat: 0g
- Unsaturated Fat: 0g
- Trans Fat: 0g
- Carbohydrates: 3g
- Fiber: 0g
- Protein: 0g
- Cholesterol: 0mg