

You know that moment when you take a bite of something so tangy and crisp it makes your taste buds wake right up? That’s exactly what these pickled Brussels sprouts do—they’re the crunchy, zesty side dish you didn’t know you needed. I first fell in love with them at a farmers’ market years ago, tucked between jars of pickles and sauerkraut. One bite, and I was hooked. Now, I make them at home all the time because they’re ridiculously easy and add a punch of flavor to everything from salads to sandwiches. Trust me, once you try these, you’ll want to keep a jar in your fridge at all times.
Why You’ll Love These Pickled Brussels Sprouts
Listen, these aren’t your average side dish – these pickled Brussels sprouts are little flavor bombs that’ll change the way you snack forever. Here’s why they’ve become my go-to:
- Crazy easy to make – We’re talking 15 minutes of active time, then just let the fridge do the rest of the work
- That perfect crunch – Unlike mushy cooked sprouts, these stay satisfyingly crisp even after pickling
- Flavor that grows on you – The tang mellows beautifully after 24 hours, developing this addictive sweet-sour-spicy balance
- Endless ways to use them – Toss in salads, pile on sandwiches, or just snack straight from the jar (no judgment)
- Fridge-friendly – They keep for weeks, always ready to jazz up a boring meal
Honestly? The hardest part is waiting that first day while they pickle. After that first crisp, vinegary bite, you’ll understand why I’m obsessed.
Ingredients for Pickled Brussels Sprouts
Okay, let’s gather our flavor makers! Here’s what you’ll need for the most addictive pickled Brussels sprouts you’ve ever tasted (measurements matter, so follow these exactly):
- 1 pound Brussels sprouts – trimmed of any sad outer leaves and cut in half (makes ’em pickle faster)
- 1 cup white vinegar – the tangy backbone of our pickling liquid
- 1 cup water – to balance that vinegar punch
- 1 tablespoon salt – kosher or sea salt works best
- 1 tablespoon sugar – just enough to round out the flavors
- 1 teaspoon black peppercorns – whole, not ground (they’ll float prettily in the jar)
- 2 cloves garlic – smashed with the side of your knife (this releases all the good stuff)
- 1 teaspoon red pepper flakes – optional, but gives the best little kick
See? Nothing fancy – just good, simple ingredients that transform into something magical together. Now let’s make some magic happen!
How to Make Pickled Brussels Sprouts
Okay, let’s get these little green flavor bombs ready! The process is so simple you’ll wonder why you haven’t been pickling everything in sight. Just follow these steps, and you’ll have crunchy, tangy sprouts in no time (well, after the waiting period – but trust me, it’s worth it).
Step 1: Prep the Brussels Sprouts
First things first – grab those sprouts and give them a good rinse under cool water. Now, here’s my trick: trim just the very bottom stem (don’t go crazy) and peel off any loose or yellow outer leaves – they tend to get mushy. Cut each sprout in half from top to bottom – this helps them soak up that delicious pickling liquid evenly. Keep them about the same size so they pickle at the same rate. No one wants some overly sour and some barely flavored, right?
Step 2: Make the Pickling Liquid
This is where the magic happens! Grab a medium saucepan and combine the vinegar, water, salt, sugar, peppercorns, smashed garlic, and red pepper flakes if you’re using them. Crank the heat to medium-high and bring it to a proper boil – you’ll see big bubbles breaking the surface. Stir occasionally to make sure the sugar and salt completely dissolve (about 2 minutes). Once boiling, reduce the heat to a gentle simmer – just little bubbles around the edges – and add your prepped sprouts. Let them hang out for exactly 2 minutes – we’re just taking the raw edge off, not cooking them to mush!
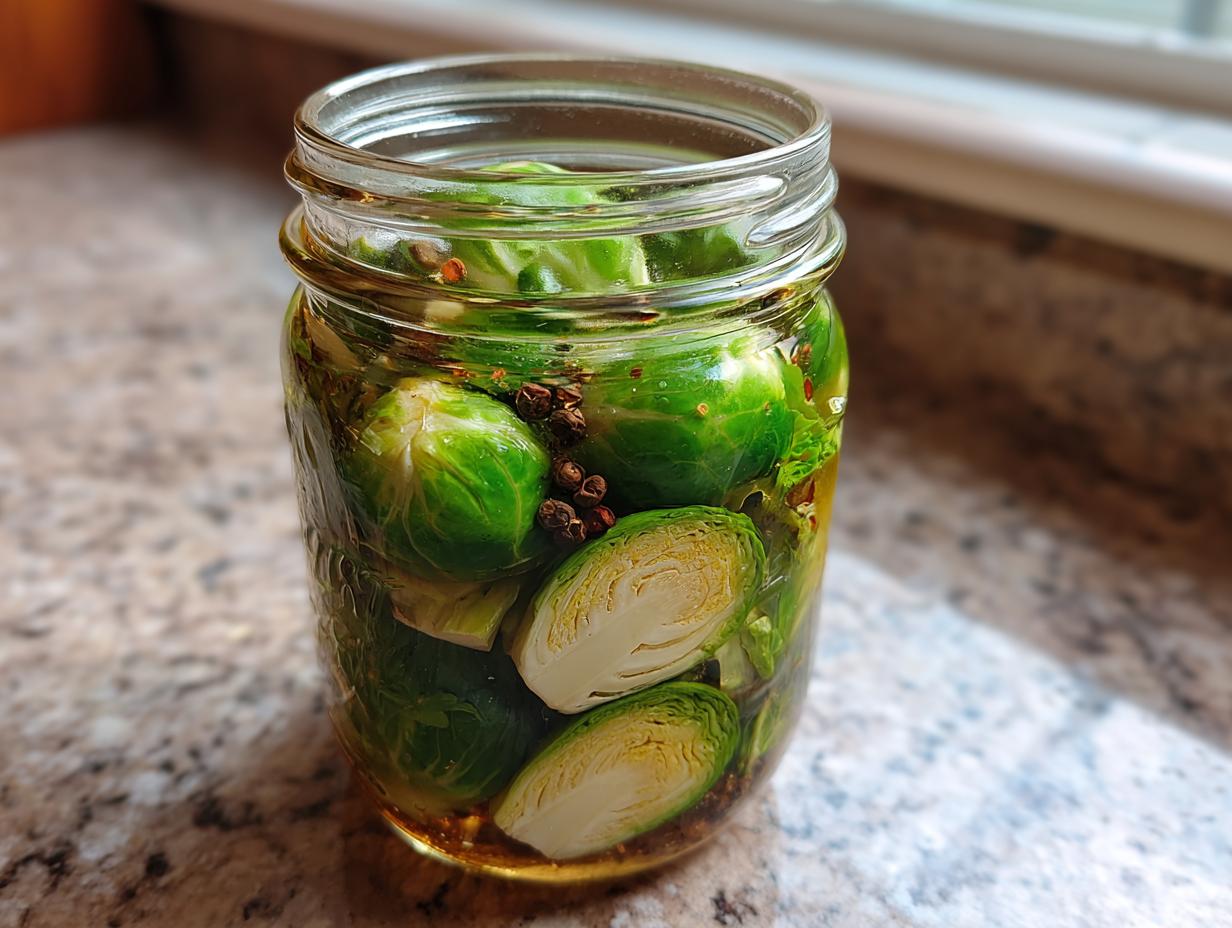
Step 3: Jar and Chill
Here comes the hard part – waiting! Carefully pour the hot sprouts and liquid into a clean quart-sized jar (I just run mine under hot water to sterilize). Make sure the sprouts are completely submerged – you can use a clean spoon to press them down if needed. Screw on the lid (not too tight – you want gases to escape), and let it cool on the counter until it’s room temperature. Now the hardest part – pop it in the fridge and try to forget about it for at least 24 hours. I know, I know – but that waiting time is crucial for developing that perfect tangy flavor and crisp texture. The longer they sit, the better they get!
Tips for Perfect Pickled Brussels Sprouts
After making dozens of batches (okay, maybe hundreds), I’ve picked up some tricks that’ll take your pickled Brussels sprouts from good to “can’t-stop-eating-them” great:
- Spice it your way – Start with 1 teaspoon red pepper flakes, then adjust next batch. Too mild? Double it! Too hot? Try just 1/2 teaspoon.
- Fresh herb magic – Toss in a few sprigs of fresh dill or thyme when jarring for an herby twist that smells amazing.
- Jar matters – Wide-mouth jars make packing sprouts easier. Mason jars work perfectly – just check for chips first!
- Patience pays – Seriously, wait the full 24 hours before tasting. The flavor transformation is wild.
- Keep ’em submerged – If sprouts float, place a small glass weight or folded cabbage leaf on top to keep them under the liquid.
My biggest tip? Make two jars – one to eat now, one to forget in the fridge for a week (they get even better!).
Variations for Pickled Brussels Sprouts
Want to mix things up? Here are my favorite easy twists on the classic recipe:
- Vinegar swap – Try apple cider vinegar for a slightly fruity tang or rice vinegar for milder acidity
- Sweet alternatives – Honey or maple syrup instead of sugar adds depth (use same amount)
- Spice blends – Swap peppercorns for mustard seeds or add a cinnamon stick for warmth
- Quick-pickled – Slice sprouts thin instead of halving for faster flavor absorption (ready in 12 hours!)
The beauty? You can’t mess it up – each version becomes your new favorite.
Serving Suggestions for Pickled Brussels Sprouts
Oh, where don’t these tangy little gems belong? My favorite way? Straight from the jar with a fork when no one’s looking. But when I’m being civilized, I love them piled on a grilled cheese sandwich (trust me), tossed into potato salad for crunch, or alongside roast chicken to cut through the richness. They’re killer on a charcuterie board too – that vinegar bite balances creamy cheeses perfectly. Last night I chopped some into my tuna salad and wow, game changer!
Storage & Reheating
Here’s the beautiful part – these pickled Brussels sprouts just get better as they sit! Keep them tightly sealed in the fridge (that brine works magic), and they’ll stay crisp and flavorful for up to 2 weeks. No reheating needed – in fact, they’re best served cold right from the jar. I’ve never actually had a batch last the full two weeks though… they tend to disappear long before that in my house!
Nutritional Information for Pickled Brussels Sprouts
Here’s the scoop on what you’re eating (and why you won’t feel guilty going back for seconds): Each 1/2 cup serving packs just 30 calories, 2g fiber, and 2g protein. That vinegar kick comes with practically no fat! Of course, these numbers can vary slightly depending on your exact ingredients, but one thing’s certain – these sprouts are as good for you as they are delicious.
Frequently Asked Questions
Can I use frozen Brussels sprouts for pickling?
Oh honey, I tried this once in a pinch – big mistake! Frozen sprouts turn mushy when pickled. Fresh is absolutely the way to go for that perfect crunch. If your sprouts seem dry, soak them in ice water for 10 minutes before prepping to plump them up.
How long do pickled Brussels sprouts last in the fridge?
Properly stored in their brine with a tight lid, they’ll stay crisp and flavorful for about 2 weeks. Mine never last that long though – between snacking and adding them to meals, the jar’s usually empty within a week!
Can I make these without sugar?
You can skip it if you must, but that tablespoon really balances the flavors. For a sugar-free version, try a natural sweetener like monk fruit or stevia – just use half the amount since they’re sweeter.
Why are my pickled sprouts too soft?
Two likely culprits: either you simmered them too long (stick to exactly 2 minutes!), or your jar wasn’t properly sealed. Also make sure your vinegar is at least 5% acidity – weaker vinegar won’t preserve properly.
Got your own twist on this recipe? I’d love to hear how you make it your own – drop your variations in the comments!
PrintTangy 24-Hour Pickled Brussels Sprouts That Addict Your Taste Buds
A tangy and crunchy side dish made with fresh Brussels sprouts.
- Prep Time: 10 minutes
- Cook Time: 5 minutes
- Total Time: 15 minutes plus 24 hours chilling
- Yield: 1 quart 1x
- Category: Side Dish
- Method: Pickling
- Cuisine: American
- Diet: Vegetarian
Ingredients
- 1 pound Brussels sprouts, trimmed and halved
- 1 cup white vinegar
- 1 cup water
- 1 tablespoon salt
- 1 tablespoon sugar
- 1 teaspoon black peppercorns
- 2 cloves garlic, crushed
- 1 teaspoon red pepper flakes (optional)
Instructions
- Wash and trim the Brussels sprouts, then cut them in half.
- In a saucepan, combine vinegar, water, salt, sugar, peppercorns, garlic, and red pepper flakes. Bring to a boil.
- Add the Brussels sprouts and simmer for 2 minutes.
- Remove from heat and let cool slightly.
- Transfer the Brussels sprouts and liquid to a clean jar.
- Seal the jar and refrigerate for at least 24 hours before serving.
Notes
- Store in the refrigerator for up to 2 weeks.
- For extra flavor, add fresh herbs like dill or thyme.
- Adjust the level of spice by adding more or less red pepper flakes.
Nutrition
- Serving Size: 1/2 cup
- Calories: 30
- Sugar: 2g
- Sodium: 300mg
- Fat: 0g
- Saturated Fat: 0g
- Unsaturated Fat: 0g
- Trans Fat: 0g
- Carbohydrates: 6g
- Fiber: 2g
- Protein: 2g
- Cholesterol: 0mg