
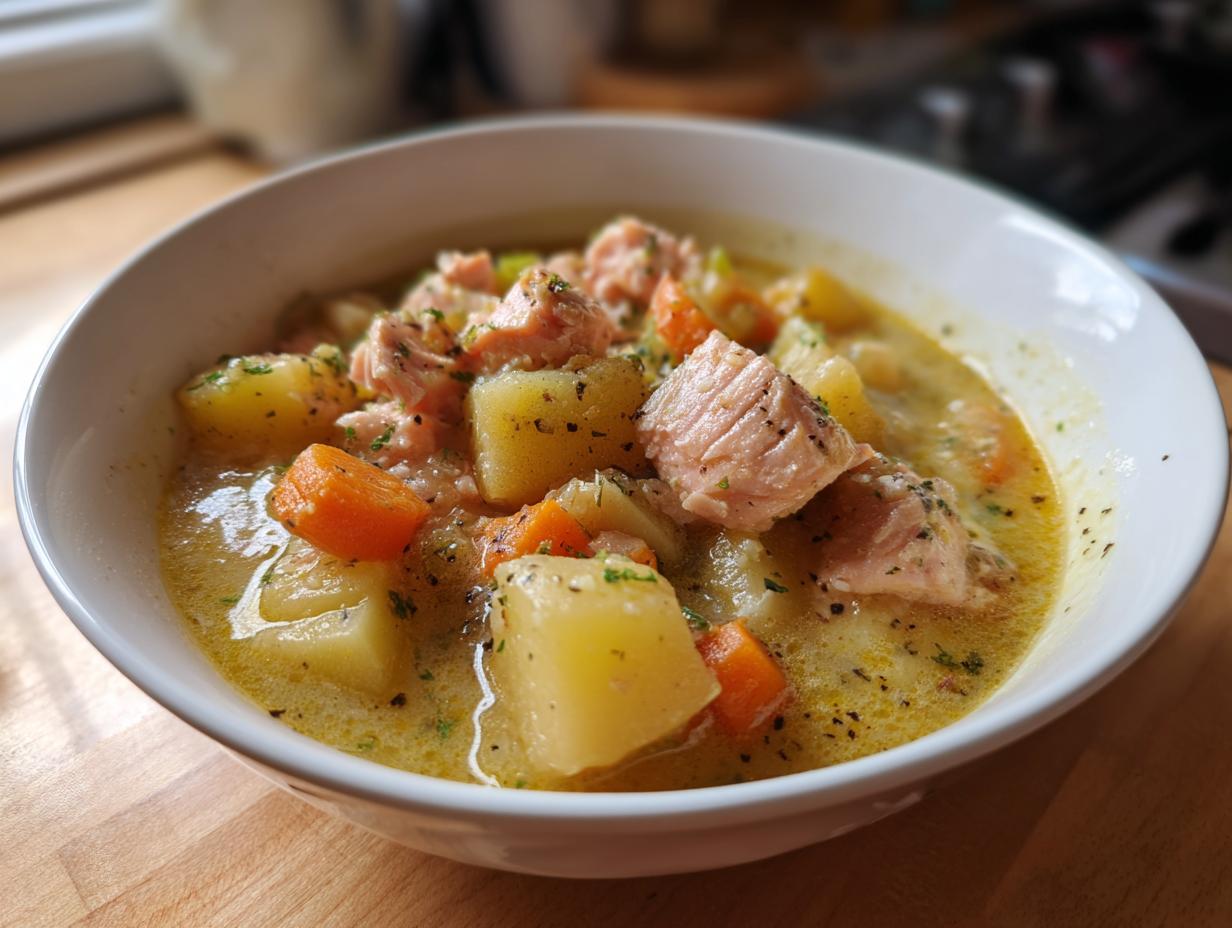
You know those gloomy fall afternoons when all you want is a steaming bowl of homemade chowder? That’s exactly when I pull out my jars of salmon chowder base – my grandma’s secret weapon for quick, hearty meals. She’d spend September canning batch after batch, filling the pantry with these golden jars that carried us through winter. Now I understand her wisdom!
This canning salmon chowder base recipe gives you that same convenience with rich, layered flavors ready whenever you need them. What I love most? You control exactly what goes in – no mystery ingredients or excess salt. Just wholesome salmon, fresh veggies, and aromatic herbs waiting to transform into dinner with a splash of cream. Safety first though – we’ll stick to tested pressure canning methods so every jar stays shelf-stable and delicious.

Why You’ll Love This Canning Salmon Chowder Base
This recipe has become my go-to for so many reasons:
- Saves busy weeknights – Just grab a jar and dinner’s halfway done
- Tastes fresh as the day you made it – The pressure canning locks in all that rich salmon flavor
- Endless customization – Add cream, herbs, or extra veggies when reheating to suit your mood
- Pantry powerhouse – Shelf-stable protein and veggies ready whenever you need them
- Waste-free – Preserve salmon when it’s in season or on sale
Trust me, once you taste that first spoonful of homemade chowder from your own pantry, you’ll be hooked!
Ingredients for Canning Salmon Chowder Base
Gathering the right ingredients is what makes this salmon chowder base so special – every component works together to create that perfect, rich flavor. Here’s what you’ll need:
- 2 lbs salmon fillets – skin removed and cut into 1-inch cubes (fresh is best, but thawed frozen works too!)
- 4 cups fish or vegetable stock – homemade gives the best flavor, but low-sodium store-bought works in a pinch
- 2 cups potatoes – peeled and diced (Yukon Golds hold up beautifully during canning)
- 1 cup carrots – diced small so they soften just right
- 1 cup celery – diced (don’t skip this – it adds such a nice background flavor)
- 1 cup onions – diced (I prefer yellow for their sweetness)
- 2 cloves garlic – minced (fresh only, please!)
- 1 tbsp lemon juice – brightens all the flavors and helps preserve color
- 1 tsp salt – I use sea salt, but any non-iodized salt works
- 1/2 tsp black pepper – freshly ground if you have it
- 1/2 tsp dried thyme – the perfect herb pairing with fish
- 1 bay leaf – our secret flavor booster (just remember to remove it later!)
See how simple that is? Just a handful of real ingredients that you probably already have in your kitchen!
Equipment Needed for Canning Salmon Chowder Base
You don’t need fancy gadgets to can this chowder base, but a few key tools make the process smoother and safer. Here’s what I always gather before starting:
- Large, heavy-bottomed pot (at least 6 quarts) for cooking the chowder
- Pressure canner (water bath canning isn’t safe for low-acid foods like fish!)
- Canning jars with new lids (pint or quart size, sterilized)
- Jar lifter and canning funnel – trust me, you’ll want these for safety
- Bubble remover/headspace tool (a chopstick works in a pinch)
- Sharp knife and cutting board for prepping all those veggies
- Ladle for filling jars without splattering hot soup everywhere
That’s it! Just basic canning tools that’ll last you for years of preserving.
Step-by-Step Instructions for Canning Salmon Chowder Base
Don’t let the canning process intimidate you – I’ll walk you through each step to ensure your salmon chowder base turns out perfect every time. Just follow along and you’ll have pantry gold in no time!
Preparing the Chowder Base
This is where all that wonderful flavor comes together. Here’s how I do it:
- Combine everything in your large pot – salmon, stock, potatoes, carrots, celery, onions, garlic, lemon juice, and seasonings. That bay leaf is important, but don’t forget we’ll fish it out later!
- Bring to a rolling boil over medium-high heat, stirring occasionally. You’ll smell those amazing aromas start to develop!
- Reduce heat to simmer and let it bubble gently for 20 minutes. The potatoes should be tender but not mushy – test one with a fork.
- Remove the bay leaf – this is crucial! That little leaf has done its flavor work and shouldn’t go into the jars.
Canning the Salmon Chowder Base
Now for the magic that makes this shelf-stable:
- Ladle the hot chowder into sterilized jars, leaving 1-inch headspace. Use your funnel to keep the rims clean – messy rims can prevent sealing.
- Remove air bubbles by sliding your bubble tool (or chopstick) around the inside of each jar.
- Wipe rims with a clean, damp cloth before placing lids and rings on finger-tight – don’t overtighten!
- Process pints for 100 minutes or quarts for 120 minutes in your pressure canner at 10 lbs pressure (adjust for altitude if needed).
- Let pressure drop naturally before removing jars. You’ll hear that satisfying “ping” as they seal while cooling!
See? Not so scary after all. Just take it step by step and you’ll be rewarded with the most convenient homemade meal starter!
Tips for Perfect Canning Salmon Chowder Base
After canning dozens of batches, I’ve picked up some tricks that make all the difference. First, always check your seals after cooling – lids should be concave and not move when pressed. If one didn’t seal, just refrigerate and use it within a few days.
Don’t panic if the flavors seem muted straight from the jar – that’s normal! The magic happens when you heat it up and add your finishing touches. I always stir in a splash of cream or milk while reheating (never before canning – dairy doesn’t preserve well). Fresh dill or parsley brightens it up beautifully too.
For best texture, use firm potatoes like Yukon Golds – they hold their shape through the canning process. And here’s my favorite trick: save a few salmon chunks to add fresh when serving for an extra-special presentation!
Serving Suggestions for Canning Salmon Chowder Base
Oh, the possibilities with this chowder base! My favorite way is to heat it gently with a splash of cream, then top with a handful of fresh dill and oyster crackers for crunch. It’s heavenly with thick slices of sourdough for dipping. For a full meal, I’ll serve it alongside a crisp green salad – the perfect balance to that rich, comforting chowder.
Storage and Reheating Instructions
Properly sealed jars of salmon chowder base will keep beautifully in your pantry for up to a year – though ours never last that long! Store them in a cool, dark place and always check lids before using. When you’re ready to enjoy:
- Never microwave sealed jars – always transfer contents to a saucepan first
- Heat gently on the stovetop, stirring occasionally until steaming hot
- Add dairy or cream at this stage if desired (never before canning!)
After opening, refrigerate any leftovers and use within 3-4 days.
Nutritional Information for Canning Salmon Chowder Base
Now, I’m no nutritionist, but here’s the scoop on what’s in that delicious jar of chowder base (remember – these are estimates and can vary based on your exact ingredients):
- Per 1-cup serving: About 180 calories
- Protein powerhouse: 18g from that beautiful salmon
- Just 12g carbs – mostly from the wholesome veggies
- Watch the sodium: Around 450mg (less if you use low-sodium stock)
- Healthy fats: 7g, with those amazing omega-3s from the salmon
Keep in mind these numbers don’t include any cream or milk you might add when serving – that’s when it really becomes indulgent!
Frequently Asked Questions About Canning Salmon Chowder Base
I get asked about this recipe all the time – here are the questions that pop up most often with my tried-and-true answers:
Can I use frozen salmon for this recipe?
Absolutely! Just thaw it completely first and pat it dry. I actually keep frozen salmon specifically for canning when it goes on sale. The texture holds up beautifully in the chowder base.
How long does canned salmon chowder base last?
Properly sealed jars will keep safely for up to 1 year in a cool, dark pantry. But honestly? The flavor peaks around 3-6 months. After opening, refrigerate and use within 3-4 days.
Can I add cream before canning?
No way! Dairy products can’t be safely canned at home. Always add cream or milk when reheating the chowder base to serve. That’s when it transforms into that creamy, dreamy texture we all love.
What if my jars didn’t seal?
No panic needed! Just refrigerate those jars and enjoy them within a few days. I sometimes deliberately leave one unsealed as my “tester” jar – the cook’s reward!
Can I make this without a pressure canner?
Sorry, but no. Fish is a low-acid food that requires pressure canning for safety. A water bath just won’t get hot enough to prevent spoilage. It’s worth investing in a good pressure canner – you’ll use it for so many recipes!
Share Your Canning Salmon Chowder Base Experience
I’d love to hear how your chowder turns out! Drop a comment below to share your tips, photos, or any tasty twists you tried. Your feedback helps other home canners too – happy preserving!
PrintCanning Salmon Chowder Base – 10 Steps to Homemade Comfort

A hearty salmon chowder base perfect for canning. This recipe provides a rich, flavorful foundation you can customize with fresh ingredients when serving.
- Prep Time: 20 minutes
- Cook Time: 20 minutes
- Total Time: 40 minutes (plus canning time)
- Yield: 6 pints 1x
- Category: Soup
- Method: Canning
- Cuisine: North American
- Diet: Low Lactose
Ingredients
- 2 lbs salmon fillets, skin removed and cubed
- 4 cups fish or vegetable stock
- 2 cups diced potatoes
- 1 cup diced carrots
- 1 cup diced celery
- 1 cup diced onions
- 2 cloves garlic, minced
- 1 tbsp lemon juice
- 1 tsp salt
- 1/2 tsp black pepper
- 1/2 tsp dried thyme
- 1 bay leaf
Instructions
- Combine all ingredients in a large pot.
- Bring to a boil, then reduce heat to simmer for 20 minutes.
- Remove bay leaf and discard.
- Ladle hot chowder base into sterilized canning jars, leaving 1-inch headspace.
- Process pints for 100 minutes or quarts for 120 minutes in a pressure canner at 10 lbs pressure.
Notes
- Always use tested canning methods for safety.
- Add cream or milk when reheating before serving.
- Can top with fresh herbs when serving.
Nutrition
- Serving Size: 1 cup
- Calories: 180
- Sugar: 3g
- Sodium: 450mg
- Fat: 7g
- Saturated Fat: 1.5g
- Unsaturated Fat: 4g
- Trans Fat: 0g
- Carbohydrates: 12g
- Fiber: 2g
- Protein: 18g
- Cholesterol: 45mg