
There’s something magical about opening a jar of home-canned shrimp months after you put it up—it’s like capturing summer in a bottle! I’ll never forget the first time I tried canning shrimp myself. I was nervous (okay, terrified!) about getting it right, but that first bite of perfectly preserved shrimp in December made all the effort worthwhile. Trust me, once you taste your own canned shrimp, you’ll never go back to store-bought.
Canning shrimp at home isn’t just about saving money (though you definitely will). It’s about having that fresh-from-the-sea flavor whenever you want it—even when shrimp season is long gone. The secret? Starting with the freshest shrimp you can find and following these simple but important steps carefully. Safety comes first when preserving seafood, so we’ll take our time getting everything just right.
I’ve made every mistake in the book so you don’t have to—from overcooking the shrimp (mushy disaster!) to not leaving enough headspace (messy cleanup). Now, after years of perfecting my method, I’m excited to share my canning shrimp secrets with you. Let’s make sure you end up with jars of sweet, tender shrimp that’ll make your future self do a happy dance!
Why You’ll Love Canning Shrimp
Once you try home-canned shrimp, you’ll wonder how you ever lived without it. Here’s why this method is a total game-changer:
- Summer flavor all year: That bright, briny taste of fresh shrimp? Imagine having it in January—straight from your pantry.
- Weeknight dinner hero: Salad toppings, pastas, or quick stir-fries become instant meals with pre-cooked shrimp ready to go.
- Budget-friendly: Buy shrimp in bulk when prices drop and preserve the extras (way cheaper than store-bought canned options!).
- Zero waste: No more frantic cooking before shrimp goes bad—just pop open a jar when cravings hit.
My favorite part? The satisfaction of seeing rows of gleaming jars lined up, knowing I’ve got deliciousness on demand. It’s like a seafood security blanket!
Ingredients for Canning Shrimp
Here’s the simple lineup you’ll need – nothing fancy, just good quality stuff:
- 2 lbs fresh shrimp (peeled and deveined – trust me, do this first!)
- 1 tablespoon salt (I use kosher, but any non-iodized works)
- 4 cups water (filtered is best if your tap water tastes funky)
- 1 teaspoon lemon juice (optional, but gives a nice bright note)
Quick tip: When prepping the shrimp, give them a good rinse under cold water and let them drain in a colander while you get everything else ready. And don’t skip deveining – those dark veins can make your canned shrimp taste muddy. I learned that the hard way!
Equipment Needed for Canning Shrimp
Don’t worry—you don’t need fancy gear to can shrimp like a pro. Here’s the must-have lineup:
- Pressure canner (this is non-negotiable for seafood—regular water bath canning isn’t safe!)
- Sterilized jars (pint or half-pint work best—I reuse mine for years)
- New lids and rings (never reuse lids—they won’t seal properly)
- Jar lifter and canning tongs (burned fingers are no joke with boiling jars!)
- Large stockpot (for pre-cooking the shrimp)
No pressure canner? Some folks use an Instant Pot on “canning” mode, but check your manual—not all models are approved for seafood. When in doubt, borrow or invest in a proper canner. It’s worth it for that perfect, shelf-stable shrimp!
Step-by-Step Guide to Canning Shrimp
Okay, let’s get down to business! I’ll walk you through each step carefully – this isn’t hard, but attention to detail makes all the difference between “meh” and “wow” shrimp. Grab your apron and let’s do this!
Preparing the Shrimp
First things first – we need perfect shrimp ready for their jar vacation. Start with cold, fresh shrimp (if they smell fishy, toss ’em!). Peel and devein them thoroughly – I use kitchen shears to snip along the back and pull out that dark vein. Rinse them under cold running water until the water runs clear, then let them drain in a colander.
Now, bring your salted water (and lemon juice if using) to a rolling boil. Here’s the trick – shrimp cook FAST. Drop them in and set a timer for 2 minutes max! They’ll turn pink almost immediately, but we want them just cooked through – overcooked shrimp turn rubbery in the jar. Drain immediately and spread them on a tray to cool slightly while you prep jars.
Packing and Sealing the Jars
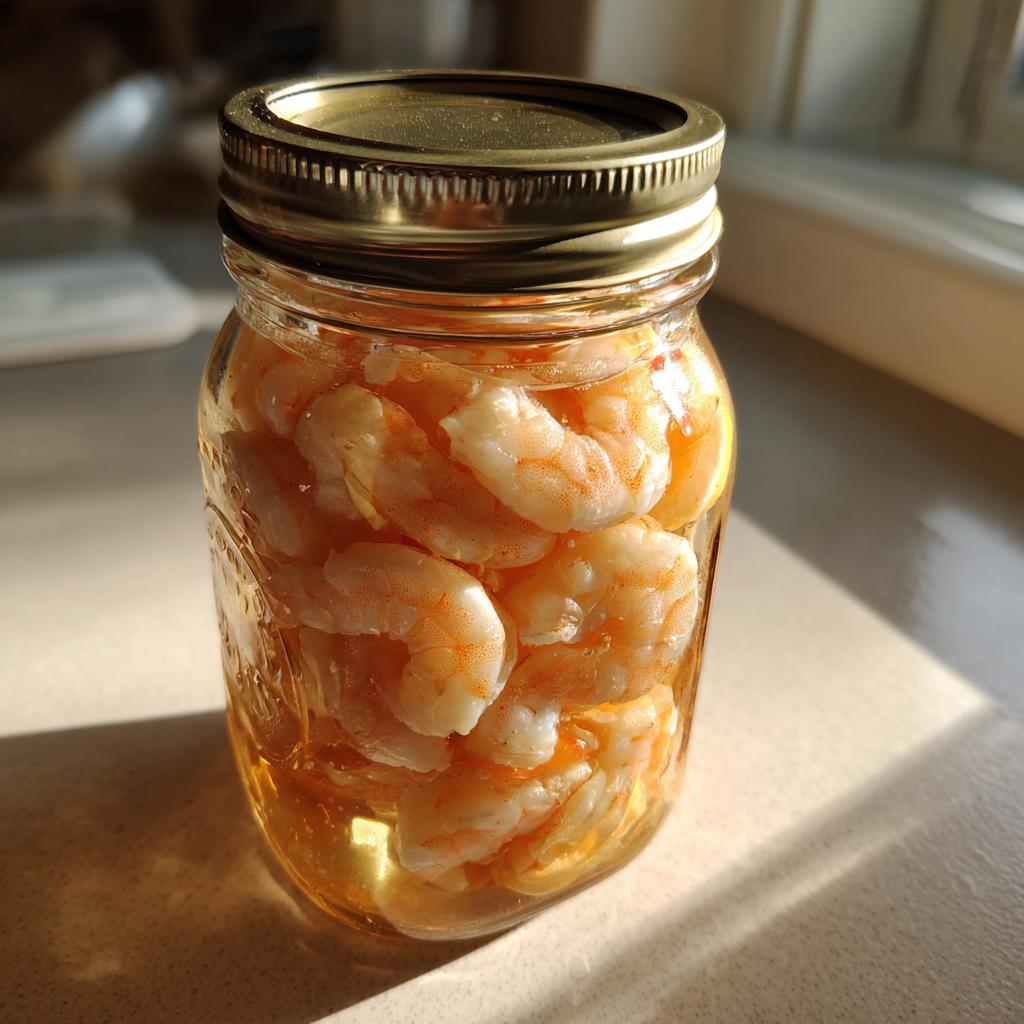
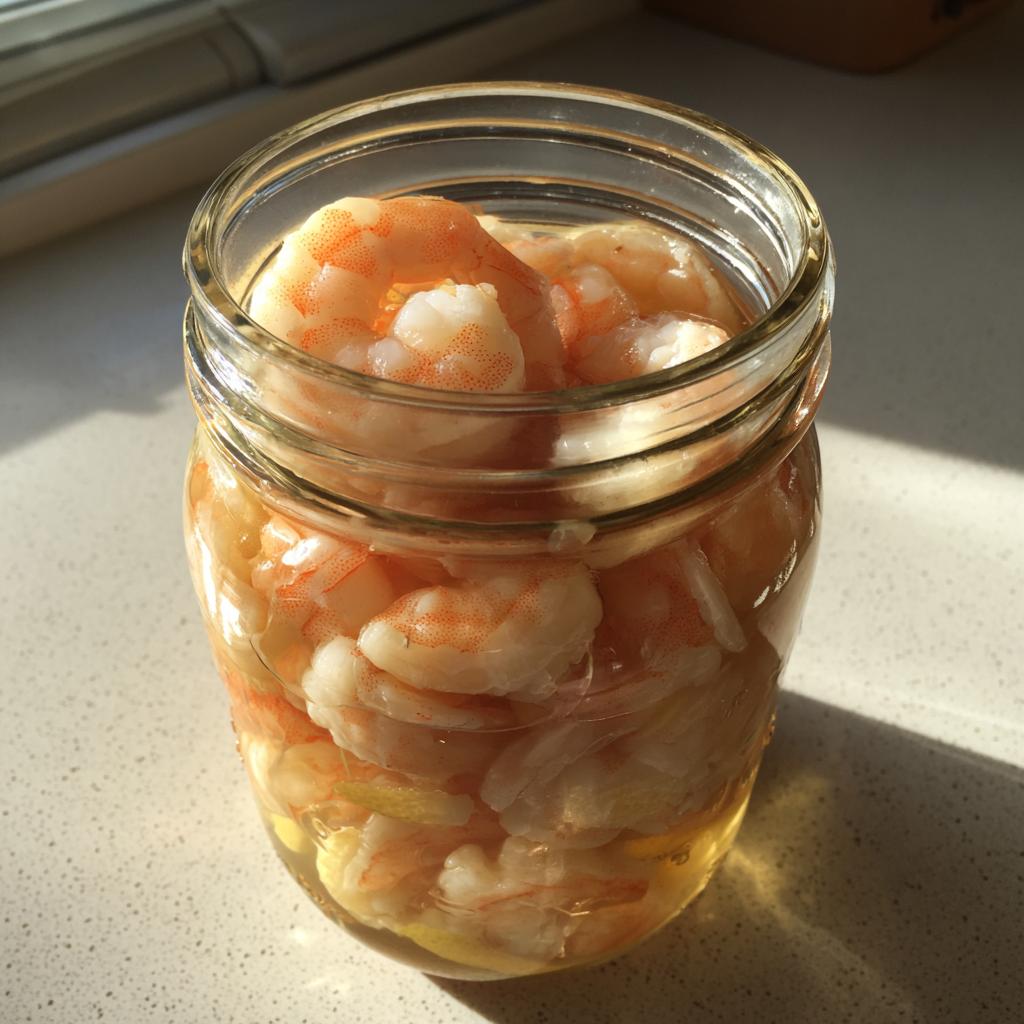
Hot jars = happy canning! Take your sterilized jars straight from the dishwasher or boiling water bath. Pack the shrimp in snugly but don’t smash them – leave about 1 inch of headspace at the top. Pour boiling water over the shrimp, keeping that same headspace.
Run a chopstick or plastic utensil around the inside to release any trapped air bubbles (metal can scratch jars). Wipe the rims spotless with a clean damp cloth – any food residue will ruin your seal. Place lids on and screw bands fingertip-tight – no Hulk strength needed here!
Processing in the Pressure Canner
Here’s where safety is crucial. Place jars in your pressure canner with 2-3 inches of hot water (follow your canner’s manual). Lock the lid and turn heat to high. Once steam flows steadily for 10 minutes, put the weight on. For shrimp, we need 10 lbs pressure (adjust for altitude if needed). Start timing when the gauge hits 10 lbs – process pints for 45 minutes.
When time’s up, turn off heat and let pressure drop naturally – don’t rush this! Wait until the canner is completely depressurized before opening. Carefully remove jars with your lifter and let them cool undisturbed for 12-24 hours. You’ll hear the magical “pop” of seals forming – music to a canner’s ears!
Tips for Perfect Canning Shrimp
After countless batches (and learning from my mishaps), here are my golden rules for shrimp canning success:
- Fresh is best: Use shrimp within 24 hours of purchase if possible. That “off” smell? It’ll only get stronger in the jar!
- Seal check is sacred: After cooling, press each lid’s center – if it pops, refrigerate and eat within a week. Good seals stay down.
- Label everything: Write the date with a grease pencil – even your future self will forget when these were canned.
- Store smart: Keep jars in a cool, dark place. Sunlight can bleach color and affect flavor over time.
Pro tip: Always can one extra jar as your “tester” – try it after a week to check seasoning and texture before giving jars as gifts!
Storing and Using Canned Shrimp
Properly canned shrimp will keep beautifully for up to a year in your pantry – but let’s be real, mine never last that long! Store your jars in a cool, dark place (I use my basement shelves). The magic happens when you pop one open – that fresh shrimp aroma will transport you right back to canning day.
My favorite ways to use canned shrimp:
- Toss them cold into salads (no thawing needed!)
- Warm gently in pasta sauces at the last minute
- Make instant shrimp cocktail by draining and chilling
- Add to omelets or fried rice for quick protein
Remember – once opened, treat them like fresh shrimp and use within 3 days. The brine makes a fantastic base for seafood soups too – never pour it down the drain!
Nutritional Information for Canned Shrimp
Here’s the scoop on why canned shrimp is such a nutritional powerhouse! A half-cup serving packs about 120 calories with a whopping 24g protein—that’s more protein than a chicken breast! You’re looking at just 1.5g fat (mostly the good omega-3 kind), zero carbs, and all the natural minerals shrimp are famous for.
Just remember—these numbers can vary slightly depending on your shrimp size and how much salt you use. But no matter what, you’re getting one of the leanest, most protein-packed pantry staples around!
FAQs About Canning Shrimp
I get asked these questions all the time—here’s what you really want to know about canning shrimp at home:
Is it safe to can shrimp at home?
Absolutely—when done right! The key is using a pressure canner (not water bath) to reach the high temps needed to kill bacteria. Follow tested processing times and never cut corners with seafood safety. My grandmother canned shrimp for 50 years this way!
Can I use frozen shrimp instead of fresh?
You can, but thaw completely first—ice crystals affect texture. That said, fresh shrimp give the best results. If using frozen, check for freezer burn (those dry, white spots mean toss ’em).
How long does home-canned shrimp last?
Properly sealed jars keep 1 year at room temp, but quality’s best within 6 months. Once opened, refrigerate and use within 3 days—just like store-bought.
My jars didn’t seal—now what?
No panic! Just refrigerate and eat within a week, or reprocess with new lids within 24 hours. I keep a couple jars in the fridge for immediate cravings anyway!
Share Your Canning Shrimp Experience
Now it’s your turn! Did you try canning shrimp for the first time? Maybe you’ve got your own family secrets for perfect preservation? Drop a comment below—I’d love to hear your stories, questions, or even your “oops” moments (we’ve all had them!). Happy canning, friends! You can also find more great canning ideas on Pinterest.
PrintDelicious Canning Shrimp Secrets for Lasting Pantry Joy
Learn how to can shrimp at home for long-term storage. This method ensures your shrimp stays fresh and ready to use whenever you need it.
- Prep Time: 20 mins
- Cook Time: 45 mins
- Total Time: 1 hr 5 mins
- Yield: 4 pints 1x
- Category: Preserving
- Method: Pressure Canning
- Cuisine: American
- Diet: Low Calorie
Ingredients
- 2 lbs fresh shrimp, peeled and deveined
- 1 tbsp salt
- 4 cups water
- 1 tsp lemon juice (optional)
Instructions
- Prepare the shrimp by peeling and deveining them.
- Rinse the shrimp under cold water and drain.
- Bring water to a boil in a large pot.
- Add salt and lemon juice to the boiling water.
- Add shrimp and cook for 2-3 minutes until pink.
- Drain and pack shrimp into sterilized jars.
- Fill jars with boiling water, leaving 1-inch headspace.
- Seal jars and process in a pressure canner for 45 minutes at 10 lbs pressure.
Notes
- Use only fresh shrimp for best results.
- Ensure jars are properly sterilized before use.
- Check seals after processing to confirm they are airtight.
Nutrition
- Serving Size: 1/2 cup
- Calories: 120
- Sugar: 0g
- Sodium: 350mg
- Fat: 1.5g
- Saturated Fat: 0.3g
- Unsaturated Fat: 0.8g
- Trans Fat: 0g
- Carbohydrates: 1g
- Fiber: 0g
- Protein: 24g
- Cholesterol: 170mg