

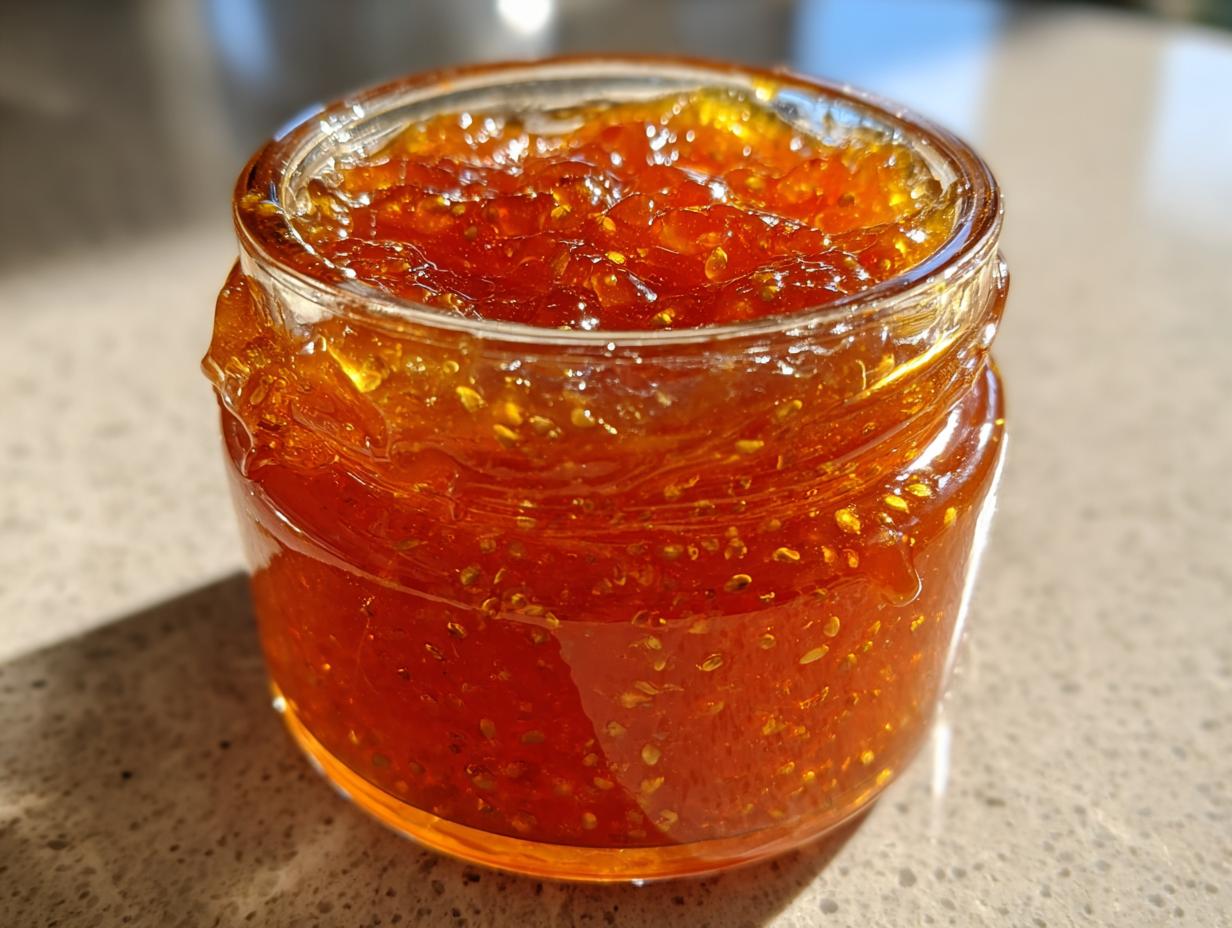
There’s something magical about homemade orange marmalade that just can’t be beaten. That perfect balance of sweet and tangy, with little bits of citrus peel that burst with flavor – it’s pure sunshine in a jar! I still remember the first time I made orange marmalade years ago, nervously watching the pot bubble away, then feeling so proud when those jars sealed with that satisfying “pop.”
What I love most about this orange marmalade recipe is how simple it really is. Just oranges, sugar, water and a squeeze of lemon – that’s it! No fancy equipment needed, no mysterious pectin packets. Just good old-fashioned simmering until the magic happens. Trust me, once you taste this bright, citrusy spread on your morning toast, you’ll never go back to store-bought again.
This recipe makes about 3 jars, which is perfect because you’ll want to keep one for yourself and give the others away (though fair warning – you might end up keeping them all!). The whole process takes less than 2 hours from start to finish, with most of that being hands-off simmering time. Let’s get started!
Why You’ll Love This Orange Marmalade
This orange marmalade recipe has become my absolute favorite for so many reasons – let me tell you why it’ll be yours too:
- It’s ridiculously easy – just four simple ingredients you probably already have in your kitchen. No fancy techniques or special equipment needed!
- That homemade taste – store-bought versions can’t compete with the bright, fresh citrus flavor of this orange marmalade made from scratch.
- Perfect for gifting – nothing says “I care” like a jar of homemade preserves. Tie a ribbon around it and you’ve got instant happy recipients!
- Endless uses – beyond toast, stir it into yogurt, glaze chicken, or swirl into muffin batter. The options are deliciously endless.
The best part? You’ll feel like a domestic goddess while barely breaking a sweat. Now that’s my kind of recipe!
Ingredients for Orange Marmalade
One of the best things about this recipe is you only need four simple ingredients to create magic. Here’s what you’ll need to gather:
- 4 large oranges – I always try to get organic since we’re using the peel. Wash them really well! You’ll want to slice them thin with the peel on – that’s where all that wonderful bitter-sweet flavor lives.
- 4 cups granulated sugar – This might seem like a lot, but trust me, it balances perfectly with the tartness. I’ve tried cutting back and it just wasn’t the same.
- 4 cups water – Plain old tap water works just fine here. It helps soften those orange slices beautifully.
- 1 lemon (juiced) – The acidity helps the marmalade set and adds a nice bright note. I always roll my lemon on the counter first to get every last drop!
A quick tip – if your oranges are particularly sweet, you might reduce the sugar by 1/4 cup. But for the first time making this, I’d stick with the original amounts. It’s a foolproof ratio that’s never failed me!
Equipment You’ll Need
Don’t worry – you don’t need fancy gadgets to make amazing orange marmalade! Here’s what I always grab from my kitchen:
- A large, heavy-bottomed pot (trust me, you’ll want the extra space when it starts bubbling)
- Wooden spoon for stirring (metal can react with the citrus)
- Sterilized jars with lids (I run mine through the dishwasher right before using)
- A ladle for pouring (less messy than trying to pour directly from the pot!)
- Kitchen thermometer (optional but helpful for checking doneness)
That’s it! See? I told you this was simple. Now let’s get cooking!
How to Make Orange Marmalade
Alright, let’s dive into the fun part – making that glorious orange marmalade! I’ve made this recipe dozens of times, and I promise it’s way easier than you might think. Just follow these simple steps, and you’ll be rewarded with jars of golden sunshine.
Prepare the Oranges
First things first – give those oranges a good scrub! Since we’re using the peels, you want them nice and clean. I run mine under warm water while gently scrubbing with a vegetable brush. Then comes the slicing – this is where the magic begins!
Slice the oranges as thin as you can manage (about 1/8-inch thick). Don’t worry about perfection – rustic is charming! Just be sure to remove any seeds you spot. The thin slices mean more surface area to soften during cooking, which gives that perfect tender-yet-slightly-chewy texture we love in good marmalade.
Cook the Orange Slices
Now toss all those beautiful orange slices into your big pot with the water. Bring it to a lively boil, then immediately reduce to the gentlest simmer you can manage. This is where patience comes in – we’re going to let those slices bubble away for a full hour.
What’s happening? The peels are transforming from tough and bitter to tender and sweet. Give it an occasional stir, but mostly just let it do its thing. Your kitchen will start smelling like a citrus grove – absolute heaven!
Add Sugar and Lemon Juice
After your hour is up, it’s time for the sugar. Pour it all in at once along with the lemon juice, then stir slowly until every grain dissolves. This is crucial – undissolved sugar can lead to crystallization later.
Now turn the heat up to medium and let it cook, stirring frequently. The lemon juice isn’t just for flavor – its natural pectin helps the marmalade set beautifully. You’ll see the mixture gradually darken to a deep amber color over the next 30-40 minutes. Just keep stirring to prevent any sticking or burning on the bottom.
Test the Consistency
Here’s my favorite test – put a small plate in the freezer when you start cooking. When you think the marmalade is ready, drop a teaspoon onto the cold plate. Wait 30 seconds, then push it with your finger. If it wrinkles slightly, it’s perfect! If not, give it a few more minutes.
Warning – it’s easy to get overexcited and overcook it. The marmalade will thicken more as it cools, so when in doubt, err on the slightly runny side.
Jar and Seal the Marmalade
Time to package up your golden creation! Carefully ladle the hot marmalade into your sterilized jars, leaving about 1/4-inch headspace. Wipe the rims clean, then screw on the lids finger-tight.
As the jars cool, you’ll hear that magical “pop” sound as they seal. It’s the best sound in the world! Let them sit undisturbed for 24 hours, then check that all lids have sealed properly before storing.
Tips for Perfect Orange Marmalade
After making this orange marmalade more times than I can count, I’ve picked up some handy tricks to guarantee success every time:
- Taste your oranges first – If they’re super sweet, you can reduce the sugar by 1/4 cup. But don’t go overboard – sugar helps with both flavor and setting.
- Thermometer is your friend – If you have one, aim for 220°F (104°C) for perfect consistency. No thermometer? That cold plate test never lies!
- Gentle stirring is key – Too vigorous and you’ll break up those lovely orange slices we worked so hard to keep intact.
- Skim the foam – A quick pass with a spoon removes any bubbles for clearer marmalade (though I sometimes leave them – they don’t affect taste!)
Remember – even if it’s not perfect, it’ll still taste amazing. That’s the beauty of homemade!
Orange Marmalade Variations
Once you’ve mastered the basic orange marmalade recipe, the fun really begins! Here are my favorite ways to mix things up:
- Spice it up – Toss in a cinnamon stick or star anise while cooking for cozy warmth. My winter favorite!
- Blood orange beauty – Swap regular oranges for blood oranges – the deep red color is stunning and the flavor slightly more complex.
- Vanilla dream – Add a split vanilla bean for a subtle floral note that pairs amazingly with citrus.
- Ginger zing – A few slices of fresh ginger make the marmalade extra bright and lively.
The best part? You can taste as you go and adjust to your heart’s content. That’s the joy of homemade orange marmalade – it’s all yours to play with!
Serving Suggestions
Oh, the possibilities with homemade orange marmalade are endless! My absolute favorite? Slathered on warm buttered toast – that perfect blend of crispy, creamy, sweet and tangy. But don’t stop there:
- Swirled into morning yogurt or oatmeal
- As a glaze for roasted chicken or ham
- Between layers of a vanilla cake
- On fresh scones with clotted cream
Honestly? I’ve been known to eat it straight from the jar with a spoon when no one’s looking. No judgment here!
Storing and Shelf Life
Here’s the best part – your homemade orange marmalade keeps beautifully! Store sealed jars in a cool, dark place (my pantry works perfectly) and they’ll last up to a year. Once opened, pop it in the fridge where it’ll stay fresh for about 3 months – though mine never lasts that long!
Pro tip: If a jar doesn’t seal properly, no worries! Just keep it in the fridge and use it first. The satisfying “pop” when jars seal is music to my ears – it means I’ve got sunshine preserved for months to come!
Orange Marmalade FAQs
Over the years, I’ve gotten so many great questions about making orange marmalade – here are the ones that come up most often with my tried-and-true answers:
Can I use bottled orange juice instead of fresh oranges?
Oh honey, don’t do it! The magic of marmalade comes from the whole fruit – especially the peel. Bottled juice just won’t give you that perfect balance of bitter and sweet or that lovely texture. Fresh is absolutely worth the extra effort!
Help! My marmalade is too runny – can I fix it?
Been there! Just pour it back into the pot and simmer it a bit longer. The cold plate test is your best friend here. Next time, remember it thickens as it cools, so take it off the heat when it’s just slightly thinner than you want.
Do I need to add pectin?
Nope! The natural pectin in the citrus peels and the lemon juice work together beautifully to set your marmalade perfectly. One less thing to buy at the store – hooray!
Nutritional Information
Now, I’m no nutritionist, but I know we all like to have an idea of what we’re eating! Keep in mind these are just estimates – your actual orange marmalade might vary slightly depending on your exact ingredients and how long you cook it.
Per tablespoon (because let’s be real, who stops at a teaspoon?), you’re looking at:
- 50 calories – A little goes a long way flavor-wise!
- 12g sugar – It is a preserve after all, but most comes from natural fruit sugars
- 0g fat – Hooray for guilt-free indulgence!
- 0mg sodium – No sneaky salt hiding in this recipe
Remember, this orange marmalade is meant to be enjoyed in moderation as part of a balanced diet. I always say – a spoonful of sunshine in the morning is good for the soul!
Share Your Experience
I’d love to hear how your orange marmalade turns out! Did you add any fun twists? Snap a photo of your jars – nothing makes me happier than seeing others enjoy this recipe as much as I do. You can also find more delicious recipes and inspiration on Pinterest!
Print3 Simple Steps to Perfect Orange Marmalade Every Time

A sweet and tangy orange marmalade made with fresh oranges.
- Prep Time: 15 mins
- Cook Time: 1 hour 40 mins
- Total Time: 1 hour 55 mins
- Yield: 3 jars 1x
- Category: Preserves
- Method: Stovetop
- Cuisine: British
- Diet: Vegetarian
Ingredients
- 4 large oranges
- 4 cups sugar
- 4 cups water
- 1 lemon (juiced)
Instructions
- Wash and thinly slice the oranges.
- Place the sliced oranges in a pot with water and bring to a boil.
- Reduce heat and simmer for 1 hour until the peels soften.
- Add sugar and lemon juice, stirring until dissolved.
- Cook on medium heat for another 30-40 minutes until thickened.
- Test the consistency by placing a small amount on a cold plate.
- Pour the marmalade into sterilized jars and seal.
Notes
- Use organic oranges for best flavor.
- Adjust sugar based on orange sweetness.
- Store in a cool, dark place.
Nutrition
- Serving Size: 1 tbsp
- Calories: 50
- Sugar: 12g
- Sodium: 0mg
- Fat: 0g
- Saturated Fat: 0g
- Unsaturated Fat: 0g
- Trans Fat: 0g
- Carbohydrates: 13g
- Fiber: 0g
- Protein: 0g
- Cholesterol: 0mg