
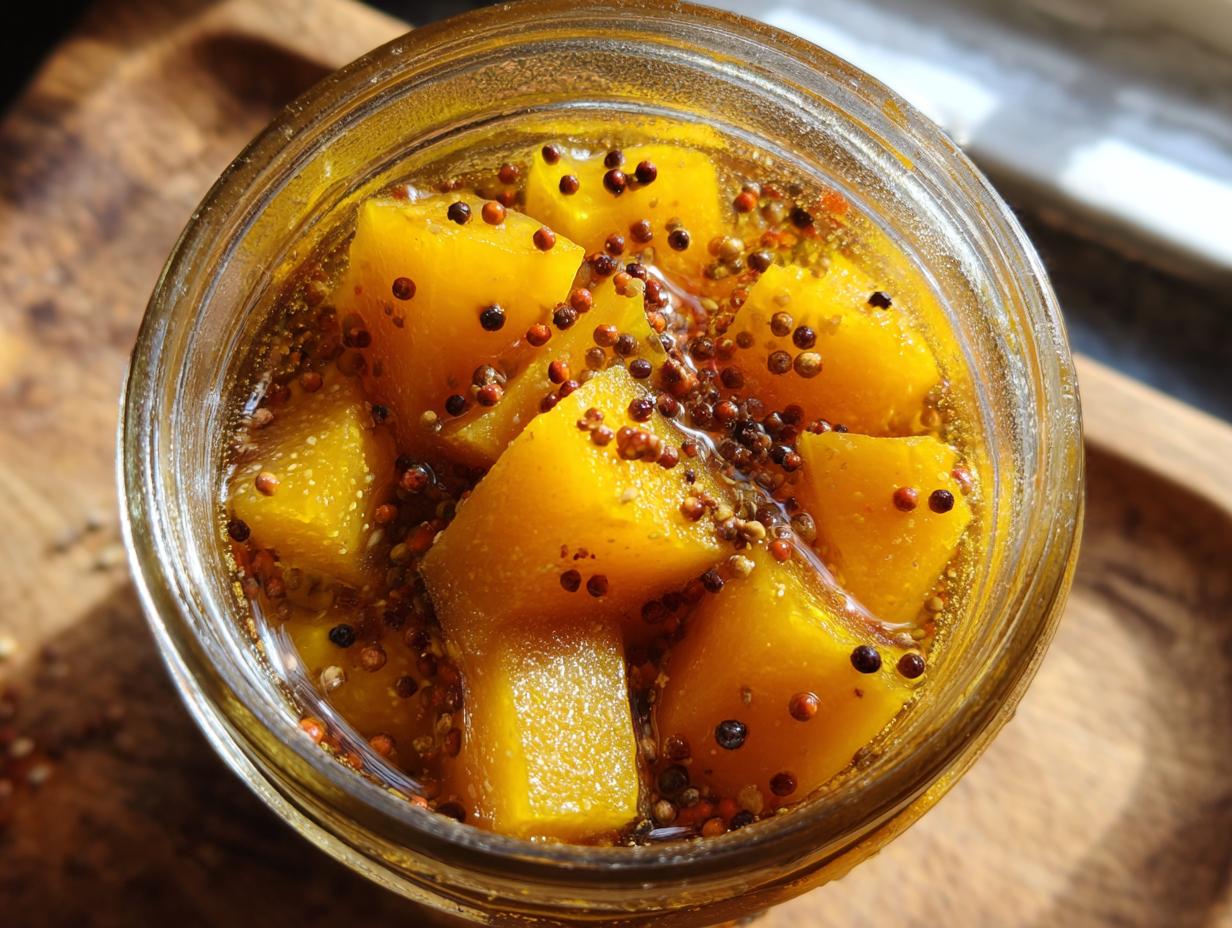
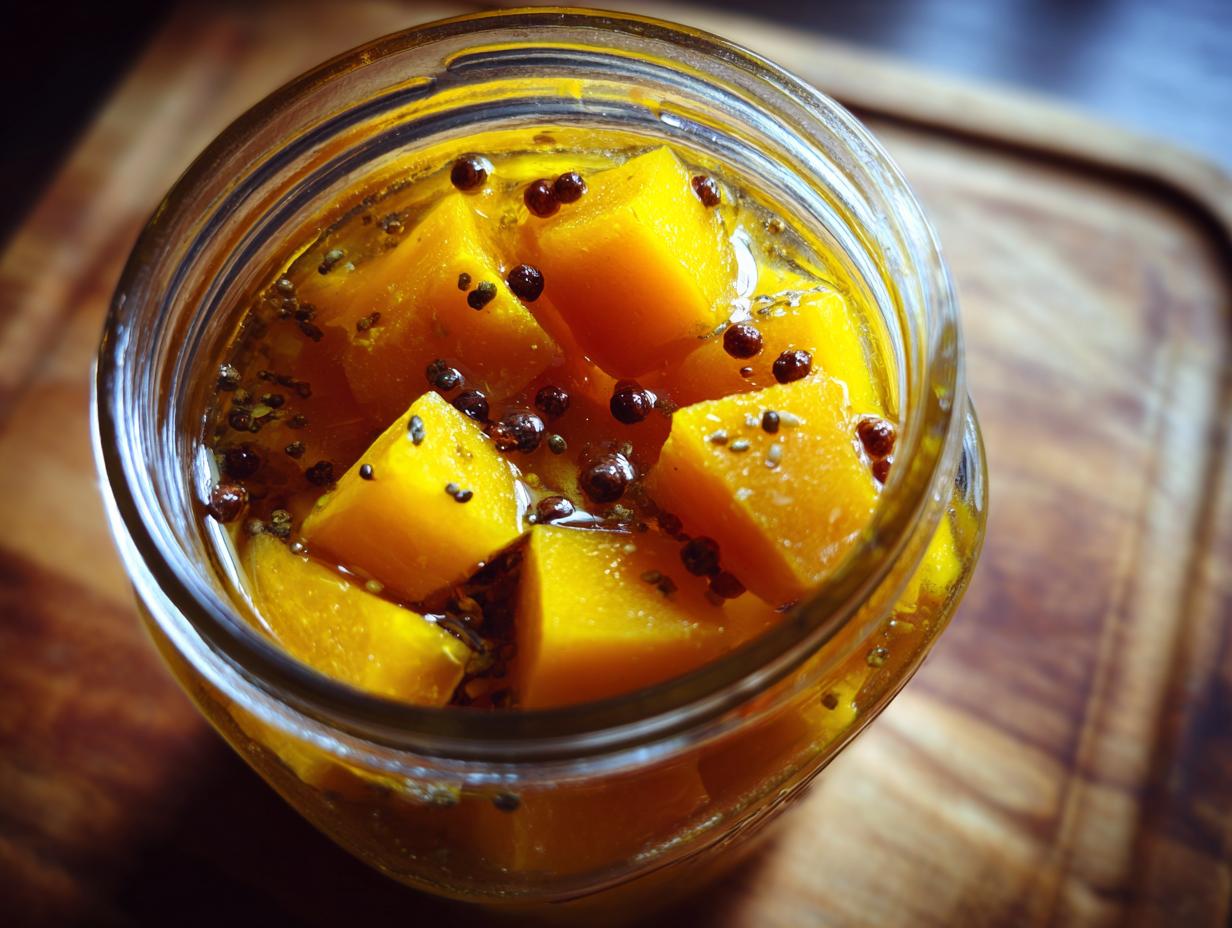
I still remember the first time I tried pickled sugar pumpkin at a friend’s fall gathering—that perfect balance of sweet and tangy stopped me mid-bite. “What is this magic?” I asked, immediately begging for the recipe. Now it’s my go-to way to preserve autumn’s best flavors when sugar pumpkins pile up at the farmers’ market. Unlike traditional pickles, these golden cubes keep their delicate sweetness while soaking up just enough vinegar punch to make them addictive. Toss them in salads, pair them with sharp cheeses, or snack straight from the jar—they’re the versatile preserve you didn’t know you needed.
Why You’ll Love This Pickled Sugar Pumpkin
This recipe is my favorite way to turn humble sugar pumpkins into something extraordinary. Here’s why it’s become a staple in my kitchen:
- Quick magic: From cutting board to jar in under 30 minutes—no fancy equipment needed
- Sweet meets tangy: The sugar pumpkin’s natural sweetness plays perfectly with the vinegar’s zing
- Pantry-friendly: Uses basic ingredients you probably already have (that bay leaf hiding in your spice rack finally gets its moment!)
- Gift-worthy: Pretty jars make thoughtful homemade presents that stand out from typical jams
- Meal prep hero: Keeps for weeks, ready to jazz up everything from sandwiches to grain bowls
Trust me, once you taste these golden bites, you’ll be hooked!
Ingredients for Pickled Sugar Pumpkin
Here’s everything you’ll need to make my beloved pickled sugar pumpkin recipe—simple ingredients that transform into something truly special:
- 1 small sugar pumpkin (about 2 lbs) – peeled and cut into 1-inch cubes (no seeds or stringy bits!)
- 1 cup white vinegar – the sharp backbone of our brine
- 1 cup water – to balance out that vinegar punch
- 1/2 cup granulated sugar – just enough to complement the pumpkin’s natural sweetness
- 1 tbsp salt – enhances all the flavors
- 1 tsp mustard seeds – adds a subtle pop of flavor
- 1 tsp whole black peppercorns – yes, whole! They infuse gradually
- 2 cloves garlic, peeled – because everything’s better with garlic
- 1 bay leaf – that secret earthy note
Ingredient Notes & Substitutions
Don’t stress if you need to tweak things—I’ve made this recipe every which way over the years:
Vinegar swap: White vinegar gives the cleanest tang, but apple cider vinegar works beautifully for a fruitier note (just expect a slightly darker color).
Sweetener options: You can use honey instead of sugar—start with 1/3 cup since it’s sweeter. Maple syrup’s another fun twist for fall flavors!
Pumpkin pro tip: Avoid overripe pumpkins—they’ll turn mushy. Look for firm, heavy ones with smooth skin. Butternut squash makes a great substitute if sugar pumpkins aren’t available.
Spice it up: Feel free to add a cinnamon stick or star anise to the brine for extra warmth. Just don’t skip the mustard seeds—they’re the unsung heroes here!
How to Make Pickled Sugar Pumpkin
This is where the magic happens—turning simple ingredients into those irresistible sweet-tangy bites. Follow these steps carefully, and you’ll have perfect pickled pumpkin every time!
Step 1: Prep the Pumpkin
First things first: tackle that pumpkin! I can’t stress enough how important good prep is here. Grab your sharpest peeler (or a sturdy knife if you’re confident) and remove all the skin—no orange bits left behind! Then cut the pumpkin in half, scoop out the seeds and stringy parts (save those seeds for roasting later!), and chop the flesh into neat 1-inch cubes. Uniform size is key so they pickle evenly. Pro tip: If your cubes vary too much, the smaller pieces will turn mushy while the big ones stay crunchy.
Step 2: Make the Brine
Now for the flavor-packed liquid that makes these pickles shine. Combine the vinegar, water, sugar, salt, mustard seeds, peppercorns, garlic, and bay leaf in a saucepan. Turn the heat to medium-high and stir occasionally until it comes to a lively boil—you’ll see those mustard seeds dancing! This is crucial: keep stirring until every grain of sugar dissolves completely. I usually give it a full minute after boiling starts to be sure. That sweet-tart balance makes all the difference!
Step 3: Combine & Jar
Here comes the fun part! Carefully add your pumpkin cubes to the bubbling brine. Reduce the heat to a gentle simmer and set your timer for exactly 5 minutes—no more! We want the pumpkin slightly softened but still holding its shape. Remove from heat and let it cool for about 10 minutes (this prevents jar cracking). Then use a slotted spoon to pack the pumpkin into clean jars, pouring the brine over top until everything’s submerged. Seal tightly while still warm—you’ll hear that satisfying “pop” as they cool! Don’t skip this wait: refrigerate for at least 24 hours before digging in. The flavors need time to mingle and develop fully.
Tips for Perfect Pickled Sugar Pumpkin
After making dozens of batches of these pickled sugar pumpkins, I’ve picked up some tricks that make all the difference between good and wow results. Here are my hard-earned secrets:
- Jar prep is everything: If you want shelf-stable pickles (beyond the 2-week fridge life), sterilize jars by boiling them for 10 minutes. I keep mine piping hot until filling—cold jars can crack when you add the warm brine!
- Patience pays off: I know it’s tempting, but resist eating them right away! That full 24-hour fridge wait lets the flavors mingle properly. The vinegar mellows, the spices bloom, and the pumpkin absorbs all that goodness.
- Give ’em a shake: During storage, gently turn your jars upside down every few days. This redistributes the spices and keeps every piece evenly flavored—no bland cubes at the bottom!
- Size matters: Stick to that 1-inch cube guideline religiously. Any bigger, and the centers won’t pickle well; any smaller, and they’ll turn to mush. My grandma’s old ruler lives in my pickle-making drawer for this reason.
- Brine backup: Always make a little extra brine—about 1/4 cup more than you think you’ll need. It’s heartbreaking when you’re short just enough liquid to fully cover the last few pumpkin pieces!
Follow these tips, and you’ll have pickled sugar pumpkins that’ll make your friends beg for the recipe—just like mine did!
Serving Suggestions for Pickled Sugar Pumpkin
Oh, where don’t these little golden cubes belong? I’ve been sneaking them into everything since I first made them—here are my favorite ways to let these pickled sugar pumpkins shine:
Cheese board superstar: They’re absolute magic with sharp cheddar or creamy brie. The sweet-tangy pop cuts through rich cheeses beautifully. I always include them in my holiday charcuterie spreads—they disappear faster than the prosciutto!
Salad game-changer: Toss a handful into autumn grain bowls or mixed greens. They add brightness to roasted squash salads and pair wonderfully with toasted pecans and goat cheese. My kids even love them in tuna salad instead of pickles!
Meat’s best friend: Serve alongside roasted pork or turkey—the acidity balances rich meats perfectly. I sometimes chop them finely to make a quick relish for sandwiches or burgers. Game day secret: they’re incredible on pulled pork sliders!
Taco night upgrade: Forget boring garnishes! These pickled cubes add unexpected crunch to fish tacos or vegetarian options. Pro tip: dice them smaller and mix with red onion for a vibrant topping that wows guests.
Breakfast bonus: I’ve been known to stir them into morning oatmeal or yogurt bowls for a sweet-savory twist. They’re especially good with maple syrup and walnuts—trust me on this one!
The possibilities are endless once you start experimenting. Last week I even blended some into a vinaigrette that had everyone asking for the recipe. What will you try first?
Storage & Reheating
Here’s the beautiful thing about these pickled sugar pumpkins—they practically take care of themselves! After that initial 24-hour patience test in the fridge (I know, the wait kills me too), they’ll keep beautifully for up to 2 weeks in the refrigerator. Just make sure those lids are on tight—I give mine an extra twist every few days just to be safe.
Want to keep them longer? If you’ve sterilized your jars properly (remember that 10-minute boil we talked about?), you can process them in a water bath canner for shelf-stable storage. Process pints for 15 minutes, and they’ll last months in your pantry! Though honestly? Mine never stick around that long—they’re too delicious.
As for reheating—don’t! These pickles are meant to be enjoyed cold or at room temperature. Heating them up would make the pumpkin too soft and mess with that perfect sweet-tangy balance we worked so hard to achieve. If you absolutely must take the chill off (maybe for a warm salad?), just let the jar sit on the counter for 20 minutes before serving. Easy as pie—or should I say, easy as pickled pumpkin!
Pickled Sugar Pumpkin Nutrition
Now, I’m no nutritionist, but after making these pickled sugar pumpkins for years, I can tell you they’re about as guilt-free as snacks get! Here’s the breakdown per 1/4 cup serving (that satisfying little handful I always sneak straight from the jar):
- Calories: Just 35—perfect for when you want “just one more bite” (or five)
- Sugar: 6g (mostly from the pumpkin itself and that bit of sugar in the brine)
- Sodium: 290mg (thanks to the salt that makes all the flavors pop)
- Fat/Carbs/Protein: Basically zero across the board—it’s practically vegetable confetti!
Important note: These numbers can vary slightly depending on your exact ingredients—like if you used honey instead of sugar, or a particularly sweet pumpkin. But honestly? When something tastes this good and is this good for you, who’s counting? (Okay, maybe I am—but only so I can justify eating them by the jarful!)
FAQ About Pickled Sugar Pumpkin
I get asked about these pickled sugar pumpkins all the time—friends texting me photos of their batches with urgent questions! Here are the answers to everything you might wonder:
“Can I reuse the brine?”
Oh honey, no—and here’s why: That brine has done its job soaking up all the pumpkin goodness! By the time you’re done, it’s lost its punch and picked up cloudiness from the pumpkin’s starches. Plus, reusing could lead to bacterial growth. But don’t toss it! I sometimes use leftover brine in salad dressings or to deglaze pans—just within a day or two.
“How long do they actually last?”
In the fridge, they’re perfect for about 2 weeks—though mine never last that long! The pumpkin stays crispest in the first week. If you see any fuzziness or smell anything funky (rare, but possible), toss the batch immediately. Properly canned jars keep for months, but once opened, treat them like refrigerator pickles.
“Can I jazz up the spices?”
Absolutely! This recipe is your playground. I’ve added cinnamon sticks for warmth, star anise for licorice notes, even a dried chili for heat. My neighbor swears by adding orange zest to the brine—divine! Just keep the total spice volume about the same (1-2 tsp extra max) so you don’t overpower the delicate pumpkin flavor.
“Why did my pumpkin turn mushy?”
Three likely culprits: overripe pumpkin (always choose firm ones!), simmering too long (stick to that 5-minute timer!), or uneven cube sizes. I learned this the hard way—now I’m militant about uniform 1-inch pieces!
“Can I make this with other squash?”
You bet! Butternut works beautifully—just peel it well. Acorn squash is trickier (tends to fall apart), and delicate zucchini turns to mush. Kabocha? Heaven! Its chestnut-like flavor pickles like a dream. Whatever you use, adjust simmer time slightly based on firmness.
Share Your Pickled Sugar Pumpkin
Nothing makes me happier than seeing how you’ve made this recipe your own! Over the years, I’ve gotten giddy texts from friends showing off their pickled pumpkin masterpieces—some with extra spices, others packed into beautiful jars with handwritten labels. One friend even sent a photo of hers served on a Thanksgiving cheese board that looked straight out of a magazine!
If you give this recipe a try, I’d love to hear how it turns out. Did you add a special twist with different spices? Maybe you discovered a brilliant new way to serve them? Every batch tells its own story, and I’m always looking for fresh inspiration. Your kitchen experiments might just end up in my next batch—after all, that’s how the best recipes evolve!
Whether it’s your first time pickling or you’re a seasoned pro, remember: cooking is about joy, not perfection. So if your cubes aren’t perfectly even or your brine boils over (been there!), just laugh it off. The best part? Even the “mistakes” usually taste amazing. Now go forth and pickle with confidence—I can’t wait to see what you create!
For more delicious ideas, check out our Pinterest page!
PrintSweet-Tangy Pickled Sugar Pumpkin in Just 30 Minutes
A simple recipe for pickled sugar pumpkin that preserves its sweet flavor with a tangy twist.
- Prep Time: 15 mins
- Cook Time: 10 mins
- Total Time: 25 mins
- Yield: 2 pints 1x
- Category: Preserves
- Method: Pickling
- Cuisine: American
- Diet: Vegetarian
Ingredients
- 1 small sugar pumpkin (about 2 lbs)
- 1 cup white vinegar
- 1 cup water
- 1/2 cup granulated sugar
- 1 tbsp salt
- 1 tsp mustard seeds
- 1 tsp black peppercorns
- 2 cloves garlic, peeled
- 1 bay leaf
Instructions
- Peel the pumpkin and cut into 1-inch cubes.
- In a saucepan, combine vinegar, water, sugar, salt, mustard seeds, peppercorns, garlic, and bay leaf. Bring to a boil.
- Add pumpkin cubes and simmer for 5 minutes.
- Remove from heat and let cool slightly.
- Transfer pumpkin and liquid to clean jars. Seal tightly.
- Refrigerate for at least 24 hours before serving.
Notes
- Use within 2 weeks for best quality.
- Adjust sugar if you prefer sweeter or tangier pickles.
- Sterilize jars for longer storage at room temperature.
Nutrition
- Serving Size: 1/4 cup
- Calories: 35
- Sugar: 6g
- Sodium: 290mg
- Fat: 0g
- Saturated Fat: 0g
- Unsaturated Fat: 0g
- Trans Fat: 0g
- Carbohydrates: 8g
- Fiber: 1g
- Protein: 0g
- Cholesterol: 0mg