

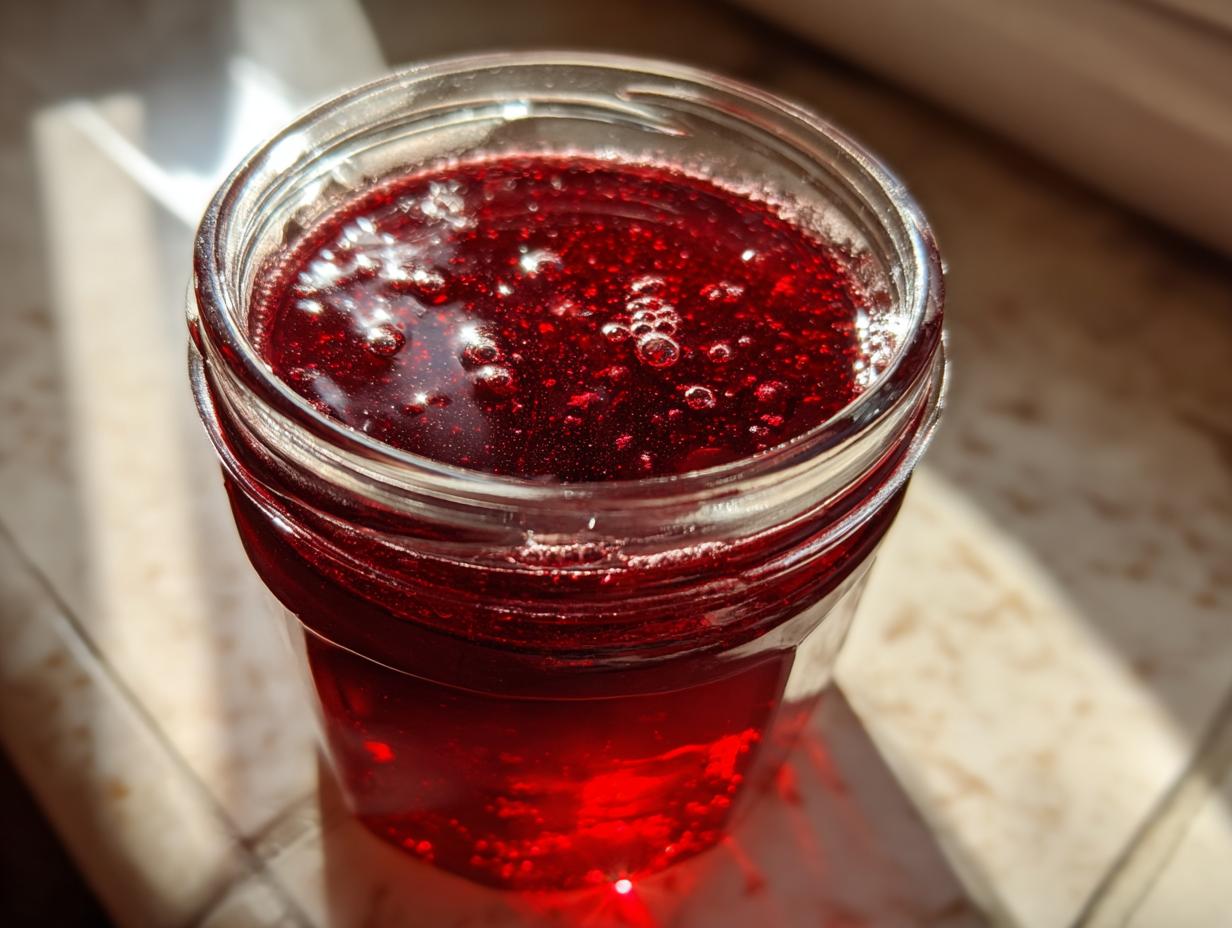
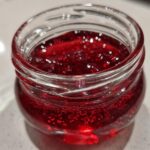
There’s something magical about turning tiny wild pin cherries into jars of jewel-toned jelly that tastes like summer in a spoon. I remember my first time stumbling upon a thicket of these tart little berries – I nearly walked right past them until their bright red color caught my eye! That was years ago, and now making pin cherry jelly has become my favorite late-summer ritual. What I love most is how simple it really is – just three main ingredients transform into something extraordinary. This jelly shines on morning biscuits, glazes roasted meats beautifully, and makes the most incredible peanut butter sandwich you’ve ever tasted. Once you try homemade, store-bought jam just won’t compare!
Why You’ll Love This Pin Cherry Jelly
This isn’t just any jelly – it’s a jar of pure happiness! Here’s why this pin cherry jelly recipe has stolen my heart (and will probably steal yours too):
- Bursting with flavor – that perfect balance of sweet and tangy you just can’t buy in stores
- Ready in under an hour – from stove to shelf before you know it
- Wildly versatile – amazing on toast, swirled into yogurt, or as a glaze for meats
- Makes ordinary meals special – turns basic biscuits into something you’ll dream about
Trust me, one taste and you’ll be hooked!
Ingredients for Pin Cherry Jelly
Gathering your ingredients is half the fun with this recipe! Here’s what you’ll need to make your pin cherry jelly shine:
- 4 cups pin cherry juice (from about 8 cups fresh berries – I’ll show you how to extract every precious drop!)
- 1 package (1.75 oz) powdered pectin – this magic powder gives our jelly that perfect wobble
- 5 cups granulated sugar – yes, it seems like a lot, but trust me, those tart cherries need it!
Pro tip: Taste your cherry juice before adding sugar – if they’re extra tart, you might want to grab an extra 1/4 cup sugar just in case.
Equipment You’ll Need
Before we dive in, let’s gather our jelly-making arsenal! You’ll need:
- A large, heavy-bottomed pot – Big enough for your jelly to bubble without boiling over
- Sterilized jars with lids – I use half-pints because they’re the perfect size for gifting
- A good ladle and funnel – Makes filling those jars mess-free (mostly!)
- Water bath canner or deep pot – For that final sealing magic
That’s it – simple tools for spectacular results!
How to Make Pin Cherry Jelly
Now for the fun part – turning those ruby-red cherries into glorious jelly! I’ve made this recipe dozens of times, and these simple steps never fail me. Just follow along, and soon you’ll be admiring rows of sparkling pin cherry jelly jars on your countertop.
Sterilizing Jars
First things first – clean jars mean happy jelly! I always start by boiling my jars and lids for 10 minutes in a water bath canner. Keep them in the hot water until you’re ready to fill them – cold jars meeting hot jelly can lead to breakage, and we definitely don’t want that!
Cooking the Jelly
Alright, let’s get cooking! Grab your biggest pot and pour in that beautiful pin cherry juice. Stir in the pectin until it dissolves completely – no lumps allowed! Crank up the heat until it reaches a full rolling boil that you can’t stir down. This is when the magic starts!
Now add all the sugar at once – yes, all of it! – and stir constantly until it dissolves. The mixture will foam up dramatically (don’t panic!), then return to a rolling boil. Set your timer for exactly 1 minute – this is crucial for perfect gel formation. When time’s up, remove from heat and skim off any foam with a spoon.
Canning and Sealing
Working quickly, ladle the hot jelly into your prepared jars, leaving 1/4 inch headspace. Wipe the rims clean (sticky rims prevent sealing), then screw on the lids fingertip-tight. Process in your water bath for 10 minutes, then let the jars cool undisturbed. That satisfying “pop” sound means you’ve succeeded!
Tips for Perfect Pin Cherry Jelly
After countless batches (and a few learning experiences!), I’ve gathered my best tricks for pin cherry jelly that sets just right every time:
- Taste your juice first – If those cherries were extra tart, add 1/4 cup more sugar. Too sweet? Reduce by 1/4 cup.
- Watch the clock religiously – That 1-minute boil is sacred! Overcooking makes jelly tough; undercooking leaves it runny.
- Test the gel – Chill a spoonful in the freezer for 2 minutes. If it wrinkles when pushed, it’s ready!
- Skim like your jelly depends on it – Foam makes cloudy jelly. I keep a metal spoon in ice water for perfect skimming.
Remember – even “imperfect” batches still taste amazing on toast!
Variations and Substitutions
Don’t be afraid to play with your pin cherry jelly! Here are some fun twists I’ve tried over the years:
- Honey swap – Replace 1 cup sugar with mild honey for floral notes (reduce pectin slightly)
- Spice it up – A cinnamon stick or star anise while cooking adds warmth
- Citrus zing – A teaspoon of lemon zest brightens the flavor beautifully
- Boozy version – Splash in a tablespoon of bourbon before canning for grown-up jelly
The best part? Even your “experiments” will be delicious!
Serving Suggestions for Pin Cherry Jelly
Oh, the possibilities with this pin cherry jelly! My absolute favorite is slathered on warm buttermilk biscuits – the way the sweet-tart jelly melts into those flaky layers is pure bliss. But don’t stop there! Try it:
- Swirled into oatmeal for a breakfast that feels special
- Paired with sharp cheddar on a cheese board – the combo is magical
- Glazing pork chops during the last few minutes of roasting
- Filling thumbprint cookies for a pretty pop of color and flavor
Once you start using it, you’ll find excuses to eat it with everything!
Storing and Preserving Pin Cherry Jelly
Properly sealed jars of pin cherry jelly will keep beautifully for up to a year in a cool, dark pantry – though in my house, they never last that long! Once opened, store in the fridge and use within 3 months. Always check for signs of spoilage like mold, off smells, or a broken seal before using. If you see bubbles, cloudiness, or any change in texture, it’s better to be safe than sorry – toss it out. But honestly, with jelly this good, you’ll probably finish it long before storage becomes an issue!
Pin Cherry Jelly FAQs
Over the years, I’ve gotten all sorts of questions about making pin cherry jelly – and I’ve probably asked most of them myself at some point! Here are the answers to the ones that come up most often:
Can I use frozen pin cherries?
Absolutely! I freeze berries all summer to make jelly year-round. Just thaw them completely before juicing, and expect slightly less juice than fresh. The flavor’s just as wonderful!
Why didn’t my jelly set properly?
Oh, I’ve been there! Usually it’s one of three things: not boiling long enough (that 1-minute timer is crucial), old pectin (check expiration dates!), or inaccurate measurements. If it’s too runny, don’t despair – it makes fabulous syrup over pancakes!
Do I have to can it?
Not at all! You can skip the water bath and just refrigerate your jelly for up to 3 months. But canning lets you enjoy that summer flavor all winter long.
Can I reduce the sugar?
I get this one a lot! The sugar isn’t just for sweetness – it helps the jelly set. You can try low-sugar pectin, but expect a softer set and shorter shelf life.
How do I know it’s safe to eat?
Trust your senses! Properly sealed jars will “pop” when opened, the jelly should be clear, and there should be no mold or funky smells. If in doubt, toss it out.
Nutritional Information
Here’s the scoop on what’s in that delicious pin cherry jelly (per tablespoon): about 50 calories and 12g sugar. Remember, these are estimates – your actual numbers might vary slightly depending on your cherries’ natural sweetness and exact sugar measurements. But let’s be real – we’re here for the flavor, not the math!
Share Your Pin Cherry Jelly Experience
I’d love to hear about your jelly-making adventures! Did you find a secret thicket of pin cherries? Try a fun variation? Snap a photo of your ruby-red jars – I live for seeing how your batches turn out! You can find more inspiration on Pinterest.
3-Ingredient Pin Cherry Jelly Will Make You Swoon
A sweet and tangy homemade jelly made from pin cherries. Perfect for spreading on toast or using as a topping for desserts.
- Prep Time: 20 minutes
- Cook Time: 15 minutes
- Total Time: 35 minutes
- Yield: 5 half-pint jars 1x
- Category: Preserves
- Method: Stovetop
- Cuisine: American
- Diet: Vegetarian
Ingredients
- 4 cups pin cherry juice
- 1 package (1.75 oz) powdered pectin
- 5 cups granulated sugar
Instructions
- Sterilize jars and lids in boiling water.
- Combine pin cherry juice and pectin in a large pot. Bring to a boil.
- Add sugar and stir until dissolved. Return to a rolling boil for 1 minute.
- Remove from heat and skim off any foam.
- Pour into sterilized jars, leaving 1/4 inch headspace.
- Seal jars and process in a water bath for 10 minutes.
Notes
- Use freshly picked pin cherries for best flavor.
- Adjust sugar if cherries are very tart or sweet.
- Store in a cool, dark place.
Nutrition
- Serving Size: 1 tablespoon
- Calories: 50
- Sugar: 12g
- Sodium: 0mg
- Fat: 0g
- Saturated Fat: 0g
- Unsaturated Fat: 0g
- Trans Fat: 0g
- Carbohydrates: 13g
- Fiber: 0g
- Protein: 0g
- Cholesterol: 0mg